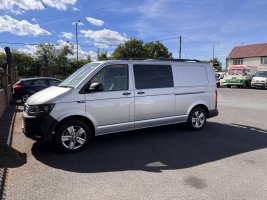
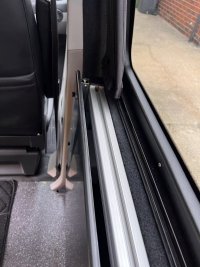
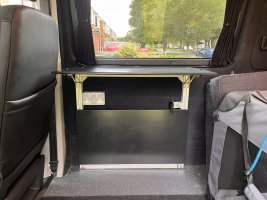
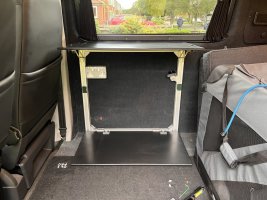
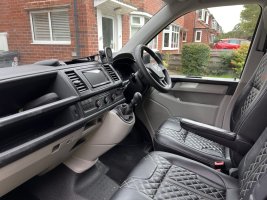
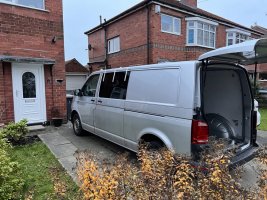
Wanted to share progress on our family project. Bought an ex-fleet 2016 LWB T32 in December and been converting it over the winter. Judging from the tiny shards of vehicle wrap left on the body work, I think this was a British Gas van in its past life.
This is our second home-spun camper conversion , so we had a better idea of what we wanted this time, across the board. Oh and a child and a dog have been added to the family. That's our old camper just visible in the background of the first image. We wanted to upgrade from our previous spec because we wanted:
I should also say this is our main and only vehicle, hence some of the decisions below are based on the reality of being able to put the van back together at the end of each weekend ready for use by the family. Working on it and using it at the same time is a bit of a hassle but possible with a bit of careful planning.
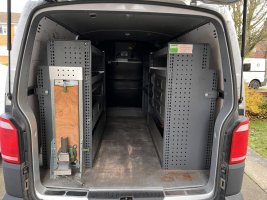
When we found the right vehicle, it had a BOTT shelving system and vice. Was surprised how quickly that sold second hand.
The bulkhead and inverter were removed... [note: we do not buy lard by the box full, it was waste from a café wheel bin ]
]
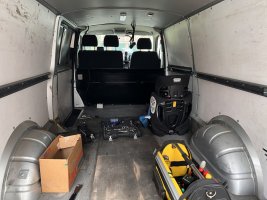
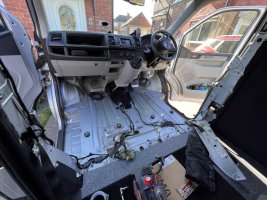
The floor had full width steel interlocks, and was a pain to get out, but lots of swearing solved that. Then the floor plate was cleaned and any holes from the shelving painted and sealed.
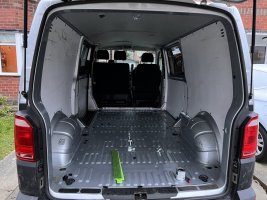
Then it was time for the windows...
And probably the job I was fearing the most turned out to be very straightforward - removing the bulkhead support rails. In removing the passenger seat I noticed the bung had been left off by someone and five years of motorway grit had collected under the passenger seat...
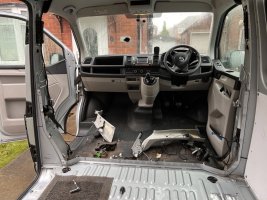
But it cleaned up OK and the bung was replaced.
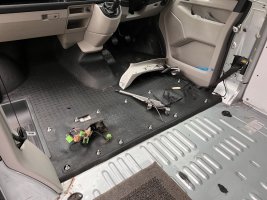
The internal panelling was then degreased and cleaned. Started to look like a project to be proud of by this point...
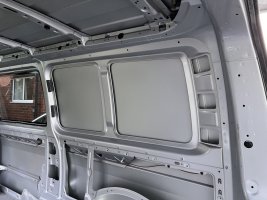
Then sound deadening the large resonant surfaces...
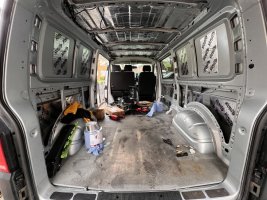
...and insulating with Dodo liner...
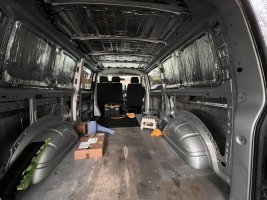
By this time we'd booked a slot with Cascade Conversions for the Solace bed / seat system, so I had to finish the back end first!
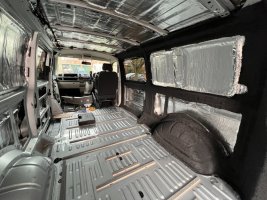
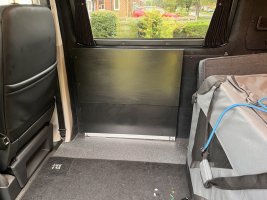
All the while the electrical design was under way and parts ordered. Decided on a circa 100Ah battery and controller under the driver's seat but with all the load (bar the fridge) controlled by the YIS Marine membrane controller, and decided to hide everything behind the walls between the C and D pillars...
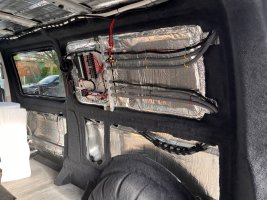
Then the floor - a single piece on top of the metal interlocked (biscuit) phenolic ply.
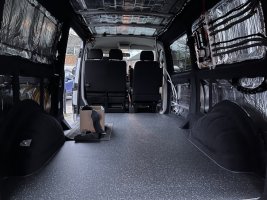
Then the paneling, speakers, control surfaces and monitors and a trip to Wales for the bed to be fitted. Can highly recommend Rob at Cascade. Fantastic guy. Super happy with the bed.
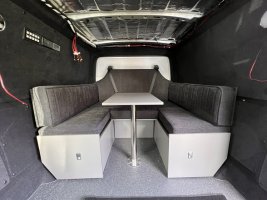
Then the ceiling with 21 different light fittings over four circuits...
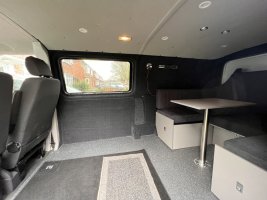
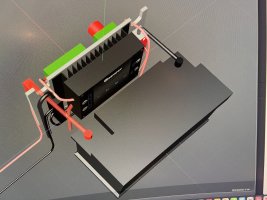
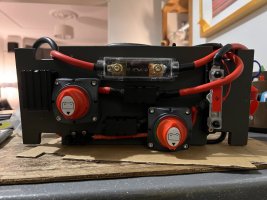
Fitting the gubbins under the seat was going to take some proper planning, so I modelled the assemblies in 3D.
Then built it on the dining room table...
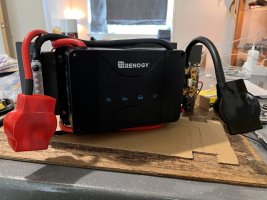
Working on the basis that all the fuses and isolators needed to be accessible from the front.
Then the biggest operation of the whole project - take the floor out and connect the cables, putting everything back, all in one day...
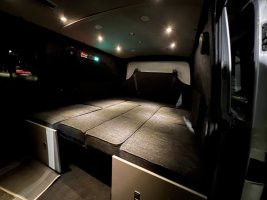
But now we have a very sleep-friendly full width, full length bed, and great lighting that can match our mood.
Since then I've fitted the fold-forward mechanism for the passenger seat - that's where the dog sleeps in her travel crate. Next we're planning the kitchen unit, looking at the moment at an Evo 2 Pod that fits even with the bed fully extended. At some point a season or two away I might get chance to think about lowering the suspension, but let's see how much crap we can get in it first.
Nearly none of this would've been possible without the generous souls on this forum that have rekindled my love for the internet in times when so much of the internet is dark and lousy. Particular thanks to @Dellmassive, @mmi, @Pauly, and a special thanks to @Mud Digger for helping me solve the source of the fumes smell - an incorrectly fitted tailgate seal. Incorrectly fitted by me, I might add.
Lastly, a bit of encouragement to others considering a Startline as the base van - because there's so little kit in it, all the access routes are lovely and clear!
This is our second home-spun camper conversion , so we had a better idea of what we wanted this time, across the board. Oh and a child and a dog have been added to the family. That's our old camper just visible in the background of the first image. We wanted to upgrade from our previous spec because we wanted:
- A totally hidden and comprehensive power installation
- Lots of lighting options to suit moods
- Much more power than before to allow us to use grass pitches
- Spare electrical capacity for future-proofing
- A table to sit around
- Darker interior
- No windows in the rear quarter
- Tin top with insulation
I should also say this is our main and only vehicle, hence some of the decisions below are based on the reality of being able to put the van back together at the end of each weekend ready for use by the family. Working on it and using it at the same time is a bit of a hassle but possible with a bit of careful planning.
When we found the right vehicle, it had a BOTT shelving system and vice. Was surprised how quickly that sold second hand.

The bulkhead and inverter were removed... [note: we do not buy lard by the box full, it was waste from a café wheel bin

The floor had full width steel interlocks, and was a pain to get out, but lots of swearing solved that. Then the floor plate was cleaned and any holes from the shelving painted and sealed.

Then it was time for the windows...

And probably the job I was fearing the most turned out to be very straightforward - removing the bulkhead support rails. In removing the passenger seat I noticed the bung had been left off by someone and five years of motorway grit had collected under the passenger seat...

But it cleaned up OK and the bung was replaced.

The internal panelling was then degreased and cleaned. Started to look like a project to be proud of by this point...

Then sound deadening the large resonant surfaces...

...and insulating with Dodo liner...

By this time we'd booked a slot with Cascade Conversions for the Solace bed / seat system, so I had to finish the back end first!

All the while the electrical design was under way and parts ordered. Decided on a circa 100Ah battery and controller under the driver's seat but with all the load (bar the fridge) controlled by the YIS Marine membrane controller, and decided to hide everything behind the walls between the C and D pillars...

Then the floor - a single piece on top of the metal interlocked (biscuit) phenolic ply.

Then the paneling, speakers, control surfaces and monitors and a trip to Wales for the bed to be fitted. Can highly recommend Rob at Cascade. Fantastic guy. Super happy with the bed.

Then the ceiling with 21 different light fittings over four circuits...

Fitting the gubbins under the seat was going to take some proper planning, so I modelled the assemblies in 3D.

Then built it on the dining room table...

Working on the basis that all the fuses and isolators needed to be accessible from the front.

Then the biggest operation of the whole project - take the floor out and connect the cables, putting everything back, all in one day...

But now we have a very sleep-friendly full width, full length bed, and great lighting that can match our mood.

Since then I've fitted the fold-forward mechanism for the passenger seat - that's where the dog sleeps in her travel crate. Next we're planning the kitchen unit, looking at the moment at an Evo 2 Pod that fits even with the bed fully extended. At some point a season or two away I might get chance to think about lowering the suspension, but let's see how much crap we can get in it first.
Nearly none of this would've been possible without the generous souls on this forum that have rekindled my love for the internet in times when so much of the internet is dark and lousy. Particular thanks to @Dellmassive, @mmi, @Pauly, and a special thanks to @Mud Digger for helping me solve the source of the fumes smell - an incorrectly fitted tailgate seal. Incorrectly fitted by me, I might add.
Lastly, a bit of encouragement to others considering a Startline as the base van - because there's so little kit in it, all the access routes are lovely and clear!
Last edited:

