DentedT6.1
Member
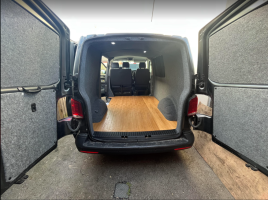
Hi all- we are partway through our conversion and the only major issue we've faced is getting the flooring right. I've relaid it twice and we're on the verge of doing it again for a third time- so any help is appreciated!
Firstly, we've insulated all over using Dodomat DEADN 2.0, and we have the oak look plywood flooring from Vanfurniture (VW T5/6 Ply Floor). We originally assumed that with the insulation covering both ridges and gaps in the floor, we would place some 9mm battens across the biggest gaps and simply lay the floor on +screw it into the ridges and battens.

Unfortunately, when we did that there was flex in some of the gaps, so we pulled it all up, and added more battens. We tried adding battens to the smaller gaps- but because of the insulation they were sitting too high, so we had some gaps left. Re-checking, we still have flex in multiple places across the floor.
I chatted with the guys at Seaside Campers (fantastic setup- thanks again!) and the recommendation was:
1. Pull up the floor, remove battens (currently not bonded to anything, were just placed down)
2. Cut with a stanley knife where the battens would go, and remove insulation
3. Bond the battens to the floor in the gaps
4. Place sikaflex on top of the battens, and relay the floor- weight down and leave it to bond
5. Screw in wherever is easy to hide/is covered anyway
So, I wanted to get a quick censor check and see what people think- is this way to dig our way out of the flooring mess? Is there anything else I should be considering? It's not a ton of flex but I appreciate it will niggle us forever when it could be fixed with a couple of extra days and some additional materials. That said, I'm not sure how many times I can face relaying this floor! Plus, once bonded we won't be able to get it up- so that commitment worry is probably what led me to use screws in the first place..
Second Q- is it worth buying the extremely expensive Batten kit you can find online for £100 ish, or should I just continue buying 9mm wood and cutting generally to size?
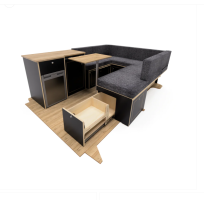
Thank you again and I have learned my lessons about half measures! On the bright side- our furniture from Seaside Campers has arrived and we collected today, so looking forward to putting it all together soon. U-Shaped Campervan Interior . If anyone is interested in our experience of fitting and using the VanFurniture U-Bed furniture and kit, I'll post a more comprehensive update of our build so far.

Firstly, we've insulated all over using Dodomat DEADN 2.0, and we have the oak look plywood flooring from Vanfurniture (VW T5/6 Ply Floor). We originally assumed that with the insulation covering both ridges and gaps in the floor, we would place some 9mm battens across the biggest gaps and simply lay the floor on +screw it into the ridges and battens.

Unfortunately, when we did that there was flex in some of the gaps, so we pulled it all up, and added more battens. We tried adding battens to the smaller gaps- but because of the insulation they were sitting too high, so we had some gaps left. Re-checking, we still have flex in multiple places across the floor.
I chatted with the guys at Seaside Campers (fantastic setup- thanks again!) and the recommendation was:
1. Pull up the floor, remove battens (currently not bonded to anything, were just placed down)
2. Cut with a stanley knife where the battens would go, and remove insulation
3. Bond the battens to the floor in the gaps
4. Place sikaflex on top of the battens, and relay the floor- weight down and leave it to bond
5. Screw in wherever is easy to hide/is covered anyway
So, I wanted to get a quick censor check and see what people think- is this way to dig our way out of the flooring mess? Is there anything else I should be considering? It's not a ton of flex but I appreciate it will niggle us forever when it could be fixed with a couple of extra days and some additional materials. That said, I'm not sure how many times I can face relaying this floor! Plus, once bonded we won't be able to get it up- so that commitment worry is probably what led me to use screws in the first place..
Second Q- is it worth buying the extremely expensive Batten kit you can find online for £100 ish, or should I just continue buying 9mm wood and cutting generally to size?
Thank you again and I have learned my lessons about half measures! On the bright side- our furniture from Seaside Campers has arrived and we collected today, so looking forward to putting it all together soon. U-Shaped Campervan Interior . If anyone is interested in our experience of fitting and using the VanFurniture U-Bed furniture and kit, I'll post a more comprehensive update of our build so far.


