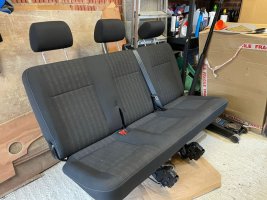
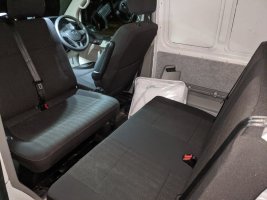
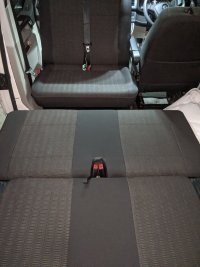
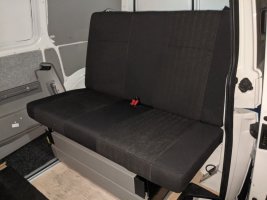
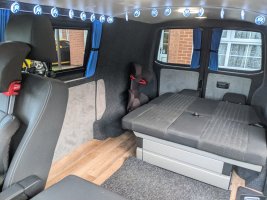
[GUIDE] How to remove a T6 California double rear bench/bed covers and retrim

Andysmee

Previously the last of the TSI's
Moderator
VIP Member
T6 Legend
Ever wish you never started something? Well, this is a candidate for it.

I didn't take as many pictures as I used to, as I'm familiar with tearing down seats now, but this had some new challenges.

Removing the covers should be easy but they are simply not made to be removed, compared to all the other seats in the panel vans, kombi and shuttles/caravelles.

Here's a quick version that I'll refine as I remember and re-fit the new cover.

1. Move the seat forward so you can get to the nearside side. Fold the seat down flat (bed mode) although I didn't!
2. Unscrew the retaining strap on the nearside of the seat base which allows the seat base pad to lift up.
3. In this position you should be able to undo the two panel clips on the top of the trim on the leading edge of the base above the front of the drawer (I didn't! And I'm still not sure how you are meant to).
4. With this trim out of the way you can pivot the seat base pad upwards (I couldn't!) and unclip the plastic hooks all around the cover. Some have pig rings keeping them on which need levering off with screwdriver or similar. There are velcro bits too.
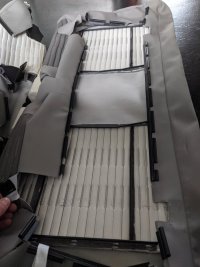
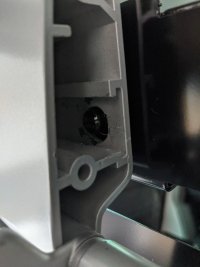
PXL_20211019_144506019.MP.jpg
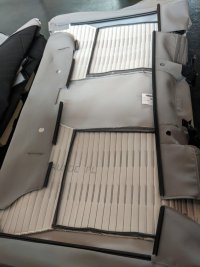
5. If you're lucky (and I've not forgotten anything that I did) the seat base foam and cover will come off the base metal lattice work in one piece.
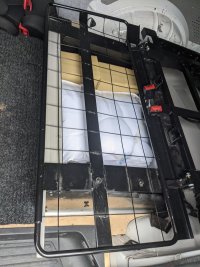
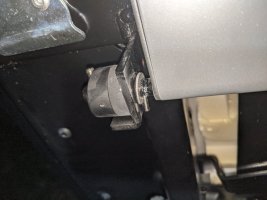
PXL_20211019_145157431.jpg
6. You just need to remove the 36 pig rings to separate the cover from the foam now (!). Don't pat yourself on the back, that was the easy bit.
 
Last edited:
7. Now you need to work on the backrest, so put the seat back to seat mode.
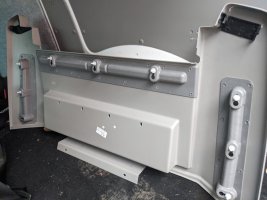
8. Remove the rear trim panel by pulling up each side firmly to remove the clips. These are the same challenging clips as the B-pillars and other annoying panels. Oh, you have to lever out the black bits around the seat belt exit, or possibly do the next step before the whole thing comes off, I think.
PXL_20211019_145630823.jpg
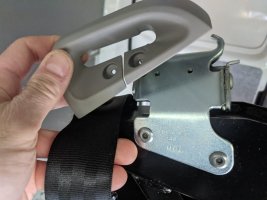
9. Remove the seat belt exit trims by undoing the two torx screws and slide the seat belt through the slot.
PXL_20211019_145920832.jpg
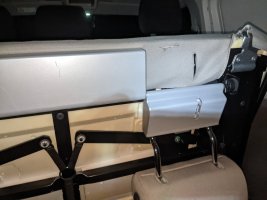
10. Fold the headrests down and unclip all the plastic clips around the cover.
PXL_20211019_151227959.jpg
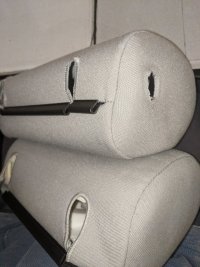
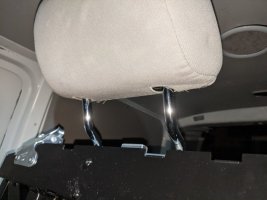
11. This is when you discover that part of the headrest mounting system goes through the covers (through those round holes in the top of the cover) so you can't get any further.
12. After a bit of Googling, it seems there is no way to disassemble the headrest bar (even though mine has a pin that has come slightly adrift).
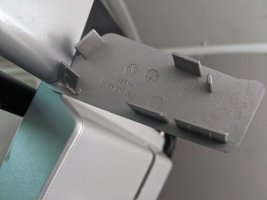
PXL_20211007_201507960.jpg
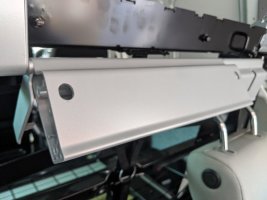
PXL_20211019_145756343.jpg
13. And you can't get in to remove the spring clip without removing the end cap, which is captive by the headrest rotating bar:
PXL_20211007_201523837.jpg
 
Last edited:
14. So you have to resort to what all the california forums describe (if you want to permanently remove the headrests, for example) and hacksaw a retaining tab on the trim in order to bend it out and rotate it out of the way:
PXL_20211019_145746570.jpg
15. Then you can remove the spring clip on the metal post inside the headrest assembly and release the cover off the posts.
PXL_20211019_145812769.jpg
16. Now the cover and foam should be removable with a little jiggling of the isofix sleeves and other complications at the bottom.
17. Then there's just another 24 pig rings to remove (!) and the cover will be free of the foam.

Bung them on a quick machine wash and you can reverse the steps to refit the covers and pretend it was easy, or...
 
You could decide to make replacement covers to match your front seats, right? Because that's clearly a simple bit of beginner needlework on the wife's sewing machine? Well...
received_4661246540628976.jpeg
My front seats have ended up as a nice combination of a Caravelle T5 captain's driver's seat retrimmed in Caravelle T6 Pandu covers with a front double seat in matching T6 Pandu covers, which actually has a lowered seat base on an mscraft sliding swivel (over a raised rear floor) with a Vankraft 10 degree reclined folding bracket, and new foams and a backboard installed. Which means three nice storage pockets in the back of the front row, so...why not retrim the rear bench in Pandu?

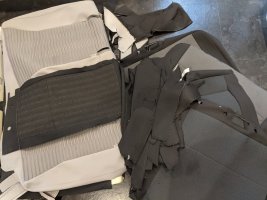
Well, because they never used Pandu on the California, it was on on the shuttle and caravelle. But what if I could cannibalise a rear triple Pandu cover (as they are sadly worth not a lot) and a couple of other worthless black double seat covers with plain titan black fabric...
IMG-20210816-WA0001.jpg
PXL_20211019_154657648.jpg
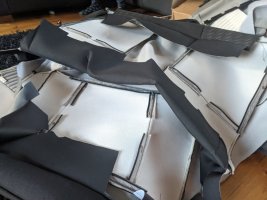
Bingo! It turns out that the width of the Pandu pattern on the triple cover matches the width of the Valley pattern on the California covers and even the pig rings bars are a close enough fit to the foam wiring.
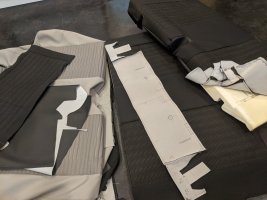
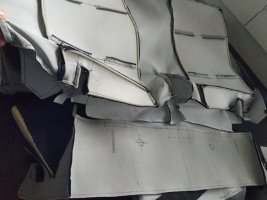
And so we are slowly building the most complicated upholstery pattern conceivable by painstakingly copying each part by hand, pinning and then sewing, and we haven't even got to the plastic clips, velcro and all the isofix nonsense (which we don't need!)
PXL_20211019_155709719.jpg
16346539777991979394570087952367.jpg
 
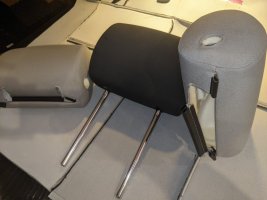
...18. The headrests are easy to remove at least, no tools, just release the plastic clip bars underneath and carefully prise the cover round the height adjustment button, then take them off with the foams complete.

Looking at whether a T6 Caravelle adjustable headrest is the same size to avoid more sewing, but not a big job after everything else we've done either way

PXL_20211021_193638848.jpg

Test fitted a T5.1 Caravelle adjustable headrest cover on the California headrest foam and it's a great match but the holes underneath are longer to allow the adjustment (tilt) on the caravelle headrests. So I'll make my own copies but if you have damaged your California rear headrests it's definitely an option rather than going to VW for new covers...
PXL_20211021_200148895.jpg
 
Last edited:
  • Like
Reactions: DXX
...18. The headrests are easy to remove at least, no tools, just release the plastic clip bars underneath and carefully prise the cover round the height adjustment button, then take them off with the foams complete.

Looking at whether a T6 Caravelle adjustable headrest is the same size to avoid more sewing, but not a big job after everything else we've done either way

View attachment 134325

Test fitted a T5.1 Caravelle adjustable headrest cover on the California headrest foam and it's a great match but the holes underneath are longer to allow the adjustment (tilt) on the caravelle headrests. So I'll make my own copies but if you have damaged your California rear headrests it's definitely an option rather than going to VW for new covers...
View attachment 134331
Are you a professional upholsterer / trimmer or just bloody good with a sewing machine?
 
Are you a professional upholsterer / trimmer or just bloody good with a sewing machine?
Well...I'm an expert at pinning, and my wife is good with the machine, but not professional, no.

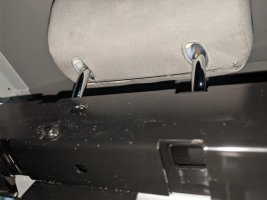
When I said we needed to make headrest covers my wife suggested i reconsider, so I did a test fit with a Caravelle cover and it's easily adequate so I'll sacrifice some T6 Caravelle headrests to the project (and put standard T6 black ones in their place on the front double)

PXL_20211021_203426642.jpg

PXL_20211021_204121642.jpg

PXL_20211021_204126454.jpg

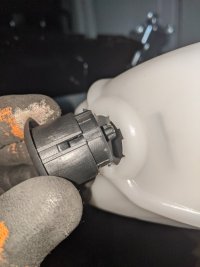
P.S. the adjustment button is easy to remove, just push the little clips in with a small screwdriver or trim tool (above)
 
Ever wish you never started something? Well, this is a candidate for it.

I didn't take as many pictures as I used to, as I'm familiar with tearing down seats now, but this had some new challenges.

Removing the covers should be easy but they are simply not made to be removed, compared to all the other seats in the panel vans, kombi and shuttles/caravelles.

Here's a quick version that I'll refine as I remember and re-fit the new cover.

1. Move the seat forward so you can get to the nearside side. Fold the seat down flat (bed mode) although I didn't!
2. Unscrew the retaining strap on the nearside of the seat base which allows the seat base pad to lift up.
3. In this position you should be able to undo the two panel clips on the top of the trim on the leading edge of the base above the front of the drawer (I didn't! And I'm still not sure how you are meant to).
4. With this trim out of the way you can pivot the seat base pad upwards (I couldn't!) and unclip the plastic hooks all around the cover. Some have pig rings keeping them on which need levering off with screwdriver or similar. There are velcro bits too.
View attachment 134014
5. If you're lucky (and I've not forgotten anything that I did) the seat base foam and cover will come off the base metal lattice work in one piece.
View attachment 134017
6. You just need to remove the 36 pig rings to separate the cover from the foam now (!). Don't pat yourself on the back, that was the easy bit.

Thanks for putting this guide together @Andysmee. What are pig rings, and once removed how do you put them back again?


I'm looking to remove the seat base only, to modify the frame so it clears the wheel arch.
 
Well, this seat needs recovering even if I haven't. So I've been pinning and she's been running stitches and we're on the home straight. The rest is hand stitching the plastic clip rails and a bit of button hole stitching where the release strap goes through the back rest cover.

PXL_20220314_170032584.jpg

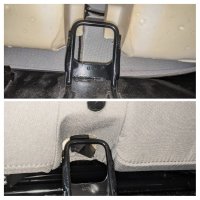
We've decided to reduce complexity by removing the isofix mounts, since we don't need them and they are not structural, otherwise we have to do this:

20220314_170149-COLLAGE.jpg

So it's out with the hacksaw and grinder before refitting
 
what about the foam part of the base, didn't that need cutting to match the new angle of the seat base? so the top is flat
I see the pig rings only attach to the top of the seatbase, so should be possible to cut the foam from the bottom without removing them.
 
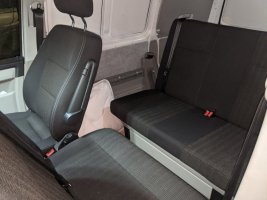
Well, finally, we're finished... this is a test fit, and we need to make a few holes to close the headrest rail and fit the caravelle headrest covers, but the cover fits and matches the front.

Good timing as the van goes in for windows and carpet lining on Monday

PXL_20220323_220513743.jpg

PXL_20220323_220445299.jpg

PXL_20220323_220912375.jpg

PXL_20220323_215519509.jpg
 
Back
Top