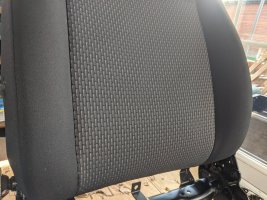
I've waited a fair while to share this knowledge as I was doing a good trade in seat upgrades last year and, having refitted covers to 20-odd single seats, I'd learn some tricks of the trade.
Unfortunately I now have a proper back problem so I am moving to more sedate business options and so I thought it was time to write this up.
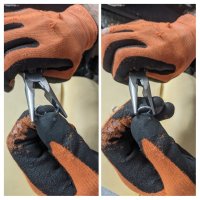
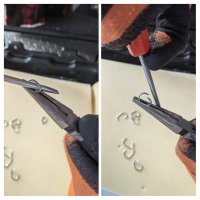
I'm focusing on the toughest (most painful, swear word inducing, and bloody hard work) bit of the job which is refitting the covers using hog rings, but I've written notes on the easier bits as a rough guide below. (And thanks to my wife for being photographer!)
1. Remove the driver or passenger single seat from the van (unless you are a contortionist!)... that's simply the four 13mm bolts/nuts attaching the front and back ends of the rails to the seat base. Don't forget to unplug the seat belt sensor if it's a driver's seat. Lift it out of the van.
2. In a nice warm dry place, on a bench that doesn't mind getting scratched, and wearing gloves (you'll thank me later)... Remove the seat base pad from the seat which is four spline bolts underneath. Don't forget to pull out the seat belt sensor wire from the metal seat base pad and also remove the two plastic screws attaching the plastic side trims to the seat base pad.
3. If you are just changing covers, you don't need to remove the seat plastic trims either side, but it may make it easier if you remove the rear panel, as it can get marked when the seat is laid on its back.
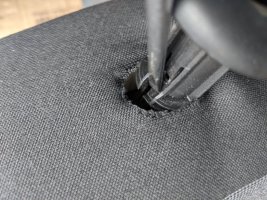
4. Remove the headrest, headrest plastic posts (prise them out... the tabs are at the side of the post).
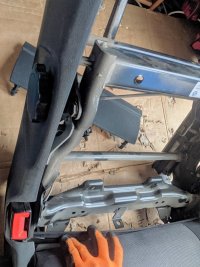
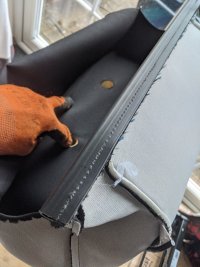
5. Recline the seat back backwards and open the bottom of the seat back cover underneath (just with your fingers from one end... pull the plastic bars apart). If you haven't bought £5 B&Q gloves to wear by this step, stop and buy some, you going to get sliced and stabbed!
If you have armrests, remove them by now. There's a guide on the forum.
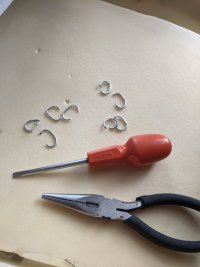
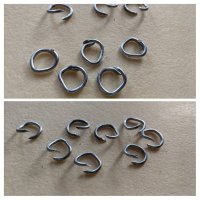
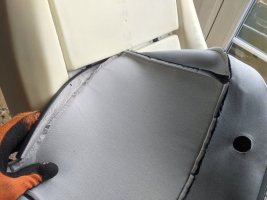
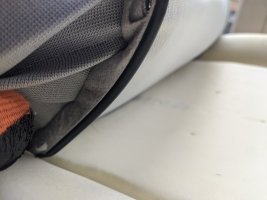
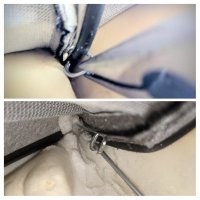
6. Peel back the seat back cover turning it inside out. When you can't peel it back, look for the hog rings holding the covers' plastic rails to the seats metal wires. Use long nosed pliers to prise the rings open, and repeat peeling back and prising free until you have all 8 hog rings on the bench.
7. When you get up to the plastic rail, peel the back top of the cover over from the back to the front of the seat so that the only thing holding the cover on is the plastic rail. Now slide the horizontal plastic rail through the three clips without nicking the foam too much. Cover should now be free.
If you have a caravelle seat, there are two plastic rails and you may need to prise the lower rail from the clips (which is okay, they won't break). If you have a T5 seat, you're reading the wrong guide as there are no hog rings more importantly, the foam is different so T6 covers will be baggy and so not suitable.
Unfortunately I now have a proper back problem so I am moving to more sedate business options and so I thought it was time to write this up.
I'm focusing on the toughest (most painful, swear word inducing, and bloody hard work) bit of the job which is refitting the covers using hog rings, but I've written notes on the easier bits as a rough guide below. (And thanks to my wife for being photographer!)
1. Remove the driver or passenger single seat from the van (unless you are a contortionist!)... that's simply the four 13mm bolts/nuts attaching the front and back ends of the rails to the seat base. Don't forget to unplug the seat belt sensor if it's a driver's seat. Lift it out of the van.
2. In a nice warm dry place, on a bench that doesn't mind getting scratched, and wearing gloves (you'll thank me later)... Remove the seat base pad from the seat which is four spline bolts underneath. Don't forget to pull out the seat belt sensor wire from the metal seat base pad and also remove the two plastic screws attaching the plastic side trims to the seat base pad.
3. If you are just changing covers, you don't need to remove the seat plastic trims either side, but it may make it easier if you remove the rear panel, as it can get marked when the seat is laid on its back.

4. Remove the headrest, headrest plastic posts (prise them out... the tabs are at the side of the post).

5. Recline the seat back backwards and open the bottom of the seat back cover underneath (just with your fingers from one end... pull the plastic bars apart). If you haven't bought £5 B&Q gloves to wear by this step, stop and buy some, you going to get sliced and stabbed!
If you have armrests, remove them by now. There's a guide on the forum.
6. Peel back the seat back cover turning it inside out. When you can't peel it back, look for the hog rings holding the covers' plastic rails to the seats metal wires. Use long nosed pliers to prise the rings open, and repeat peeling back and prising free until you have all 8 hog rings on the bench.
7. When you get up to the plastic rail, peel the back top of the cover over from the back to the front of the seat so that the only thing holding the cover on is the plastic rail. Now slide the horizontal plastic rail through the three clips without nicking the foam too much. Cover should now be free.
If you have a caravelle seat, there are two plastic rails and you may need to prise the lower rail from the clips (which is okay, they won't break). If you have a T5 seat, you're reading the wrong guide as there are no hog rings
Last edited:

