Some of you might have seen the Transporter HQ rear hinge panel kit. It allows the rear panel, betwixt rear lights & bumper, to hinge out like a door, such that an EHU point, or other connector can be secreted behind it out of sight.
My EHU is currently under the rear of my van. This is certainly out of sight, but it can be a pain to access (getting on one’s knees is pretty much essential). It is also fixed to the rear, left under-body trim which, being plastic, has a certain amount of flex making it harder to connect to and the mounting is starting to wear and weaken. So I bought one of these hinge kits with the intention of moving my EHU to behind this panel.
So, this is what you get in the kit:
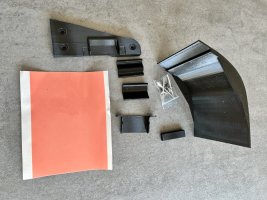
There are no instructions included, but don’t throw the box away, because this QR code takes you to some downloadable instructions. There is also a useful video available.

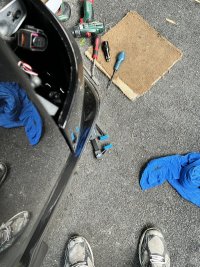
So the first thing to do is remove the left light cluster (two screws then knock it sideways to the outside) and then the panel itself, which is just held in by two push-in studs. I find that I always have to pull the tailgate door rubber trim off to help removal.
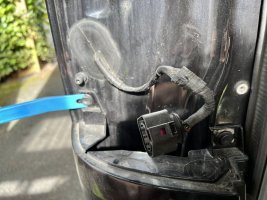
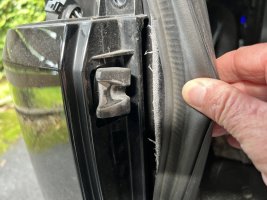
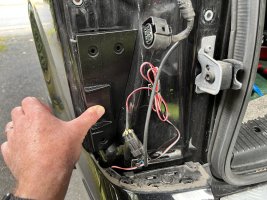
The kit comes with a shaped triangular mount for the hinge. This seems to fit quite neatly to the body.
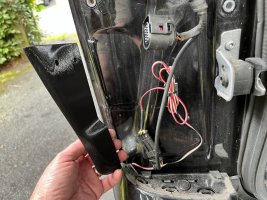
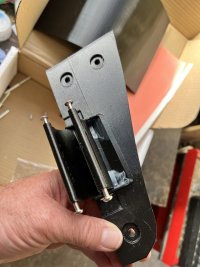
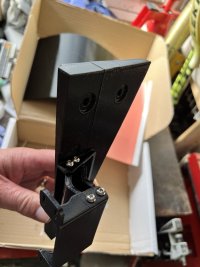
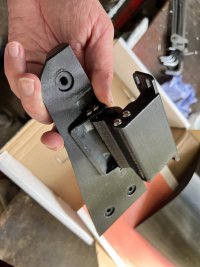
The instructions suggest assembling the hinge first, and this is fairly straight forward. I wasn’t sure whether the screw holes were threaded or not (the screws are not self-tappers but machine screws), but I don’t think so. This made it a bit awkward to assemble everything without first tapping (or easing) the holes to take the screws.
The hinge was put to one side, and bits were cut off the plastic trim panel with a Dremel as per the instructions. Well, not exactly as the instructions. I could not see why so much needed to be taken off the bottom edge, so all I removed was the locating tabs.
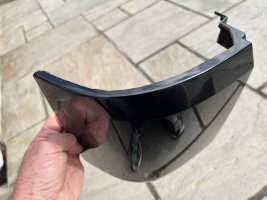
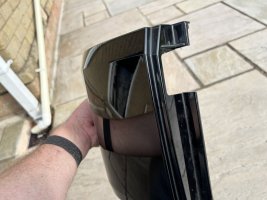
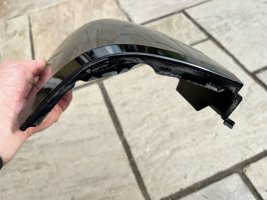
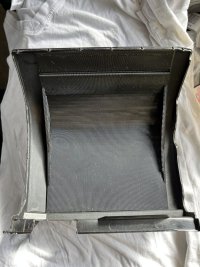
Once this was done, I fixed the 3D-printed inner panel inside the modified van panel using the double sided adhesive sheet provided. The inner panel is a tight fit so, along with the adhesive, looks to be well secured.
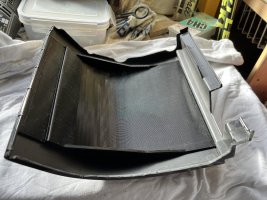
Now back out to the van, and holding the hinge panel in place, I punched the locations to drill, staring with a pilot hole before using a 5mm drill bit. I cleaned as much swarf out as I could, and applied some zinc anti-rust paint to the holes. Once that was dry, I applied some sealing adhesive stuff (that I had lying around) before riveting the hinge panel in place using the rivets provided. As noted in the instructions, the top right hole has a 2nd skin behind it, such that the rivet will not push fully home. But this was not an issue and the rivet pulled tight OK.
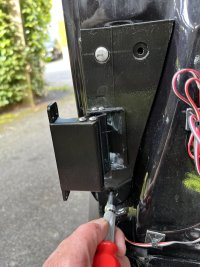
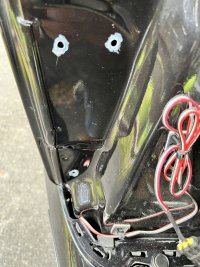
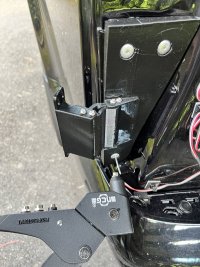
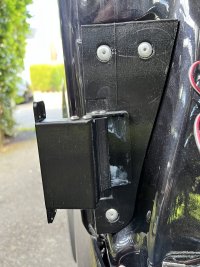
Now comes the bit that the instructions seem to gloss over - at least they over-simplify things: Fitting the panel onto the hinge.
Place the panel into position and “once you are happy with the placement, open up the flap and mark hinge location” is what the instructions state. But of course the panel is not attached to anything, so keeping it aligned with the hinge when you open it up, such that the hinge location can be marked is nigh on impossible. And with the panel in place there is very limited access to the hinge to enable any marking.
In the end I used a bit of masking tape (to be able to see the marking) on the inner panel and tried to mark through a mounting hole with a pen. I couldn’t keep the pen perpendicular to the hinge when doing this, so I tried to allow for that when drilling the first pilot hole. Not very scientific eh?
With the panel held on with just one screw, I was able to check the alignment and make further markings for the remaining 3 screws (I did one at a time and checked the alignment each time).
Fitting the magnet bar was also a pain as again there is no way to mark its correct position while the panel is closed. Get it too far away and the magnet doesn’t work. Too close and the panel will stick out to the rear.
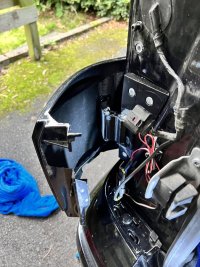
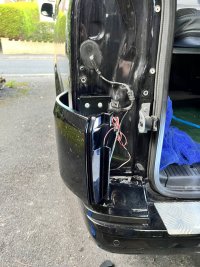
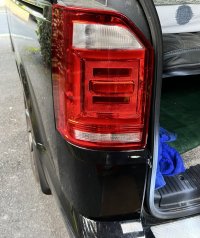
Now it is fitted, I am reasonably happy with the way it opens and closes, but I am not so happy with the alignment as the leading edge sticks out a bit and while it can be pushed in to a correct position, it just pops out again when pressure is released. It’s hard to see just why this is. It’s like there is a bit of springiness to the hinge (but I’ve kept it reasonably loose) where it resists being fully closed.
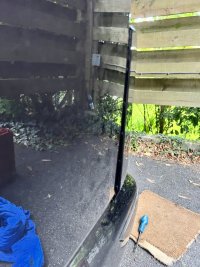
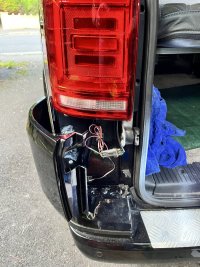
Anyway, now that panel is hinged, I can look to relocating my EHU point to behind it, though it has been pointed out elsewhere, that the hinge mounting itself takes up the most convenient position for this, where the body is only single skinned.
My EHU is currently under the rear of my van. This is certainly out of sight, but it can be a pain to access (getting on one’s knees is pretty much essential). It is also fixed to the rear, left under-body trim which, being plastic, has a certain amount of flex making it harder to connect to and the mounting is starting to wear and weaken. So I bought one of these hinge kits with the intention of moving my EHU to behind this panel.
So, this is what you get in the kit:

There are no instructions included, but don’t throw the box away, because this QR code takes you to some downloadable instructions. There is also a useful video available.

So the first thing to do is remove the left light cluster (two screws then knock it sideways to the outside) and then the panel itself, which is just held in by two push-in studs. I find that I always have to pull the tailgate door rubber trim off to help removal.


The kit comes with a shaped triangular mount for the hinge. This seems to fit quite neatly to the body.


The instructions suggest assembling the hinge first, and this is fairly straight forward. I wasn’t sure whether the screw holes were threaded or not (the screws are not self-tappers but machine screws), but I don’t think so. This made it a bit awkward to assemble everything without first tapping (or easing) the holes to take the screws.


The hinge was put to one side, and bits were cut off the plastic trim panel with a Dremel as per the instructions. Well, not exactly as the instructions. I could not see why so much needed to be taken off the bottom edge, so all I removed was the locating tabs.


Once this was done, I fixed the 3D-printed inner panel inside the modified van panel using the double sided adhesive sheet provided. The inner panel is a tight fit so, along with the adhesive, looks to be well secured.


Now back out to the van, and holding the hinge panel in place, I punched the locations to drill, staring with a pilot hole before using a 5mm drill bit. I cleaned as much swarf out as I could, and applied some zinc anti-rust paint to the holes. Once that was dry, I applied some sealing adhesive stuff (that I had lying around) before riveting the hinge panel in place using the rivets provided. As noted in the instructions, the top right hole has a 2nd skin behind it, such that the rivet will not push fully home. But this was not an issue and the rivet pulled tight OK.


Now comes the bit that the instructions seem to gloss over - at least they over-simplify things: Fitting the panel onto the hinge.
Place the panel into position and “once you are happy with the placement, open up the flap and mark hinge location” is what the instructions state. But of course the panel is not attached to anything, so keeping it aligned with the hinge when you open it up, such that the hinge location can be marked is nigh on impossible. And with the panel in place there is very limited access to the hinge to enable any marking.
In the end I used a bit of masking tape (to be able to see the marking) on the inner panel and tried to mark through a mounting hole with a pen. I couldn’t keep the pen perpendicular to the hinge when doing this, so I tried to allow for that when drilling the first pilot hole. Not very scientific eh?
With the panel held on with just one screw, I was able to check the alignment and make further markings for the remaining 3 screws (I did one at a time and checked the alignment each time).
Fitting the magnet bar was also a pain as again there is no way to mark its correct position while the panel is closed. Get it too far away and the magnet doesn’t work. Too close and the panel will stick out to the rear.


Now it is fitted, I am reasonably happy with the way it opens and closes, but I am not so happy with the alignment as the leading edge sticks out a bit and while it can be pushed in to a correct position, it just pops out again when pressure is released. It’s hard to see just why this is. It’s like there is a bit of springiness to the hinge (but I’ve kept it reasonably loose) where it resists being fully closed.


Anyway, now that panel is hinged, I can look to relocating my EHU point to behind it, though it has been pointed out elsewhere, that the hinge mounting itself takes up the most convenient position for this, where the body is only single skinned.
