Hello all!
My name is Jan and I live in Belgium. Thought to post a message immediately here (might be a better place for ideas etc than in the new member corner...)
Been sneeking around a bit for a while already, and started a project as well...
The pictures are not always the clearest but I think you can get the point. I'll give some comments here:
1. Hidden mains hookup
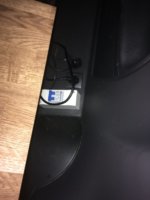
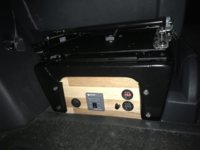
(the last picture where the cupboard is visible) quite easy, used a handy youtube movie for inspiration:
For the ones who are afraid if glue actually sticks on the plastic: it does (used 2 component epoxy) ;-)
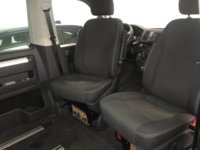
2. Seat turning platforms
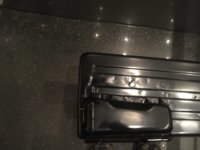
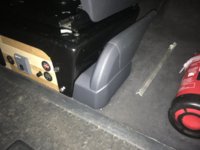
if you have a second battery under the seat YOU NEED one that's made for it (I got sportscraft ones, and they have one that works and one that doesn't!) . You also need to lower the handbrake. If you use the adapter that can be ordered with it the cover won't fit in any clean way anymore. BUT if you know how to weld or know someone who does you can get the side bit (where the handbrake is attached to) off (drilling through the spot welds, and pulling it off), cut the bottom bit off and weld it back lower on the seat base (result on the first picture after painting). When you cut the handbrake cover a little bit off at the bottom (just measure how much) it fits and looks like original.
3. The cupboard
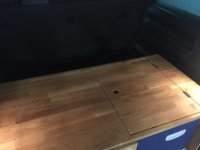
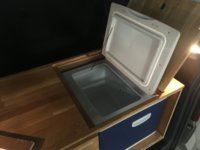
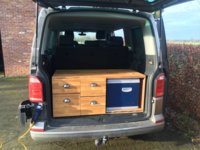
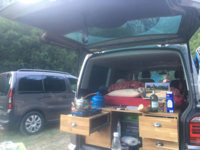
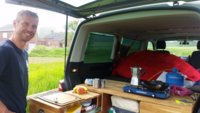
Idea is that it can be used as a working top but also as an extension of the seats to make a bed (total length with the seat folded flat is 2m). The upper left drawer is closed at the top and open at the side, so I can use a cooker on the top, and get the cutlery inside of it (the picture where it is open is an older one before I added the fridge). To fit it on the rails I cut pieces of plywood that fit inside the rail, and put a T-nut in them. Then slid them into the rails (4 pieces). In the cupboard there's some long slots drilled so I can put bolts through but still have the ability to play (to find the T-nuts.....). Seems I deleted some pictures of it, so if anyone wants I can have a look again... Opening and closing is with these pins (the alibaba version though...): https://www.aerospecialties.com/app/uploads/2015/03/RD_BLT_053_Ball_Lock_Pin_01.jpg
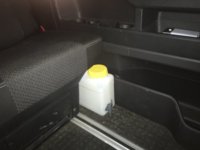
For the watter jerrycan I still have to make a retaining system, but it fits very well next to the bench
4. Electricity
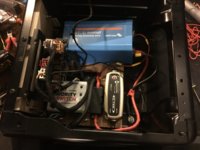
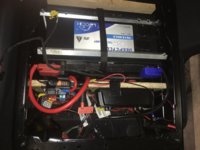
AGM battery under LH seat (driver's here...), with 12v bat to bat charger. The second cable (with yellow tape around the ends) that comes out of the 'in' side is just a cable that goes to a battery meter for the first battery. Made some kind of a scheme in the beginning but had to adapt here and there so didn't include a pic.
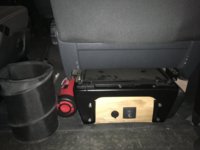
Under the RH seat there's everything 220v (bat charger 220 to 12, converter and priority box)
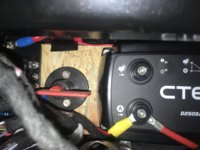
The 12v plugs in the back are all on the second battery. The voltage meter of the second battery is always lit up, the one from the first comes up when you hit the pressure switch. The other two switches are one for the converter (blue/grey) and one for one of the 12v plugs in the back. On the right next to the cupboard is a 220v plug, a 12v plug and a 'base fuse'(don't know in English) for the main hookup.
For the ground I used one of the bolts of the seat base (nice and big bolt, didn't have to cut back too much floor lining....)
Fuses are not always visible but are in place ;-)
Still to do is the lighting that I want on the second battery, but not sure how yet...
5. Roof
Problem: Belgian regulations... Wanted to have a HiLo installed (vehicle keeps nice under 2m etc...) but until now there's no homologation documents for Belgium yet...(and after some contacting etc. it seems a lot of work...) So might go with another brand, hopefully this spring...
That's about it... probably way to much text but I thought I give a bit back after getting a lot of info here...
Of course always open to questions and tips ;-)
Greetz
Jan
My name is Jan and I live in Belgium. Thought to post a message immediately here (might be a better place for ideas etc than in the new member corner...)
Been sneeking around a bit for a while already, and started a project as well...
The pictures are not always the clearest but I think you can get the point. I'll give some comments here:
1. Hidden mains hookup
(the last picture where the cupboard is visible) quite easy, used a handy youtube movie for inspiration:
2. Seat turning platforms
if you have a second battery under the seat YOU NEED one that's made for it (I got sportscraft ones, and they have one that works and one that doesn't!) . You also need to lower the handbrake. If you use the adapter that can be ordered with it the cover won't fit in any clean way anymore. BUT if you know how to weld or know someone who does you can get the side bit (where the handbrake is attached to) off (drilling through the spot welds, and pulling it off), cut the bottom bit off and weld it back lower on the seat base (result on the first picture after painting). When you cut the handbrake cover a little bit off at the bottom (just measure how much) it fits and looks like original.
3. The cupboard
Idea is that it can be used as a working top but also as an extension of the seats to make a bed (total length with the seat folded flat is 2m). The upper left drawer is closed at the top and open at the side, so I can use a cooker on the top, and get the cutlery inside of it (the picture where it is open is an older one before I added the fridge). To fit it on the rails I cut pieces of plywood that fit inside the rail, and put a T-nut in them. Then slid them into the rails (4 pieces). In the cupboard there's some long slots drilled so I can put bolts through but still have the ability to play (to find the T-nuts.....). Seems I deleted some pictures of it, so if anyone wants I can have a look again... Opening and closing is with these pins (the alibaba version though...): https://www.aerospecialties.com/app/uploads/2015/03/RD_BLT_053_Ball_Lock_Pin_01.jpg
For the watter jerrycan I still have to make a retaining system, but it fits very well next to the bench
4. Electricity
AGM battery under LH seat (driver's here...), with 12v bat to bat charger. The second cable (with yellow tape around the ends) that comes out of the 'in' side is just a cable that goes to a battery meter for the first battery. Made some kind of a scheme in the beginning but had to adapt here and there so didn't include a pic.
Under the RH seat there's everything 220v (bat charger 220 to 12, converter and priority box)
The 12v plugs in the back are all on the second battery. The voltage meter of the second battery is always lit up, the one from the first comes up when you hit the pressure switch. The other two switches are one for the converter (blue/grey) and one for one of the 12v plugs in the back. On the right next to the cupboard is a 220v plug, a 12v plug and a 'base fuse'(don't know in English) for the main hookup.
For the ground I used one of the bolts of the seat base (nice and big bolt, didn't have to cut back too much floor lining....)
Fuses are not always visible but are in place ;-)
Still to do is the lighting that I want on the second battery, but not sure how yet...
5. Roof
Problem: Belgian regulations... Wanted to have a HiLo installed (vehicle keeps nice under 2m etc...) but until now there's no homologation documents for Belgium yet...(and after some contacting etc. it seems a lot of work...) So might go with another brand, hopefully this spring...
That's about it... probably way to much text but I thought I give a bit back after getting a lot of info here...
Of course always open to questions and tips ;-)
Greetz
Jan


