Hi all
I just posted in ‘what have you done to your van today’ about the bed system I’m making and someone showed interest, so thought I’d put the details up. Even if it turns out to be a ‘how not to do it’...
I had my T4 since 2006 and the way it was configured really worked for us.
I got it as a panel van and did the whole thing myself.
We are an out door active family so need load space, as well as the occasional sleeper when we head to the alps (lets hope that returns soon..)
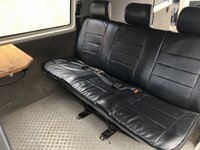
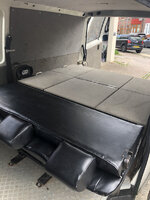
The original inspiration.
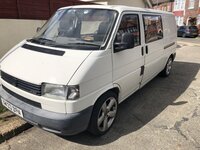
Whilst we loved the T4, she was looking a little tired. It was mechanically superb with 175k on the clock and running like a dream, so we have been discussing whether to invest in some bodywork and paint, or move on.
I wanted a kombi for obvious reasons, but the cost is rediculous.
As it happened an ‘almost bang on spec’ Shuttle came up locally and friends of ours were really keen on the T4.
So we ended up with a LWB Shuttle at significantly less than the equivalent kombi.
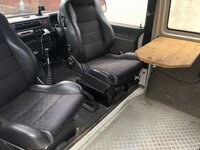
The seat config in the Shuttle is great. But we don’t need 8 seats, so rear came out straight away. We also wanted a wider removable centre section on the bed than last time. My daughter also used to complain about being so far back, so I wasn’t allowed to shift the seats back.
As it happens, in a LWB the distance from back doors to back of second row rear seats at the height we wanted the bed is about 185cm, which is my height. Unfortunately, the rear lean of the seat just makes it a touch too short for me, but my wife and daughter are fine.
Therfore, I’ll build a bed to fill the rear area, but plan to drop a seat on the side I sleep, and it will aid access to the rear.
The plan
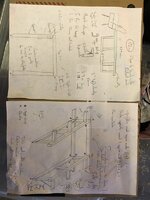
As with all good plans, it quickly went out of the window as soon as I started cutting wood.
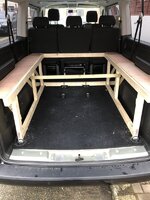
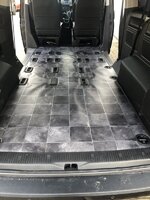
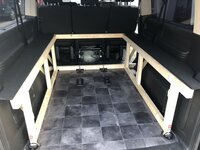
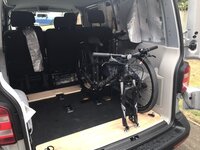
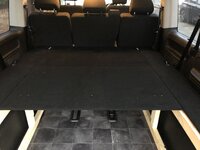
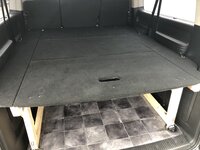
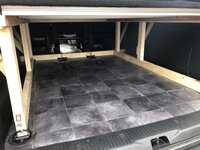
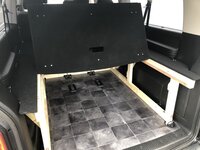
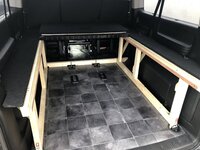
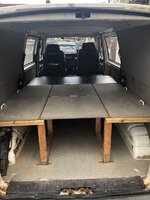
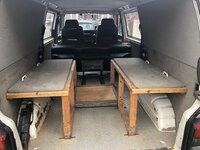
Anyway, this is where I’m at now.
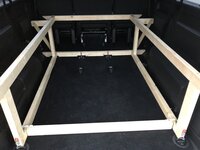
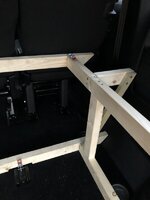
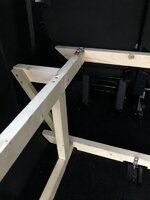
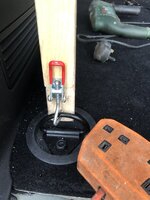
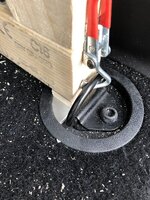
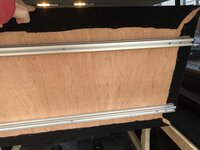
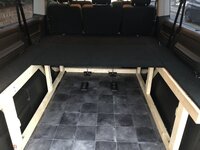
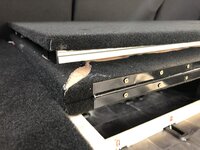
I’m using the toggle clamps as this is a modular system that (in theory) can be removed in a few minutes and the rear triple seats put back in should we need to.
The lower cross member near the rear door is just a sizing piece, but will need to have something there that doesn’t cause too much of a trip hazard when I’m loading bikes.
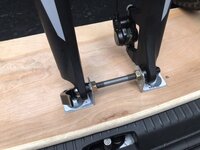
The two cross members behind the back seats are on 12mm dowels and toggle clamps. I’ve used the rear seat mount brackets to toggle onto as well.
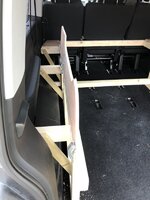
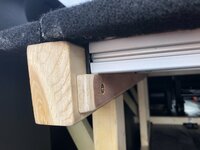
Still 2 out riggers each side to do, and the support strut. On a kombi I would just mount off the side wall, but can’t in the Shuttle as want to keep all trim in tact.
I've got felt pads on the ends of any wood that may contact the trim, mainly to stop any squeaks.
The side sections will have storage cubbies accessed by lifting the panel that will go over the top. I need to source suitable cranked hinges if anyone knows a good website.
The middle section will be in two or three pieces and hinged so it can be folded and stored like in the T4. My dilemma here is amount and height of supports due to the increased span. This may also impact the storage height under the bed, and limit the way I can store the folded centre section. It will be 12mm ply.
I just posted in ‘what have you done to your van today’ about the bed system I’m making and someone showed interest, so thought I’d put the details up. Even if it turns out to be a ‘how not to do it’...
I had my T4 since 2006 and the way it was configured really worked for us.
I got it as a panel van and did the whole thing myself.
We are an out door active family so need load space, as well as the occasional sleeper when we head to the alps (lets hope that returns soon..)
The original inspiration.


Whilst we loved the T4, she was looking a little tired. It was mechanically superb with 175k on the clock and running like a dream, so we have been discussing whether to invest in some bodywork and paint, or move on.
I wanted a kombi for obvious reasons, but the cost is rediculous.
As it happened an ‘almost bang on spec’ Shuttle came up locally and friends of ours were really keen on the T4.
So we ended up with a LWB Shuttle at significantly less than the equivalent kombi.
The seat config in the Shuttle is great. But we don’t need 8 seats, so rear came out straight away. We also wanted a wider removable centre section on the bed than last time. My daughter also used to complain about being so far back, so I wasn’t allowed to shift the seats back.
As it happens, in a LWB the distance from back doors to back of second row rear seats at the height we wanted the bed is about 185cm, which is my height. Unfortunately, the rear lean of the seat just makes it a touch too short for me, but my wife and daughter are fine.
Therfore, I’ll build a bed to fill the rear area, but plan to drop a seat on the side I sleep, and it will aid access to the rear.
The plan

As with all good plans, it quickly went out of the window as soon as I started cutting wood.
Anyway, this is where I’m at now.


I’m using the toggle clamps as this is a modular system that (in theory) can be removed in a few minutes and the rear triple seats put back in should we need to.
The lower cross member near the rear door is just a sizing piece, but will need to have something there that doesn’t cause too much of a trip hazard when I’m loading bikes.
The two cross members behind the back seats are on 12mm dowels and toggle clamps. I’ve used the rear seat mount brackets to toggle onto as well.
Still 2 out riggers each side to do, and the support strut. On a kombi I would just mount off the side wall, but can’t in the Shuttle as want to keep all trim in tact.
I've got felt pads on the ends of any wood that may contact the trim, mainly to stop any squeaks.
The side sections will have storage cubbies accessed by lifting the panel that will go over the top. I need to source suitable cranked hinges if anyone knows a good website.
The middle section will be in two or three pieces and hinged so it can be folded and stored like in the T4. My dilemma here is amount and height of supports due to the increased span. This may also impact the storage height under the bed, and limit the way I can store the folded centre section. It will be 12mm ply.
Last edited:

