My T6 Audio Upgrade

YellowHound

Photographer
VIP Member
T6 Legend
Thought I'd start a thread on the audio upgrade I'm about to do.

Starting point is:
Pioneer AVIC-F980DAB headunit
Blam amplifier
Blam 200RS door loudspeakers.
Rear speakers of indeterminate origin fitted by Vanworx.

Moving to:

Focal ES100K component speakers to replace the unknown rear units.

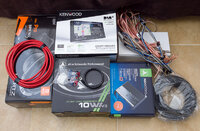
I have ordered from Absolut5:
Kenwood DNX9190DABS headunit
Absolut5 'Signature' audio comprising:
JL Audio sub
Hertz Mille Pro door component speakers
JL Audio XD500/3v2 amplifier

The rear speakers will be driven from the head unit and everything else from the JL Audio amp.
 
Nice. What level of sound insulation are you going for, or already have?
Anyone re-used the original front door speakers for the rear of the van? Swapping mine out for Eton over the weekend.
The front upgrade toppled the budget just now....
EDIT - reading here it seems connections are ready to accept wiring for rear speakers on the OEM head unit?
 
Last edited:
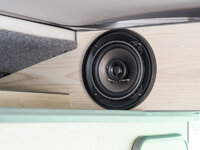
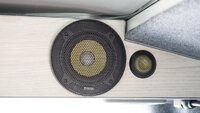
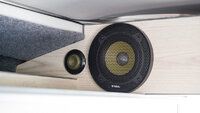
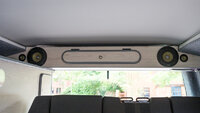
Swapped over the rear speakers today. As part of the work we have just had completed by Vanworx we had their rear 'pod' and speakers installed. The speakers used are unbranded. I decided to replace these with something much better, namely some Focal ES100Ks.

Starting point, minus grille:

Van-1.jpg

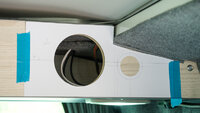
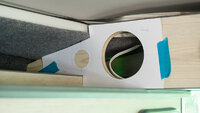
Measure twice, cut once....
Van-4.jpgVan-3.jpg

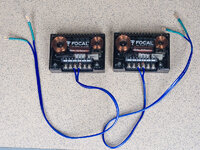
Crossovers with flying lead for bass/mid units:

Van-6.jpg

And the finished result:

Van-7.jpgVan-8.jpgVan-9.jpg
 
Last edited:
I’ve got Focal’s fitted in my front doors at the moment, they give out a decent sound with an amp.

Looking good, keep up with the updates.
 
Nice. What level of sound insulation are you going for, or already have?
Anyone re-used the original front door speakers for the rear of the van? Swapping mine out for Eton over the weekend.
The front upgrade toppled the budget just now....
EDIT - reading here it seems connections are ready to accept wiring for rear speakers on the OEM head unit?

Slidepods fitted the Blam kit that's in there at the moment. IIRC the doors have some insulation but I won't know how much until I get in there. Absolut5 are supplying what they use as part of the Signature set up I have bought. It's quite possible I will start with the doors as I have some lighting mods to go in at the same time.
 
Last edited:
Great looking install. Top solution. I really rate the Focal stuff too. I've had several installations on different vehicles over the years and everyone has sounded great.

The old P25FS sub sounded so tight and powerful, and was less than £200. That was the best sub on the market, and a bonus being so cheap. Shame they don't make them anymore.
 
Just delivered - a big jigsaw puzzle....

Van-1-2.jpg

Sub enclosure to follow when Jason has had a chance to make some more.
 
I'm still waiting on the sub enclosure but decided to make a start on the door s and A pillars.

I bought brand new A pillar trims as my plan is to sell the exiting trims complete with the Blam tweeters installed.

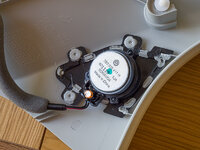
New A pillar trims with factory tweeters:
twee-1.jpg

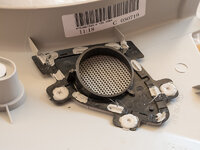
Tweeters removed by cutting through the three plastic posts visible in my first pic.

twee-2.jpg

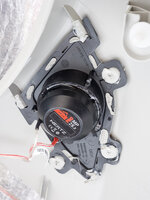
New Hertz tweeters installed with a bead of superglue:

twee-3.jpg
 
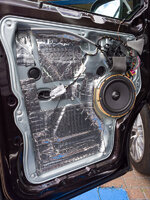
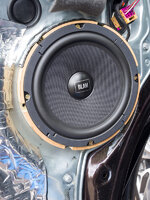
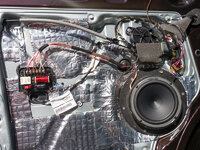
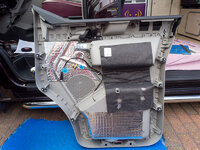
Door panel removed. This is my starting point - Blam 200RS speakers fitted by Slidepods.

Door-1.jpg
Door-2.jpg

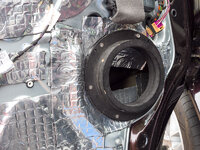
New MDF speakers collars fitted, along with some additional Silentcoat. The collars needed drilling to fit the doors, along with an access port for the cables.

Door-3.jpg

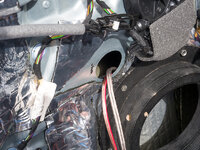
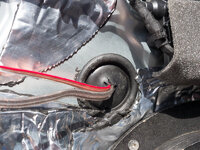
Cables for tweeter and amplifier input run through the inside of the door, exiting through this grommet:

Door-4.jpg
Door-5.jpg

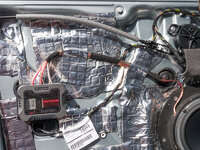
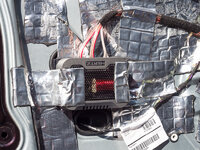
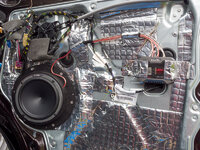
Hertz Mille Pro midrange/bass units fitted and all cables run to the crossover:

Door-7.jpg
Door-8.jpg
Door-9.jpg
 
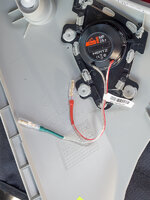
Tweeters terminated with brass bullet connectors ready connecting and fitting to the van:

A pill-1.jpg

In terms of speaker installation that's the passenger door done. I'm fitting some ambient lighting and puddle lights to the door panel so I'm not in a position to fit that just yet.
 
For the sake of completeness:

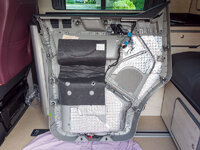
Passenger door panel ready to go back on, complete with ambient and puddle lighting mods:

Van-20.jpg

Driver's side speaker installation:

Van-21.jpg

And driver's door panel:
Van-22.jpg

Next task is to strip out the headunit, amplifier, seats, seat bases and flooring.....
 
For the sake of completeness:

Passenger door panel ready to go back on, complete with ambient and puddle lighting mods:

View attachment 82870

Driver's side speaker installation:

View attachment 82872

And driver's door panel:
View attachment 82871

Next task is to strip out the headunit, amplifier, seats, seat bases and flooring.....
I’ve got a rattle on my drivers’ side door-card after doing the same modifications, so I’d recommend you tape those cables down!
 
I’ve got a rattle on my drivers’ side door-card after doing the same modifications, so I’d recommend you tape those cables down!

Yes - added some extra silent coat when I offered the door cards up to the door. Will find out when I next drive it ;)
 
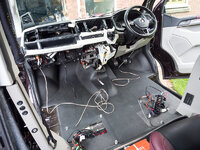
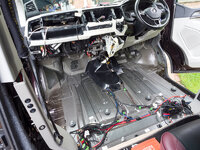
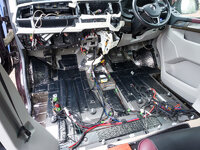
Not much time today but made a little more progress. Fed in the amplifier power supply from the battery after some head scratching. Never thought I'd be removing windscreen wipers to route a cable...

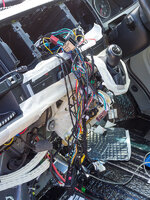
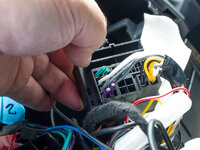
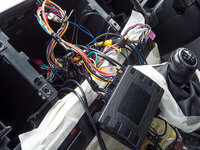
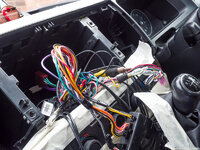
But the unholy mess of wiring left behind after removing the headunit frankly depresses me. Holy mother what did they do when they fitted it?

I was trying to strip everything out back to the interface with the van. Getting back to a 'clean' interface is going to be a challenge :(

Looks almost as though they've hacked out connectors and then done their own thing?

@Absolut5 any thoughts on these pics? Any observations/thoughts/advice gratefully received!

Van-38.jpg
Van-37.jpg
Van-35.jpg
Van-36.jpg
 
What a terrible mess, looks like a connects2 info adapter, glad we do not use them so many wires

All I can say is unplug everthing and carefully strip it back to just the original qualdlock, our loom is so much neater
 
What a terrible mess, looks like a connects2 info adapter, glad we do not use them so many wires

All I can say is unplug everthing and carefully strip it back to just the original qualdlock, our loom is so much neater

Agreed - there just seems no rhyme or reason to what's been done. I can't believe just how many wires there are.
Beginning to wish I'd ordered the DAB and USB looms from you - may well need to do that anyway.
I just hope I don't find they have hacked the van about.
 
Back
Top