To infinity....or at least out of Sussex: My T6 conversion build thread.

JBR80

CNC machinist
T6 Pro
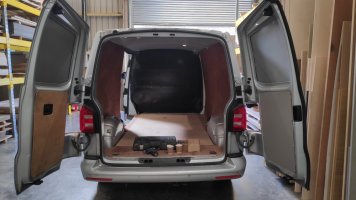
So the time has come to convert my LWB 2015 T6 into a camper. I have owned it for the last 5 years, it's had a very easy life and has only racked up 31k on the clock.
I have been reading build logs and a large number of posts to learn, get up to speed, and make myself aware of the many many options there are. I hope by documenting the build here, it will be helpful for others, even if I post mistakes it'll act as a 'what not to do guide'.

A scope of the planned work is:

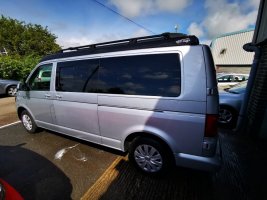
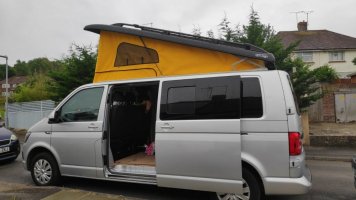
Westdubs black pop top with yellow scenic canvas
Dark tint windows for all rear doors and panels (fake rear quarter drivers side)
Jac conversions 3/4 width R&R bed with easy slide mech
Insulation and full rear carpet lining in silver grey
Possibly veneered panels on the underside of the pop top bed and kitchen splashback
Floor insulation, 9mm ply, vinyl flooring
Planar 2D diesel air heater
57 wheel arch water tank, shurflo pump, no waste water tank
Underslung Propex LPG tank with bbq point
Camplux shower at rear (makeshift cubicle utilising barn doors)
Smev 9222 or 9722 gas hob, florenz tap
JustKampers JKF50 fridge

Electrics:
  • Sargent EC155 power supply unit
  • JA solar 380w panel
  • Victron Orion tr Smart 12/12-30 dc-dc charger
  • Victron Smart Solar 30/100
  • Sterling Power 100ah LiFePO4 battery
Furniture, I'll be designing and making my own. Having a workshop with CNC machines and laminate press puts me in a good position for this part of the job.
 
Look forward to see how you get on. We're also in sussex and just about to convert a t6.1. Just trying to work out how much we do ourselves.
 
I thought it might be helpful to put some costs against the conversion items. I'm sure these aren't the cheapest available, it just may be helpful for anyone budgeting for conversion work. The orange section at the top are the items that the conversion company are supplying and fitting, the items below are ones I'm sourcing. The only large expense not listed is the kitchen units, which I am making (I think the value of this is approx £1500-2000). All prices below include VAT.

item cost.jpg
 
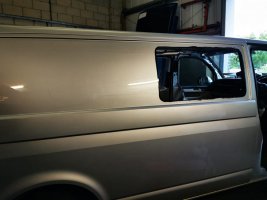
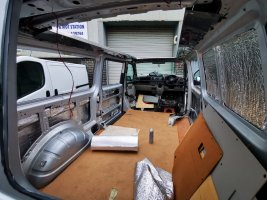
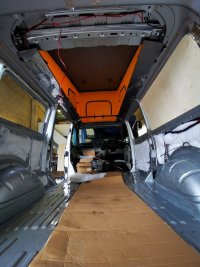
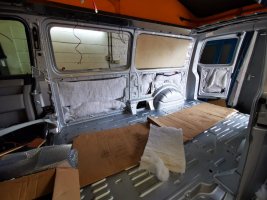
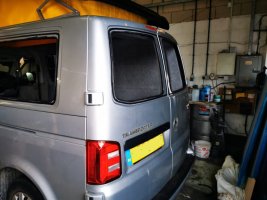
Cutting out panels for the camperglass windows and making a large hole in the roof for the Westdubs pop top. Foil insulation going behind panel cavities.
WhatsApp Image 2021-07-07 at 14.03.03 (2).jpeg
WhatsApp Image 2021-07-07 at 14.03.03.jpeg
 
  • Like
Reactions: CAB
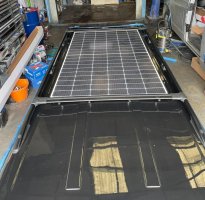
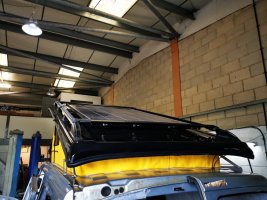
Roof bars going onto the pop top roof. The large 380w solar panel is connected to the cross bars using metal angle brackets, so the front face of the panel sits below the cross bars so they can still be used for the paddle board.
WhatsApp Image 2021-07-07 at 14.03.02 (6).jpeg
 
  • Like
Reactions: CAB
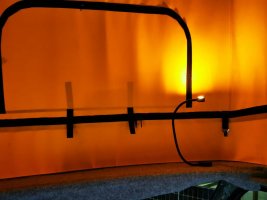
Westdubs pop top going in. Yellow canvas option thanks to my wife and daughter....the perils of democracy.WhatsApp Image 2021-07-07 at 14.02.37 (8).jpeg
Neat little flexible reading light with integrated usb charger:
WhatsApp Image 2021-07-07 at 14.02.37 (5).jpeg

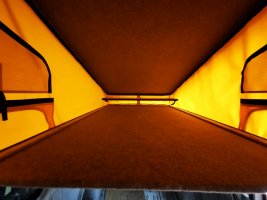
I think I can get a 120cm x 200cm mattress in the roof......but only 50mm deep (luckily my daughter is only 6)
WhatsApp Image 2021-07-07 at 14.02.35 (4).jpegWhatsApp Image 2021-07-07 at 14.02.37 (4).jpeg
 
Last edited:
  • Like
Reactions: CAB
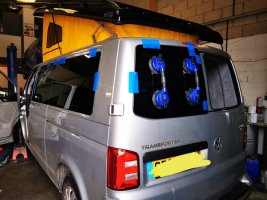
Windows going in:
WhatsApp Image 2021-07-07 at 14.02.35 (5).jpeg

I like the James Wilkins (fitter) idea to attach the solar to the cross bars. The panel looks very discrete, it has a good airgap underneath for ventilation and if the panel fails in the future it's easy to adjust the bars for a different sized panel.
WhatsApp Image 2021-07-07 at 14.02.34 (2).jpeg
 
Last edited:
  • Like
Reactions: CAB
Phase 1 complete:

WhatsApp Image 2021-07-05 at 18.18.52.jpegWhatsApp Image 2021-07-05 at 18.18.52 (1).jpeg

So far the completed work includes:
Pop top fitted
roof bars fitted
Solar panel fitted
Windows in
Planar diesel heater installed externally
First fix cables in for Sargent unit, dc-dc charger, solar MPPT, water tank gauge, fridge and external mains hook-up
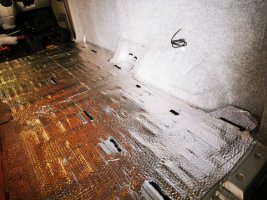
Foil and cavity insulation fitted
Carpet lining fitted
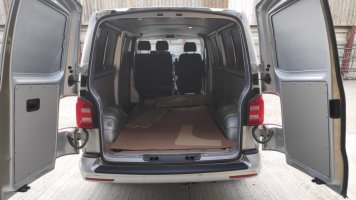
Floor foil barrier fitted, ply floor screwed and glued

Next is prepping the ply floor for vinyl, and fitting the lino.....not sure if I should do this or a call in a floor fitter to do this in 1/4 of the time without ballsing it up
 
Last edited:
Roof bars going onto the pop top roof. The large 380w solar panel is connected to the cross bars using metal angle brackets, so the front face of the panel sits below the cross bars so they can still be used for the paddle board.
View attachment 123199
What rails and cross bars have you gone for. im having a west dubs fitted and want a roof rack on the top and was thinking of fabricating my own, do you know what load rating the cross bars are as i plan to carry a fishing kayak ontop. Thanks
 
What rails and cross bars have you gone for. im having a west dubs fitted and want a roof rack on the top and was thinking of fabricating my own, do you know what load rating the cross bars are as i plan to carry a fishing kayak ontop. Thanks
I went for the trade van supplies ones. They are load rated at 50kg. The panel is 22, so it leaves 28kg to play with.
 
I went for the trade van supplies ones. They are load rated at 50kg. The panel is 22, so it leaves 28kg to play with.
That's great thank you. how are they secured? are you mounting them through the hinge plate? I don't suppose you have a picture of the securing method from the underside do you?
 
That's great thank you. how are they secured? are you mounting them through the hinge plate? I don't suppose you have a picture of the securing method from the underside do you?
Let me try and get some info for you.
 
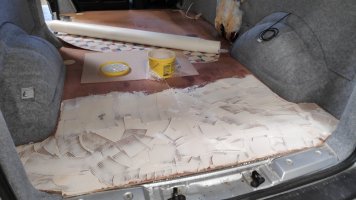
So, after contacting all the independent flooring contractors and finding none of them are currently available to do the vinyl flooring....looks like I'm doing it.

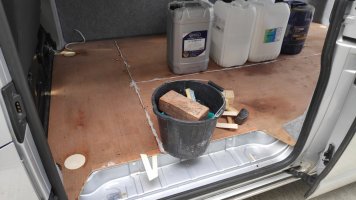
Stage 1: fill the holes in the 9mm ply that were allowing access to the tie down rings. In my case, 6x 89mm diameter discs glued in place.
Stage 2: PU gluing along the ply split lines, weighing it down with heavy stuff.
IMG_20210713_143123.jpg
 
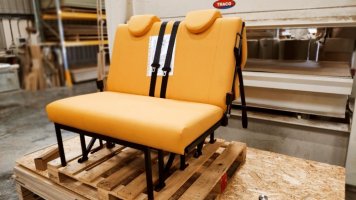
The JAC R&R bed has just arrived, yellow vinyl to match the yellow roof canvas..... yes sunglasses are necessary . The build quality looks excellent, very easy and smooth mech for turning into a bed. Very pleased indeed, and about £500 cheaper than an upholstered Rusty Lee. IMG_20210714_144606.jpg
 
That's great thank you. how are they secured? are you mounting them through the hinge plate? I don't suppose you have a picture of the securing method from the underside do you?
The roof rails are bolted through the metal hinges at the back but not at the front as they have sit where the cross bars guide them.
 
The roof rails are bolted through the metal hinges at the back but not at the front as they have sit where the cross bars guide them.
I think I'm planning to bond a spreader plate underneath at the locations I cannot use the pop top fixings. Thanks again
 
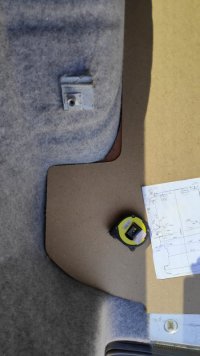
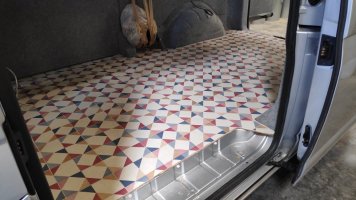
I pushed on with the flooring today. I didn't feel confident knifing the vinyl in situ....too many nooks/ details for a complete novice.

I took a stack of measurements of the floor, drew in up in CAD. I CNC cut some templates in scrap 3mm MDF, I needed to make adjustments in few places:IMG_20210719_125237_1.jpg
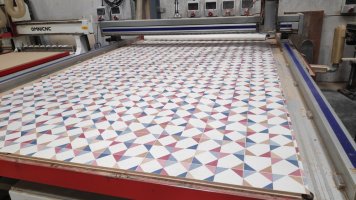
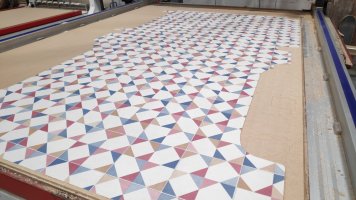
With templates matching the ply floor, I was going to use these to cut around the vinyl with a stanley knife. Although cutting very thin materials can be problematic on the CNC router, I did some test cutting with the loose vinyl and managed to get a good cut edge (using a 3mm single O flute cutter for anyone who cares) So I cut the vinyl out in 4 mins very easily!
IMG_20210720_120505.jpg

IMG_20210720_124634.jpg
With a perfect fit, it only took me half an hour (+10mins of my wife lending me a hand) to stick it down using F44 adhesive....very easy stuff to work with.
IMG_20210720_140529_1.jpg
And here it is finished:IMG_20210720_144416_1.jpg
 
Back
Top