Webasto Diesel Heater Install Questions

Depron Donkey

140 DSG Kombi Red, 150 DSG Kombi Bamboo Green
VCDS User
T6 Pro
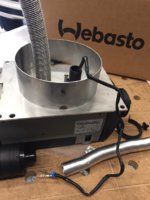
I have picked up today from a friend of mine a Webasto 3500 diesel air heater and will be fitting it within the next few weeks to my T6 Kombi.
Would just like peoples advice, preferences, advantages or disadvantages on fitting positions, under van, under seat etc. Which is quietest or easiest to do?
Any advice or suggestions, do’s and dont’s would be appreciated.
TIA.
Andy. upload_2018-12-19_21-58-15.jpeg
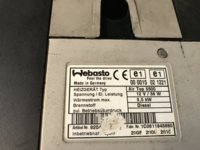
 
Not sure if this is the right place for this thread, but i wasn't sure, so Pauly please move it if it needs to be in a different area.

As some of you know i've been building my camper, in the camper van build thread.

I've come to installing the diesel heater, and the instructions from Webasto aren't the easiest.

So i have already drilled the 140mm hole, primed and installed rivnuts for the Stainless base, cables are run, multi control panel is fitted in place.

but nothing in the instructions show or explain the cable in the air inlet...
IMG_2313.JPG

I'm assuming it is the pump cable, and i'm assuming that i drill out a section of the hose and feed the cable through it and then clamp below it and then seal the entry hole?

any help will be good, as this won't be the only question, as the electrical side seems confusing to me with this item.

I've got my van booked in for the end of the month to drop the wheelchair lift, to access the fuel pump assembly, i looked at all my other options, but i don't have the time to get them done by the end of the month.
 
The pump cable slides into the slot in the combustion air intake then the pipe is just pushed up to it and clamped in position - it doesn't need to be airtight. Several people have asked me that - Webasto have never included that information in their literature for some reason. ( One guy cut off the fuel pump plug so that it would fit down the pipe - before I told him that it was unnecessary !) Polarity is immaterial with the pump terminals when you come to insert them into the connector.
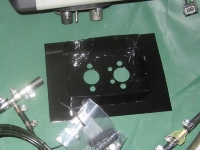
I make my floor plates with a rectangular flange - it is easier to cut a 4" x 5" rectangular hole with a disk than to faff about with cutting a circle! Using a new 4 1/2" cutting disc cut the 2 5" sides and then the disc is worn down enough to cut the 2 4" ones. I run a bead of sealant around the flange to mount junction to prevent moisture from seeping through there.
Make sure that the heater casing isn't touching the floor either side of the plate when tightened down as the slightest distortion of the case can cause the fan to rub internally as the tolerance between them is very small.
 
Thanks Oldiebut Goodie for the tips,

I thought it was odd that there was no literature on it, it had me stumped, so i'd though id ask before i jumped into it.

As for the polarity, i noticed that today as well, but i'm glad it don't have to peel of the wrap to see the wire colour.

As for the hole, it would be easier to cut a rectangle, but i have a huge selection of Bi Metal hole saws from cabinetmaking, so i used that, although i had to do it from underneath as the arbour was too short to do it from the top.

I'll keep an eye on the casing on saturday, as i'm planning on being under the van to fit the rest of the fittings.

I've got sikaflex fireproof sealant in the workshop that i am going to use
 
I admire what you are doing - how do you manage it all? I have Ankylosing Spondilitis and have arthritis in every joint of my body and can only do an hour or so of work before I have to lie down and let the pain subside. I should have bought a new body rather than a new van! I am still only half way through installing my own underslung heater as by the time I have got underneath a couple of times I have to give up for a while. If I push myself too hard it means a week or more laid up recovering.
This is how I make the mounts:
plate.jpg
 
It's not easy, as you will already know, with AS, you have good day and bad days, i just have to push through it, although it is taking me a long longer to recover, as i tend to overdo it by just wanting to get it done.

I though the build would take me about 3 months:rolleyes:, but the body didn't agree and the other issue is finding a way to do something in my position.

As for the mounts that is a good solution, as most people can cut rectangles, but cutting a hole without a holesaw can be difficult
 
Back
Top