Ads_Essex

Local lowlife
VCDS User
Moderator
VIP Member
T6 Legend
HOW TO TAILGATE


This is a guide to replacing the barn doors on your T6 with a tailgate. The conversion is in itself simple, with the parts being bolted on, and falls in to three elements - having the parts present, having the tools available, and having the electrical system altered.

Parts needed include the tailgate + ancillary components, tailgate wiring loom, tailgate gas struts, threshold cover, rear D-pillar trim pieces and, for a fully complete job, rear bumper (the barn-door bumper will still work and can be replaced later). Vagnostics offer a simple conversion kit for mounting the gas struts to the bodywork.

Tools needed include a ruler, Phillips screwdriver, drill with 8mm & 11mm metal drill-bits, generic socket set, tubular box wrench set, hex/Allen-key set, spline socket set and torx socket set; you’ll be able to work out exactly what sizes you will need beforehand by looking at the bolts in your kit and the bolts on the van. A hammer and coal chisel helps along with a wire coat hanger comes in handy. Also, some metal primer for drilled holes.

Electrical requirements boil down to either adding a timed relay to the tailgate wiring loom or to having some additional cabling added and the BCM re-coded via VCDS. You can undertake the conversion without carrying out electrical work, but will only be able to open the tailgate by physically pulling on the latch from inside the vehicle - I lived like this for around five months before finding an auto-electrician who could carry out this coding for me.
 
Last edited:
Method

1) Assemble your tailgate so it’s ready to fit.
Firstly check the tailgate hinge nuts fit - mine didn’t so I had to return to TPS. Possibly mislabelled? Affix the hinges*, the dampers and the wedge guides to the tailgate. Leave the handle and numberplate holes until later - the holes allow you to lift the tailgate panel a lot easier. Also leave the latch off - you don’t want to damage this when jiggling the tailgate about.​
Wind in the tailgate dampers - these foul the Vagnostics ball pin plate and will initially lead you to thing you’ve fitted something wrong.​
Test that the tailgate loom works first, if possible, with a multimeter checking for resistance. Attach a household 12v battery to the brake and numberplate lights - any problems now will be easier to rectify before you bolt it all together, especially with the non-removable third brake light. On some vans it appears to be that the negative switches the signal, so this may cause some headscratching. Also, the earth is shared between the components, so finding a simple positive and negative is not that straightforward.​


2) Start removing the barn doors.


Before starting, unplug the van loom for the rear lights and barn doors (both sides). The nearside loom is the busiest and will be paired to the tailgate, whilst the nearside will remain redundant.

IMG_0622.JPG
(the tail lamp grommet doesn't actually need to be removed from the van)​

Take your ceiling and side panels down now. Remove rear threshold cover.

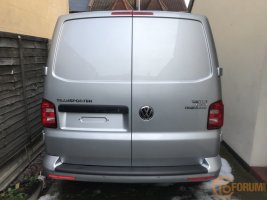
Clean barn doors whilst still fitted if you’re reselling them (remember to remove your locking barrel - it’s easier than you think and saves future worry). Much easier when on the van and saves getting your nails dirty. Now take a picture for that impending 'for sale' advert..

2.JPG

Lay down something soft on the ground for the doors to stand on once removed.

Unbolt door spring retainers. Unbolt door catches in roof.

Unbolt hinges - its a two-man job to ensure the doors don’t fall to the ground.

Now remove doors and consider going for a drive..


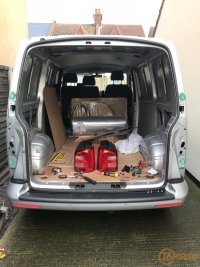
Remove taillamps. Wiring can stay where it is. Different lights may need different plugs - see below.


3.JPG
 
3) Fit the tailgate.


Offer up Vagnostics ball pin plate and drill out the captive nuts. Make sure you clean any swarf up.

The kit also comes with four triangular-shaped blanking plates to improve aesthetics - it looks like the van may have been sprayed with the hinges in situ, as my bodywork is dull behind these, so you may choose to have some paint work done later.

image-jpg.25663

Now would be a good time to remove your old striker plates from the floorpan and replace with the new plate. I just reused one of the plates and chucked the other - the plates have spreaders which are tack-welded under the body - you can take the rear bumper off now and remove these (bumper needs loosening for the D-pillar panels later on but not fully removing), or just knock them off with a screwdriver / chisel. Use a coat-hanger wire to catch them if you do knock them off without removing the bumper, and then reposition to centre with one of the striker plates. Make sure you make good and exposed metal (where you removed the old plates by force). Also, screw down in to the old plate(s) so they don’t rattle in future.

full


Install threshold.

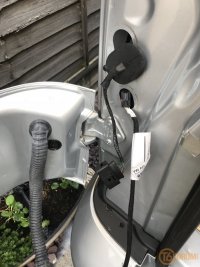
Offer up tailgate. Poke the loom through and have your helper pull it right in; tell them not to pull it through the same hole that you’ll be screwing the hinge nuts through. It’ll become clear where you’ll want it to go - alongside the roof panel.

full

The art of getting it in place is to sit the bottom on the bumper, align horizontally, and then lift up whilst standing on a stall. Have someone inside the van holding the tailgate so it doesn’t fall over.

Get the hinges through the holes.

Go round and place the gaskets*, bearer plates and nuts on to the hinges. Tighten up when sitting true (you’ll be able to properly line it up later on when the D-pllar trim pieces are installed). Install latch, install numberplate lights and install handle. Plug in loom.

*Parts diagrams showed the gaskets being fitted to the inside of the van between the roof itself and the hinge nut. I think this may be wrong as it leaves no gasket in place between the hinge and the outside of the van. Over time movement here may cause the paint to wear away so I’d suggest buying four gaskets and fitting two to the exterior side of the van also. Alternatively TPS may offer to sell you a generic oblong-shaped gasket, which will allow you to cut out the gaskets from that.

full

Replace taillamps - depending on whether you’ve gone LED, OEM or aftermarket, you’ll probably need to replace the plugs somewhere - my OEM barn door taillamps had plugs where the cables were inline whilst the LED tailgate taillamps are laid out with three cables over two parallel lines. Wiring guide below.


Install the D-pillar trims - these will need attaching to the body via guides that have no pre-drilled holes. I didn’t do these (as I ran out of time before I had to drop the van off at the converter before we went on hols) so can’t help here. Well, other than say ‘good luck and god speed’. But really, they sit in place on top of the rear bumper, making it clear where you need to drill holes in the body work.


If you are leaving your barn door bumper on then you will need to remove the two matte-plastic trim pieces which foul these D-pillar trims - it’s easier to unbolt the bumper and then give these trims a good wiggle. Otherwise the barn door bumper does still work, but just looks a little different.


full
 
4) Wiring the tailgate to the van.


By default, when the barn doors are unlocked, a pulse signal is sent from the BCM to the lock which tells an actuator to move some rods in to place; these connect with the handle, allowing the handle to mechanically pull on the latch and open the door. The same happens when the van is locked - this pulse moves the rod away from the handle, which is why you feel no resistance on the handle when you try it after having locked it.

The tailgate is, by default, wired so that the handle is always live. By this I mean that there is no lock or unlock pulse, but that the handle is in constant communication with the BCM - so that when the van is unlocked, no pulse is sent as the handle is waiting for your physical input - you squeeze the handle and the tailgate latch opens.

This is what makes the conversion a little trickier on the T5.1 and T6 vans - on the old T5 vans, the door handles were mechanical on both tailgate and barn door versions, so this pulse worked on both. When the electro soft-touch handle was introduced on the T5.1, this made the addition of either a timer-relay or wiring and coding a necessity.

As for joining the tailgate loom to the van loom, the rubber boot from the tailgate brings the loom in at the top nearside corner of the D-pillar to a 17-pin connector block. From there, a mating connector carries the wiring loom along the roof and down to the BCM (via a brown 10-pin connector at the nearside A-pillar);
the barn-door loom runs the same route from the BCM (via the same B-pillar connector), but the connector blocks (there are two - one for each door, shown as T17c & d on the wiring diagrams) are in the D-pillar roughly behind the taillamps, the main one T17c being on the nearside.
NB: The offside connection T17d can be ignored, as this only powers the other half of the third brake light.

So, as you see, the barn-door loom runs past the point where the tailgate loom enters the van. This means you can choose to either de-pin your nearside D-pillar barn-door connector plug or cut your wiring loom there and reconnect the cables to a 17-pin connector block that mates with that on the incoming tailgate loom (shown as T17o);
or you can make up a short (approx one metre length) loom with the corresponding male / female connector blocks on it (see below for part numbers) and connect the looms that way. The VIP section here has the wiring diagrams to show you the pinouts for these T17c / T17d / T17o plugs.
You’ll still need to run two cables back from this connection to the BCM if you want the wiring to work as if OEM
(EDIT: see below for wiring and coding information).

The loom on the van is colour-coded whilst the tailgate loom wiring isn’t and can only be worked out from the T17o pinout.
NB: Ignore the numbers on the tailgate loom wiring as some seem to change once they reach the individual components.


Matt Vessey worked out the wiring on his Transporter tailgate conversion and utilised a relay to operate his handle, and now sells a relay with wiring and instructions in kit form for tailgate conversions from his Vagnostics webshop (along with gas struts).

A timer-relay will take the pulse signal and energise the relay so the handle can be powered for a period of time. However this was not a straightforward install on my T6 because it required me to have some basic electrical knowledge, which I didn't, so I opted for wiring to be added and coding to be undertaken to make the BCM work as though the van had a tailgate installed from the factory.

So if you don't have access to VCDS, have the Vagnostics kit and are not bothered about the timer only being energised for a short period of time, then this is the cheaper option that you can do yourself at home.
But if you want the tailgate handle to be energised all the time the van is unlocked, and the van to act like it had a tailgate fitted at the factory, then go for OEM wiring and VCDS coding.

The Vagnostics wiring kit consists of a 6 pin relay that, when energised, is set to provide your actuator/solenoid with 15 seconds power when unlocked - this means that at all other times, the tailgate handle will effectively be switched off.

Relay wiring is as follows:

Pin 2 - wired to a 12v feed (wiring included).​
Pin 5 - wired to a 12v feed (wiring included).​
Pin 4 - joins the van loom at pin 14 (for the unlock pulse, which in turn energises the relay timer).​
Pin 6 - earthed to van.​
Pin 8 - joins the tailgate loom at pin 11 for the handle.​
The relay interrupts pins 11 and 14, which should be earthed to prevent a loss in the electrical circuit throwing up errors in the BCM.​
As you can see here, there lacks a provision for the numberplate lights.​
Update: it appears Vagnostics is no longer in business according to others who have tried to contact him plus his website being down.​


Alternatively you can opt for an OEM approach where the relay isn’t used and two cables are run from the tailgate to the BCM, with coding to accept the different locking requirement. @Eddcameron of VolksFit is the only outfit that I found able to do this (and I telephoned loads of auto-electricians but none knew how to tackle this). Edd appears to know the VW electrical system very well and carries out all sorts of retrofits, both for private owners and for VW Listers Droitwich.

EDIT: DIYer and overall good egg @Littleblackflash has managed to work out the wiring himself and has written an idiots guide here.

In short, an ex-works tailgate-van has a
brown & yellow 1.5mm wire go from pin 14 the tailgate 17-pin connector block (4F0972483:4F0972575 - T17o) to pin 10 of the BCM-A 'J519' (black connector, right-side - T73a) (via pin 5 of a brown 10-pin connector in the nearside A-pillar - T10ag) to operate the lock; and a
green 0.5mm wire run from pin 13 the tailgate 17-pin connector block (T17o) to pin 23 of the BCM-A 'J519'(T73a) (via pin 4 T10ag) to operate the switch.
Pin 15 of the tailgate connector block needs earthing to the tail-lamp earth point on the D-Pillar.
Number-plate LEDs will be taken care of by the same feed.
A heated rear window will need a 2.5mm wire from pin 73 of the BCM-B 'J519'(white connector, left side - T73b) to pin 16 of T17o (via pin 16 of T17m - a red 17-pin connector in the A-pillar). I mention this as most people convert solid barn-doors to a glazed tailgate. The alternative is to have no HRW or to fit a Cali double-glazed window.

Coding can be found on the linked post.

Anyway. If you opt for the OEM wiring - which I would advise - then you absolutely must click 'Like' on the linked post where @Littleblackflash covers the electrics and coding in more detail. If you don't, he'll drive round and cut your loom in half. And I'll luz a relay through your letterbox.
 
Last edited:
Parts

Tailgate 7E0287105c

Hinges x2 7E0827301c & 302c

Bolts to attach hinge to tailgate x2 N91069101

Bolts to screw tailgate to body x2 N90928801 (remember your box spanner)

Spreader plates x2 7H0827689

Gasket x2 7H0827365 or single piece 7E0829193R


Handle / button 7E0827566

Handle inner casing 7E0827315 (packaging shows 7E0827526; don’t accept 7E5827315(A) or 7E5827526 as that is incorrect)

Reinforcement for handle 7E0827264C

Motor actuator for handle 3B5827061C

x2 bolts for actuator N10488204

Actuator Rod 7E0827515

Actuator pivot for latch 191837199

Handle outer panel trim 7E0829139GRU

Bottom lock-latch 7E5827505b

Bolts for bottom latch x2 N90931602

Dampers x2 6X0827499F


Ball pins for tailgate panel x2 7E0827439 - if you buy the Transporter HQ struts then use the four ball-pins that they provide.

Vagnostics kit (adapts current holes for upper barn-door hinge to take a plate fitted with ball pins to mount tailgate gas struts to).

Gas struts x2 (see above) - you’ll need T5 gas struts for the Vagnostics kit, as these are slightly longer and ensure the tailgate lid stays open at the correct height.


Third brake light 7E0945087

Registration Mark lamps x2 3AF943021A (will need coding to van or having resistors added inline)

Taillamps to suit tailgate (see forum shop)


Guide (that attaches to body under tail lamps) x2 7H0829733C

Screws for above x4 N10451405 (or rivet as no holes present)

Guide (that attach to tailgate) x2 7H0829721B

Screws for above x4 N0214173


D-pillar trim pieces 7E0807322DGRU & 321DGRU

Threshold trim cover 7H0863485C


Tailgate bumper 7E5807417C

Reflectors 7E0945105E & 106E

PDC mounts - the tailgate ones supplied did not fit with my PDC sensors (sensor part 1S0929275C) as they appeared too large, meaning the sensor would simply fall out.

The barn door bumper mounts are parts

7E5919491, 7E5919491A, 7E5919491B, 7E5919491C.

The tailgate mounts are

7E5919491D, 7E5919491E, 7E5919491F, 7E5919491G.

I returned the tailgate mounts and bought two lots of the two centre barn door mounts - 7E5919491A & B.

If your PDC sensors are different then I’d suggest having a look at EKTA.

(The reason the sensors are different is due to a slight crease/curve in the bumper. More-so, the mounts on the barn door bumper are rounded at one one corner, making them unique. As far as I could see, the two centre mounts are identical so if it boils down to utilising second hand parts, try the two centre mounts on the outside)


Tailgate wiring connector plugs - if you don’t want to splice your wiring, you can use the mating plugs and around one metre of cable per pin to and make up a short loom:

4F0972575 to mate with tailgate loom plug (which is male 4F0972483)

Pins (male crimps) x14 000979035E

6Q0972777 to mate with van plug (which is female 6Q0972778)

Pins (female crimps) x14 000979131E

The plugs themselves have a built-in locking mechanism so the pins don’t pull out when pressure is applied to the loom - this lock just needs sliding out something like 5mm to release the pins.

The heated rear screen pins are larger but, as I never used them, do not know the part number. I bought these from eBay seller ‘mshugaev-2008’ who was really helpful and provided me with the part numbers after I gave him the plug part-numbers.


Cable will still need running back to the BCM - VolksFit installed this and coded the BCM to accept the tailgate.


Some other bolts that I appear to have used somewhere as I have empty bags and no bolts leftover..

x2 N10451405 bolt

x2 N90479203 nut

x2 N10741402 bolt

x4 N90962401 bolt


I’ve probably missed off some parts here, so make sure you spend a large portion of your life looking at part sites with those exploded diagrams once you have ordered all of your bits.

A good site is nemigaparts.com.
 
Now for the loom -

Barn door loom is 7E0971695C (E if you have a rear wash/wipe).

Tailgate loom (for locks, brake and numberplate light only) is 7E0971145MT which is broken down as the following.

Brake light needs plug 3C0973119C

Number plate lights need two plugs 8W0971832

Handle needs plug 1T0973119 (an interior handle would want plug 1K0972704G additionally - I don’t have the interior handle part-number)

Latch needs plug 1J0973115A (same part as the barn door plug)

Actuator / solenoid needs plug 1J0972923.


Changing the loom part number from MT to GP will provide a loom incorporating a rear heated screen with wash/wipe, child lock and interior handle:

Rear heated screen uses two spade connectors 000979204E.

Rear wiper motor needs plug 893971634.

Child lock uses plug 1J0973119 (same as the barn door brake light plug but coloured blue).

Looms HH, HK, HM, HP, HR, HT, KD, KF, MK, MP, ND and NM also exist but I don’t know what the differences will be.
 
Barn Door taillamps to Tailgate tail lamps

Nearside taillight to be rewired in to tailgate connector plug (part 1J0973733) as follows:

1 grey / blue with black stripe.​
2 fog - empty​
3 black with white stripe.​
4 Brown​
5 green with black stripe.​
6 black with red stripe​


Offside taillight to be rewired in to tailgate plug (part 1J0973733) as follows

1 black with red stripe​
2 grey with white stripe​
3 Brown​
4 black with green stripe*​
5 green with black stripe​
6 grey with red stripe*​


The asterisk indicates that I wrote down one thing but yet photographed a finished article as another. I don’t know. Trial and error it. Whats the worst that can happen.


It seemed that I could only find a VAG terminal removal tool (which looks like a miniature pitchfork) on eBay, so don’t waste your time in Halfords / ToolLine / ScrewFix / whathaveyou. Say goodbye to the feeling in your thumbs if you end up using a paperclip to free up the cables.
 
Awesome right up. I've mildly contemplated this mod so have saved for future juat in case. Top work.
 
@Ads_Essex great write up, I don’t suppose you know the coding changes? Or a scan before or after you swap?
 
What are you after @Adams i have lots of scans of vehicles ( mostly tailgates ) and will depend on spec etc
Are you doing a conversion ?
 
What are you after @Adams i have lots of scans of vehicles ( mostly tailgates ) and will depend on spec etc
Are you doing a conversion ?
It was regarding the BCM, I was under the impression a barn door tailgate BCM wouldn’t function properly in a tailgate (won’t control the lock), a mate tried my old barn door one in his tailgate and even with his coding the tailgate wouldn’t work.

I’m guessing it’s something deeper than coding, the BCM’s have different PR numbers for ordering

Maybe an EEPROM edit
 
The BCM outputs do not have defined functions so the pinouts are different between the vehicles
For example if you have LED headlights BCM pins 28 & 56 control the LEDs up front but if you have barn doors the the two cables that would be connected to these are doubled up (via a separation relay) and one of these terminals controls the deadlocking on the barn doors
I think the PR codes are BS, everytime i order a control module from VW i have to supply a VIN number to order against but the module always come blank (no coding, no WSC, no importer code), FWIW all T6s come with 090 BCMs (unlike T5.1s that had 87/88/89 etc and needed upgrading if you wanted to add a higher feature to a lower BCM) so i always thought any BCM had the capability of controlling any function, i imagine it just needs a cable running back to the BCM to get it working properly
 
Just reread your comment and realise i have the wrong end of the stick
Are we talking a T5.1 or T6 BCM ?
 
@Pauly sorry yes my bad for not making it clear (as this is a T6 forum!) it is indeed the T5.1 I’m talking about. When I ordered my 090 BCM it came blank also but I did order it with a PR code for barn doors. It’s not something I’ve ever looked into much, I just presumed they were different.
 
Following the great write up, I thought I’d add some of my thoughts.

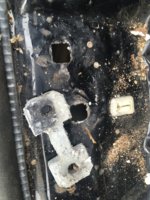
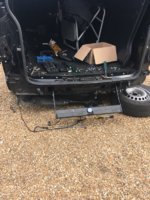
The lower barn door strikers can just be unbolted, the retaining plates are held in place with some spot welds which need breaking. Getting it back into the middle was a pain on my van. There is an access hole under the bumper neer the barn door strikers, but I had to remove my tow bar to get access.

Here's the striker retaining plate which used to be under the BIW.
910AE90B-ADD8-4EB4-B4BC-65210C4C2FFB.jpeg

Photo showing the access holes for the striker plate.
5E14AB1B-6FCA-469C-A80A-C1C60F7BA189.jpeg

I’ve not fixed my side trims under the lights yet so I’ll add a write up about them soon.

The tailgate loom is different to the barn doors and can’t be connected. Currently my door loom is not connected but it looks like I need to run an additional wire back to the BCM for the lock to work (another write up).

My tailgate has a wiper and heated window which is good. So I need to add the controls in the cab and run some wiring. If anyone has a wiring diagram of the wiper and window, please message me.

B6CFF313-E01B-45DC-8E65-0F71E09BA4E7.jpeg
 
Hi all,

I’m currently doing a tailgate conversion on my T6. I’m struggling to get the handle to work, can anyone give me any advice on which pin on the tailgate loom needs to be plugged into the BCM and where so I can code it?


Thanks, Lukas
 
Back
Top