You are using an out of date browser. It may not display this or other websites correctly.
You should upgrade or use an alternative browser.
You should upgrade or use an alternative browser.
Dellmassive`s Camper Van Adventure
- Thread starter Dellmassive
- Start date
@Bigsidavies might have a point here....I have these on the rear-already had something similar on the front before I heard of Nutexa.
I think they create a bit more dust than the previous oem pads, but work well. Not sure I’d notice much performance improvement from just the rears.
But the high carbon content does seem to affect their susceptibility to rust. I’ve had the van parked up for a couple of weeks in the wind and rain and the discs are still rust free. The black coating (which remains on the non-contact areas) also stops the edge and centre of the discs from rusting.
I’m impressed with the quality.
This is my VAN with Nutexa front setup.

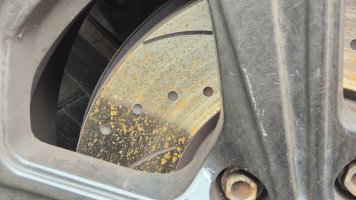
Verses the rears... Which are OEM.

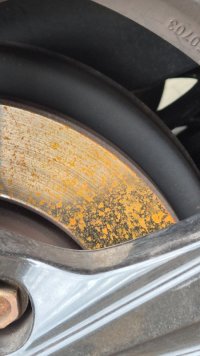
Defo more rust on the OEMs.
That's after two days parked up with a few showers in between.
Could just be coincidence.... But noticed it while walking past.
It reminded me of Simons comment.
.
Last edited:
are you at Appleby?
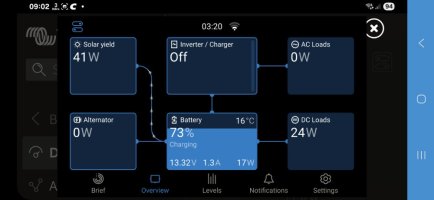
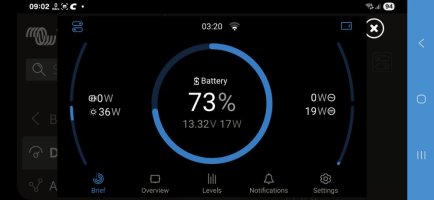
How big are you going?I've decided I want a new Solar panel on the van...... (Bigger than the 220w I have now)
Adding the second 230ah battery, will give 460ah. So I want more PV on the roof. (Plus the mobile panels I'll add in on the floor)
Whatch this space.
.
View attachment 288655View attachment 288656View attachment 288657
I bought a 270W photovoltaic Universe panel with rear gland / cable entry, am now thinking I don't want to cut such a big hole in the pop top so will look for one with top cable connections.
im going LARGE.How big are you going?
I bought a 270W photovoltaic Universe panel with rear gland / cable entry, am now thinking I don't want to cut such a big hole in the pop top so will look for one with top cable connections.
as big as i can go.
ill update here once weve had a measure up.
now fully ripped out and thrown in the recycling pile,
especially with that swollen lithium cell inside it.
especially with that swollen lithium cell inside it.
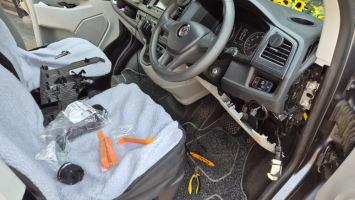
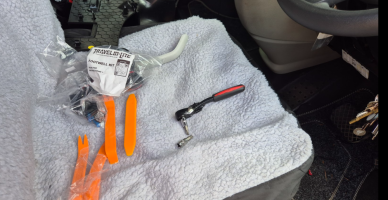
new AUTO Light switch fitted.
comes with a small light sensor attached to it, that I've fitted at the base of the A piller.
++++++++++++++++++++++++
Designed for T6's without auto headlight function. Very easy upgrade completeley plug and play. Once installed your headlights will automatically come on at dusk.


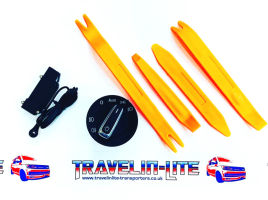
comes with a small light sensor attached to it, that I've fitted at the base of the A piller.
++++++++++++++++++++++++
Designed for T6's without auto headlight function. Very easy upgrade completeley plug and play. Once installed your headlights will automatically come on at dusk.
- Quality OEM type switch
- Module with light sensor
- Great quality & design
- Error free
- Plug & play design
- Free trim removal kit


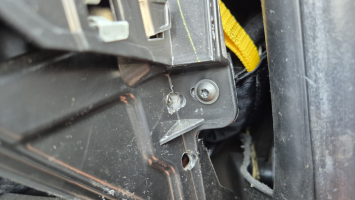
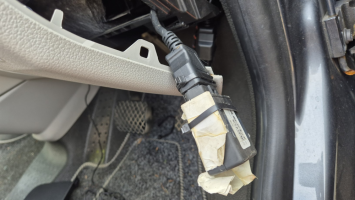
Is it one of those devices that would fry a thief's tool?Gota love an easter egg. . . .
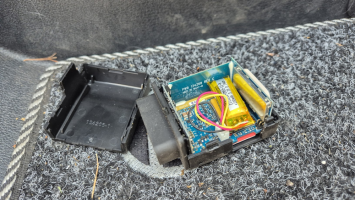
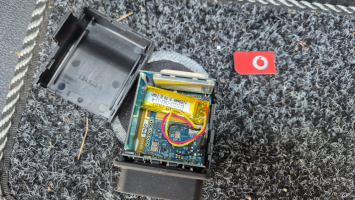
look at this little GEM i found under the dash. . . .
++++++
Ten T6Forum points if you can guess what it is
++++++
View attachment 288689View attachment 288690View attachment 288692View attachment 288693View attachment 288694View attachment 288695View attachment 288697View attachment 288698
nope.Is it one of those devices that would fry a thief's tool?
Ten Forum points to you Sir. . . .is that some kind of tracker / black box?!?
Nice little surprise for you if it was and good to get rid.
this van was once a courier/fleet van.
before its prior conversion from a panel van to a Kombi - before i had it.
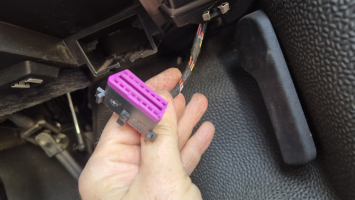
it was connected to the OBD2 port with a splitter cable,
had its own backup battery,
Vodafone SIM card with GPS etc.
looks like the company just left it in and sold the van onwards . . . .
not sure how long they kept tracking the van?
either way its ripped out now,
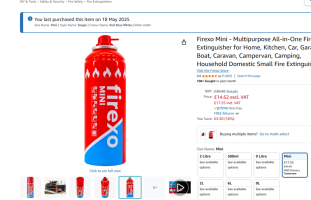
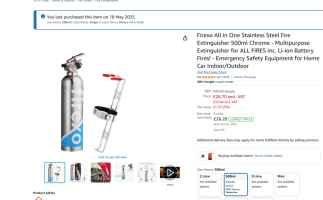
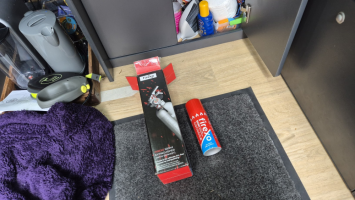
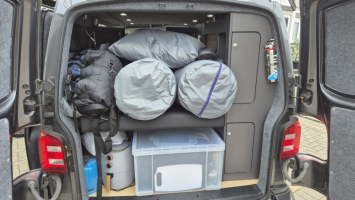
New Fire Extinguisher/s -- 7-IN-1
now including LITHIUM battery fires - thats awesome !!!
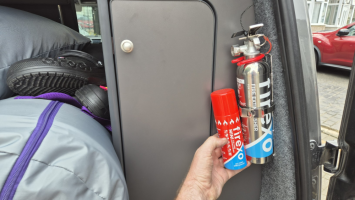
i got a tripple pack.
500ml bolted in van at the back.
a small 150ml can in the kitchen at home,
and a 150ml can in the vans kitchen area.
no more nasty powder extinguishers for me . . . .
+++++++++++
500ml - https://amzn.to/3H5dkl4
150ml - https://amzn.to/3H9UOIa

+++++++++++


++++++++++
chek em out . . .
.................................
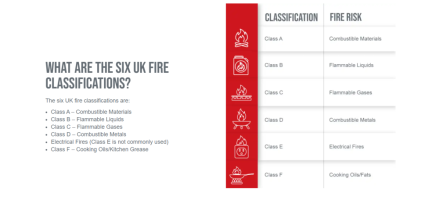
This class of fire is treated most commonly with water-based fire extinguishers but can be treated with foam, dry powder and wet chemical extinguishers as well.
As these liquids are all at high risk of quick and dangerous combustion, there are a lot of regulations surrounding the storage, transport and lifespan of them. Class B fires are very dangerous, as water becomes a conductor of fire in these cases, so ensuring that staff are trained on dealing with them is key.
The only extinguisher that can tackle Class C fires is a dry powder extinguisher, and as such, any commercial property that has flammable gases will need to be adequately prepared.
For example, aluminium cans are not often flammable, but small chips or shavings of raw aluminium can be.
To prevent a high risk, regular cleaning should be carried out in areas where combustible metal shavings could be found. And, if metal shavings are regularly used in an area, a Class D fire extinguisher (L2 or M28) must be provided.
Unlike other classes, electrical fires cover such a broad range that they are given their own category, which covers a multitude of occurrences. Electrical fires will often affect other classes, such as Class D combustible metals, or Class A combustible materials. As it is not the electricity catching fire but the materials around it, electrical fires can be incredibly dangerous.
To treat an electrical fire, you will need to first turn off the electricity access, before using a CO2 or dry powder extinguisher. To restore a fire caused by electrical faults, it’s important to use a professional fire restoration service, who can work safely and compliantly through the process.
The building proprietor of an HMO (House in Multiple Occupation) should provide fire blankets to tenants, but other building owners may choose to do this for rented properties.
And for those working in commercial kitchens, fire blankets and a wet chemical extinguisher are needed to ensure the safety of chefs and kitchen staff.
++++++

 www.restorations-uk.com
.
now including LITHIUM battery fires - thats awesome !!!
i got a tripple pack.
500ml bolted in van at the back.
a small 150ml can in the kitchen at home,
and a 150ml can in the vans kitchen area.
no more nasty powder extinguishers for me . . . .
+++++++++++
500ml - https://amzn.to/3H5dkl4
150ml - https://amzn.to/3H9UOIa


+++++++++++


++++++++++
chek em out . . .
.................................

Class A – Combustible Materials
A Class A fire is one that is starts from paper, cardboard or other flammable solids. It’s the most common type of fire people will prepare for, as it’s what makes up the majority of our buildings in the UK. A small paper fire to a house fire will often include a lot of Class A materials, as a Class A any combustible solid.This class of fire is treated most commonly with water-based fire extinguishers but can be treated with foam, dry powder and wet chemical extinguishers as well.
Class B – Flammable Liquids
Class B fires are those that come from flammable liquids, such as petrol and diesel, methanol, white spirit, etc.As these liquids are all at high risk of quick and dangerous combustion, there are a lot of regulations surrounding the storage, transport and lifespan of them. Class B fires are very dangerous, as water becomes a conductor of fire in these cases, so ensuring that staff are trained on dealing with them is key.
Class C – Flammable Gases
Much like flammable liquids, these are highly volatile compounds such as propane, butane methane, hydrogen and similar. While not something commercial premises come into contact with regularly, flammable gases need to be considered. Flammable gases can ignite very easily, so storage containers and shelving need to be kept safe.The only extinguisher that can tackle Class C fires is a dry powder extinguisher, and as such, any commercial property that has flammable gases will need to be adequately prepared.
Class D – Combustible Metals
As combustible metals are few and far between, and only really used in controlled environments, the risk to the general commercial office is lower. However, for those who come into contact with combustible metals such as magnesium, aluminium, titanium and potassium, it’s important to be aware of the risks.For example, aluminium cans are not often flammable, but small chips or shavings of raw aluminium can be.
To prevent a high risk, regular cleaning should be carried out in areas where combustible metal shavings could be found. And, if metal shavings are regularly used in an area, a Class D fire extinguisher (L2 or M28) must be provided.
Electrical Fires (Class E)
Electrical fires are one of the most common workplace fires, whether down to faulty leads, overloading a system, or by failures in old appliances. As a business owner, it’s important to be aware of the risks that electrical appliances hold and how you need to prevent any risks.Unlike other classes, electrical fires cover such a broad range that they are given their own category, which covers a multitude of occurrences. Electrical fires will often affect other classes, such as Class D combustible metals, or Class A combustible materials. As it is not the electricity catching fire but the materials around it, electrical fires can be incredibly dangerous.
To treat an electrical fire, you will need to first turn off the electricity access, before using a CO2 or dry powder extinguisher. To restore a fire caused by electrical faults, it’s important to use a professional fire restoration service, who can work safely and compliantly through the process.
Class F – Cooking Oils/Fats
Due to the high risk of oil fires, especially in commercial kitchens, it is designated as its own class. As fires from oil, especially when working on gas stoves, can easily happen, being prepared for this is essential.The building proprietor of an HMO (House in Multiple Occupation) should provide fire blankets to tenants, but other building owners may choose to do this for rented properties.
And for those working in commercial kitchens, fire blankets and a wet chemical extinguisher are needed to ensure the safety of chefs and kitchen staff.
++++++

A Guide to Fire Classification & Classes | Restorations [UK]
Learn about the different classes of fire and how they are classified with our useful guide today. Including electrical fires and Classes A-F. Read the blog today.
.
I had something similar fitted into my van and didn't know it was there until I had my tracker fitted. Old one removed and binned.Ten Forum points to you Sir. . . .
this van was once a courier/fleet van.
before its prior conversion from a panel van to a Kombi - before i had it.
it was connected to the OBD2 port with a splitter cable,
had its own backup battery,
Vodafone SIM card with GPS etc.
looks like the company just left it in and sold the van onwards . . . .
not sure how long they kept tracking the van?
either way its ripped out now,
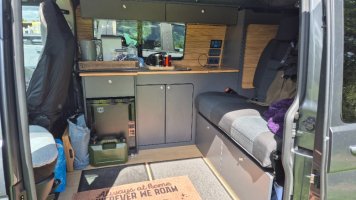
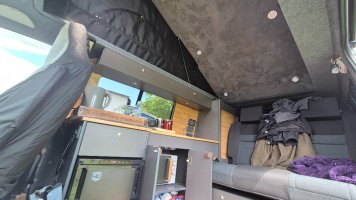
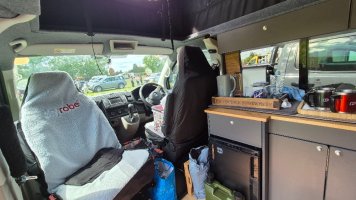
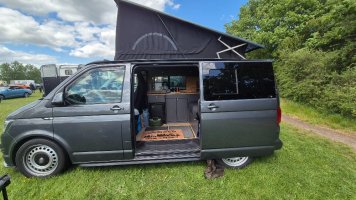
Following on from this. . . .Some more pics....
Trying to get a rough idea on layout.
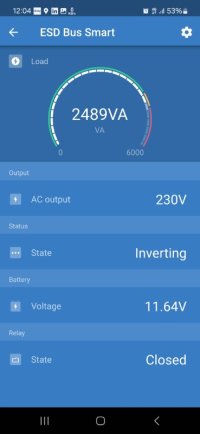
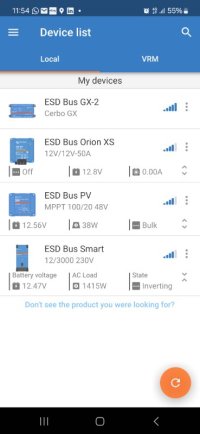
And more to the point, where to put the water bottles and 3kva inverter.
.
View attachment 283282View attachment 283283View attachment 283284View attachment 283285View attachment 283286View attachment 283287View attachment 283288View attachment 283289View attachment 283290View attachment 283291View attachment 283292
The Kitchen Install. . .
it was a mad rush get the kitchen and RIB bed installed within 48hrs, as we were booked on the EuroTunel for our first Europe trip.
it was nuts !!!!
so we had the kitchen and RIB bed at home, it was time to start fitting it.
Day #01 - the Kitchen.
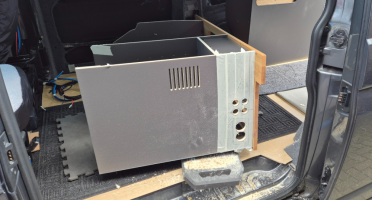
id had the 1st fix cables in roughly the right areas, and we had paid to have the kitchen pre assembled, so it was a case on lifting it in.
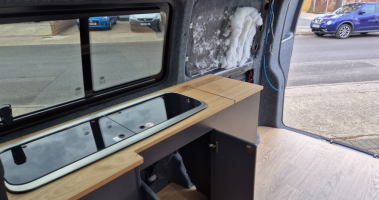
the scribing was very good and matched the rear D pillar perfectly.
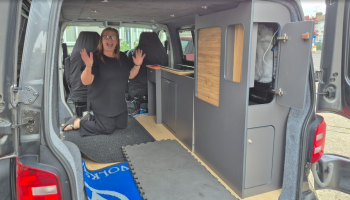
sliding in the splashback we had an idea of what it would look like.

with the rough layout the inverter had just enough space to fit in the lower rear cupboard, with a 2mm gap below the shelf.
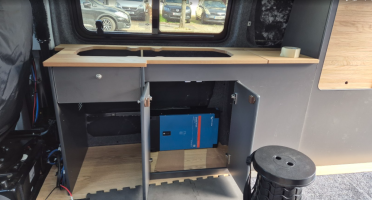
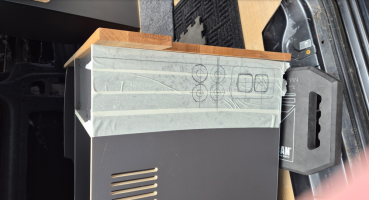
we had decided that we didn't want to spoil the oak worktop look with loads of plugs and switches. . . so done our best to hide them away.
we wanted a double mains plug on the side,
and wanted a 12v switch for the fridge and water pump. . . . . .
because they would be hidden by the drivers seat i decided to add a couple more switches for a later date.
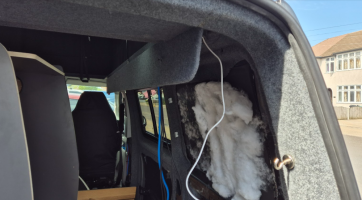
the cables for the splashback went from the seat base, up the B pilar, along the roof area to the rear wardrobe.
luckily i had an extra pair of hands or two to help. . .
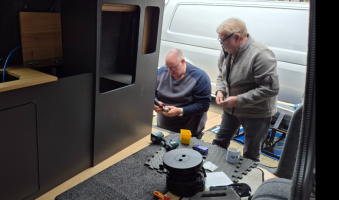
kitchen now 1st fixed and bolted down.
it was time to look at the RIB bed.
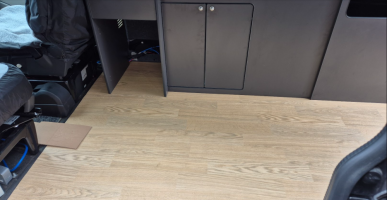
.
Following on from this. . . .
The Kitchen Install. . .
it was a mad rush get the kitchen and RIB bed installed within 48hrs, as we were booked on the EuroTunel for our first Europe trip.
it was nuts !!!!
so we had the kitchen and RIB bed at home, it was time to start fitting it.
Day #01 - the Kitchen.
id had the 1st fix cables in roughly the right areas, and we had paid to have the kitchen pre assembled, so it was a case on lifting it in.
View attachment 288750
the scribing was very good and matched the rear D pillar perfectly.
View attachment 288751
sliding in the splashback we had an idea of what it would look like.
View attachment 288752
with the rough layout the inverter had just enough space to fit in the lower rear cupboard, with a 2mm gap below the shelf.
View attachment 288753
we had decided that we didn't want to spoil the oak worktop look with loads of plugs and switches. . . so done our best to hide them away.
we wanted a double mains plug on the side,
and wanted a 12v switch for the fridge and water pump. . . . . .
because they would be hidden by the drivers seat i decided to add a couple more switches for a later date.
View attachment 288754
View attachment 288755
the cables for the splashback went from the seat base, up the B pilar, along the roof area to the rear wardrobe.
View attachment 288756
luckily i had an extra pair of hands or two to help. . .
View attachment 288757
kitchen now 1st fixed and bolted down.
it was time to look at the RIB bed.
View attachment 288758
.
Day #01 - the RIB 112 Altair Bed.
i decided to get the KIRAVANS RIB fixing kit.
we got the bed in, and was going to druill down.

but decided to drill up, as the RIB kit had two pre drilled pilot holes.
so drilled up first.

well long story short. . . it didnt line up.
so needed some major fettling.
...
there was a few heated words spoken that day.
but we made it fit.
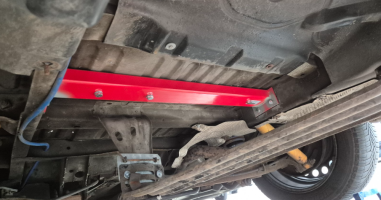
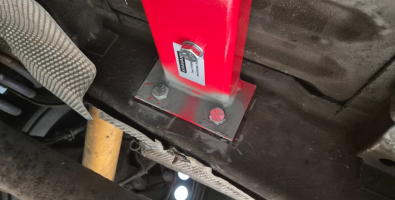
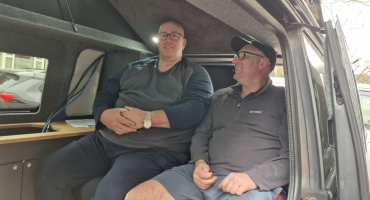
it seems the RIB bed was a bit tall for my mate Del, whos 6ft6. - he suggested cutting a hole in the roof and fitting a bubble so he could site in the back.
his other solution to traveling in the back..
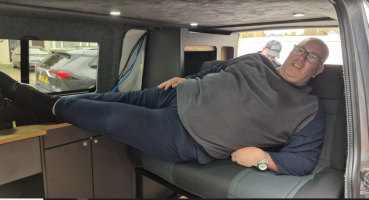
jeeze. . . .
.
....
Similar threads
- Replies
- 20
- Views
- 1K
- Replies
- 13
- Views
- 697

