Evo Designs light shelve areas

Kedlestone

Member
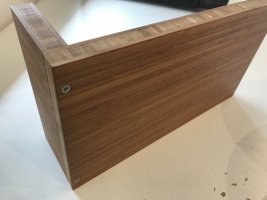
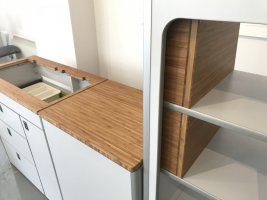
Having built and fitted my Evo designs kitchen and wardrobe finally I’m wondering what the function of the optional ‘light pockets’ dividers are. They are made from the same material as the work top and table but once in the light shelve area they just move about freely with no mention of securing them to anything in the “instructions”.

Has anyone else secured theirs or know what I’m meant to be doing with them?

Thanks.
 
Mine fitted in really tight so probably wouldn't have moved but I did also secure them with some corner pieces like used on the rest of the units. I put them up the top on the tambour door side so they were out of sight
 
Mine fitted in really tight so probably wouldn't have moved but I did also secure them with some corner pieces like used on the rest of the units. I put them up the top on the tambour door side so they were out of sight
Thanks for that. Mine are pretty tight also, more likely to only move if they get knocked, but wanted to secure them somehow also. I’ve got plenty of those joining blocks left so I’ll dig some out.
 
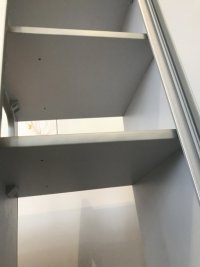
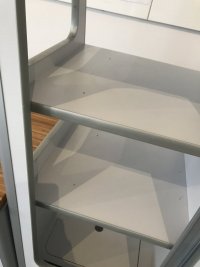
I made mine yesterday, there were holes underneath the cupboard shelves so you can drill up into the edge of the ‘L’ (if you imagine the recessed shelves are L shapes on their sides). The holes were not drilled right the way through so you would need to do that.

I’ll take some pics later to help explain.

If I could start again I’d skip these recessed shelves, I don’t like seeing the edges through the tambour doors, and the amount of cupboard space they eat into.
Thanks, very helpful. Yeah I’m not sure I’d order them again from a aesthetic point of view.
 
Here you go. I’ll number each photo in the hope they get uploaded in order :)

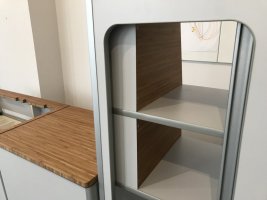
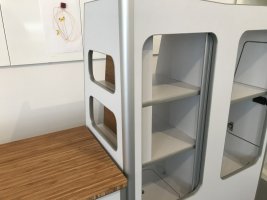
1-2. The photos show the pre-drilled holes underneath the shelves. I drilled through these as you can see in the second picture.

3. The ‘stem’ of the L had pre drilled holes as well.

4. Not sure I’m loving the view through the tambour door.

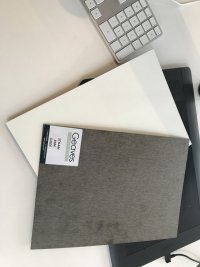
5. Samples I received for the laminate.

6-7. Cut down samples and held up against the edges of the shelves. Not glued down yet as still undecided.

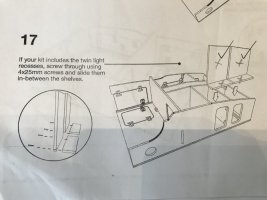
8. Minimal instructions I received as part of my kit.

76B490E8-E832-420A-A964-5DF0F8B97E6C.jpeg

FDE15386-9374-4908-BD0E-9175C6D82CA9.jpeg

3AD68F65-7538-42FC-9883-F48A73082A58.jpeg

259077F6-5FE4-468B-AB30-923D2666CCD4.jpeg

0AC2A168-5152-4B36-A11E-578B93F62348.jpeg

7FC520CC-5945-4B8A-8444-E1389EA46C55.jpeg

FF695A7E-A810-40AC-A875-9ECEE6CEFC4E.jpeg

8BB0A746-8D4A-43B0-B3D8-044EF9FDD075.jpeg
 
Also just to add, this tiny issue isn’t a deal breaker for me, the build quality is superb, I’m really impressed with the cut and finish, plus everything is MM precise. I’ve loved building it too. Very rewarding project.
 
Looks like my kit lol, gloss white, bamboo and sliver trim.

So my shelves didn’t come pre-drilled for the bamboo inserts, not a big issue, does at least explain how you fix them down.

Thanks
 
Not yet but will do. Have some clear coat treatment left from doing our house interior doors which I’m going to see if it’s suitable for. How about yours?
 
Good stuff. I used Osmo Wood Wax Finish. Went on nicely and brought out the wood beautifully. Good luck.
 
Back
Top