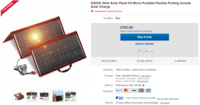
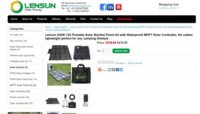
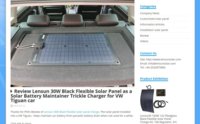
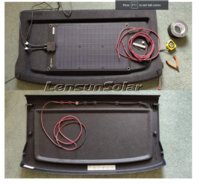
Mobile Solar Panels ? . . . - How I Did It -
There is loads of background to this . . . . . but for now here is a vid for you all. =]
Just remember W = V*A and as a general rule a good 100W panel will give you up to 6A charge with good sun.
25w = 1.5A
50W = 3A
100w = 6A
200w = 12A
300w = 18A
So if you're looking to trickle charge your starter battery then a smaller panel would be sufficient.
But if you are running kit/load from your battery then its a good idea get a setup that can supply all the load, plus a bit more to keep the battery charged.
So if your loads are 50W or 3Ah, then i would get the next size kit up. . . . 100W/6Ah
In the Tent camping example below, i was drawing up to 100w/6Amps from the battery . . . . . so i went for the next kit up that could deliver 200w/12Ah. That way the battery had a good chance of recharging during the day while the loads were running.
What actually happens is that the loads draw power from the panels and any extra the panels are providing goes into the battery...... it all depends on the voltage levels as to where the current is drawn from..... Its the solar chargers job to detect the battery voltage level and then switch the charging output on and charge it up.
As a reference the static 12v battery charged would be 12.6v
under load the same charged battery would drop to 12.2v
The solar controller would try to charge (Bulk) up to 13.6V
the solar controller will the cycle "Bulk/Absorb/Float" as required.
That means that even when the battery is under load @ 12.2V the chargers output @ 13.6v has enough potential/pressure to push a charge into the battery......(we now need to look into the current flow and internal resistance of the system..... but thats not for today)
Roof panel is nice fit and forget solution that will help you out 24/7 and keep power in the batteries. (though fit vinyl wrap first and sikaflex to that) you can then always add extra mobile panels as/when you need them . . . ie camping.
******************
These mobile solutions are great, but they are all MOBILE solutions meaning that you have to set up and put away every time you want to use/move the van.
so its great to have a temp dash solar . . . . but have to put it away.
its great to have a temp roof solar . . . . but have to put it away.
its great to have a temp floor solar . . . . but have to put it away.
all this will cause wear and tear on the panels, kit and socketrs etc . . . . . . . possible failures in the future?
******************
So if its long term solar you need/want - get a panel fitted on the roof.
if its fit-and-forget you want - get a panel fitted on the roof.
if you want to add more power just get a mobile panel and add it to you roof setup . . .
if you dont want to stick or cut your roof - get a mobile panel.
if you cant get cables to a controller due to conversion - get a mobile panel.
if you just want solar for camping or the odd trip -get a mobile panel.
***********************
for any fitting method, 50w - 300w is best power range. (3A - 18A charge rate) with 200W up (12A) or above, being the best power user choice
100w - 200w (6A - 12A) being the best all rounder to run loads and keep a battery topped up
50w (3a) being best for small loads and a battery maintainer
below 50W is only battery maintainer.
*********************************
Here are some sources:
12V solar panels charging kits for caravans, motorhomes, boats, yachts, marine
Solar Power Panels For Sale - ACOPower.com
Foldable solar kit
Lensun 100W 12V ETFE Flexible Folding Solar Panel Kit, Including 10A Solar Controller, 5m cables, Portable Foldable for RVs, Campers, 4WD, Outdoor Off Grid Charge
Solar Panels - Renogy Solar
Amazon.co.uk: 100w Foldable Solar Charger
100w Foldable Solar Charger | eBay
12V solar panels charging kits for caravans, motorhomes, boats, yachts, marine
.
SHOW US YOUR PANEL - If you have a mobile solar setup, share it with us all below.
more info:
***************************************************************************************************************************
EDIT#:
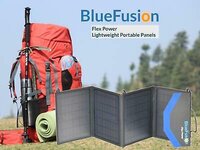
I Just found a Nice 50W & 100W foldup Solar kit (with Mono SolarWorld Cells)
50W, 100w, 120W Kit . . . .
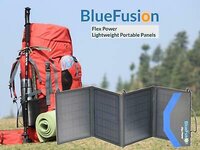
BlueFusion Portable Folding Solar Panel Charger 50W, 100W, 120W | eBay
Flex Power 50W, 100W, 120W. Peak Power (Pmax): 50W 100W 120W. Premium Solar Panels and Accessory for Leisure and Marine Applications. Lightweight and Portable. Panel Model: MD1199/50W MD1199/100W MD1199/120W.
rover.ebay.com


Premium Solar Panels and Accessory for Leisure and Marine Applications
BlueFusion Portable Folding Solar Panel Charger 50W, 100W, 120W

Off Grid Applications
Flex Power 50W, 100W, 120W
Portable Folding Solar Panel with Integrated Charge Controller
Panel Specification
Linear Power Warranty***
********************************
lets see the panels i have to test: . . . . .
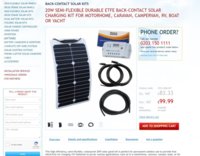
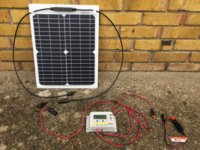
20w kit wish cack - x2 (40w) - 20W Solar | Wish
50w accopower foldable kit - Portable Solar Panels, Portable Fridge, Solar Freezer, Solar Generator
100w renogy frame suitcase kit. - Solar Power Kits & Equipment for Sale | Renogy
100w renogy flexable suitcase kit. - Solar Power Kits & Equipment for Sale | Renogy
160w renogy flexable panel. - Solar Power Kits & Equipment for Sale | Renogy
150W Photonic univers panel semi-flex - x2 (300w) - 12V solar panels charging kits for caravans, motorhomes, boats, yachts, marine
110w Lensun flexable panel. - x2 (220w) - Flexible solar panel
160w Photonic univers semi-flex panel - 12V solar panels charging kits for caravans, motorhomes, boats, yachts, marine
200w Lenusun fold kit. - Flexible solar panel
50w BlueFusion foldable kit *NEW*
120W BlueFusion foldable kit *NEW*
so thats effectively @ 1500W total . . . NICE =]
****************************************
Basics:
*****************
its assumed that ALL panels are same make/model/size.
different makes/models/sizes will effect results
****************
Series combining of solar panels:
you add up all the VOC voltages on the string . . . But the ISC current will stay the same as ONE panel

******************
Parallel combining of solar panels:
You add up all the ISC currents, but the Voltage VOC stays the same as ONE panel.


*****************

******************
BUT LOOK WHAT HAPPENS WHEN YOU USE DIS-SIMILAR PANELS . . . (IE DOWN RATING)
EG:

*********************
you can also series/parallel panels together like this:
to achieve a certain VOC or ISC . . .

*********************
Here's a Victron slide:

**********************************************************************************************************************************
EDIT March 2021 : New DOKIO Kits available.
These versions available now in 2021 : Working out about £1 per Watt, so start off with a kit like this . . Then look at upgrading the solar controller at a later date,
for example to a Victron MPPT 57/15 (or other) : Victron Energy MPPT 75|15
80w - DOKIO 80W
100w - DOKIO 100W
150w - DOKIO 150W
200w - DOKIO 200w
300w - DOKIO 300w
***
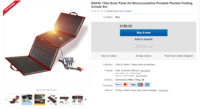
DOKIO 100W 12V Foldable Solar Panel Kit Monocrystalline with Solar Controller USB Output For Caravan RV Boat Camper Any Other Irregular Surface
NOTE: ALL BATTERY CONECTIONS MUST BE FUSED !
- So you will need to fit a inline fuse to the RED battery clamp / feed -
EDIT 2021 : - The RED battery connection MUST be FUSED - (all battery connections must be fused.)
you will need to add an inline 5/10/20A fuse to the RED battery connection !
Also be warned that the PWM controller has battery voltage at the SAE PV connection !!
DOKIO 100W 12V Foldable Solar Panel Kit Monocrystalline with Solar Controller USB Output For Caravan RV Boat Camper Any Other Irregular Surface: Amazon.co.uk: Business, Industry & Science

+
+++++++++++
if you are going to stick a panel to the roof then its a good idea to vinyl wrap that section of roof first . .
the stick, bond, velco et c etc to that . . .
that will save a you world of grief when you need to remove it !!!

 www.t6forum.com
View attachment 128626
+++++++++++
HOW TO FIT A SOLAR PANEL TO A ROOF. . . . .
copy of above attached to this thread.
quote from the guide:
The mounting surface for the solar panel should be smooth and even. If the surface is uneven, it is recommended to prepare it prior to the installation by filling in the gaps. For example, spaces between ridges on a vehicle roof can be filled in as the photos below show – this will make mounting easier and quality of bond better. When the gaps are filled in, a greater support surface area for the solar panel will reduce mechanical stress and improve solar panel longevity.

In case of bonding the solar panel, always ensure that your chosen adhesive forms a good bond with the substrate surface and the plastic back sheet of the solar panel. Before applying any adhesive to the underside of the solar panel, place the panel gently on a non-abrasive flat surface which will not cause any damage to the front side of the solar panel (e.g. its original carton box or foam packaging). Keep the solar panel as straight as possible whilst doing this (handle the solar panel like a sheet of plywood).

Note: take into account the rebounding straightening force of the solar panel. When mounting the solar panel on a curved surface, the panel must be fixed in a curved position
until the adhesive gets dry and forms a strong bond between the solar panel and the substrate surface.
Gluing with double-sided tape In general, gluing with double-sided tape is not recommended on curved surfaces because of the rebounding straightening force of the solar panel.
If bonding with tape is required, it is best to use an industrial grade porous (“foam”) tape for this application. Applying the tape across the entirety of the underside of the solar panel will improve the bond quality. When gluing with double-sided tape:
Apply the tape onto the solar panel first, by “unrolling” it on the solar panel. Use a soft cloth or a roller to gently apply pressure onto the tape (protective film side)to dispel all air from between the tape and the solar panel. Take care not to force the solar panel to bend underneath.• If the length / width of the tape exceeds the solar panel, cut the tape carefully around the edges of the solar panel.• Remove the protective film and stick the solar panel down on a clean and dry surface, keeping the solar panel as straight as possible up. While sticking it down, gently apply pressure on the solar panel with a soft cloth or a roller to ensure that no air is trapped underneath the solar panel (2 people are recommended for the installation).• Observe the required application temperature for the double-sided tape and the time for the glue to dry. Warning! Double-sided adhesive tape forms a very strong immediate bond with the contact material and does not allow for repositioning. Attempting to remove the solar panel, even if only partially attached, can seriously damage the solar cells.
Gluing with adhesive Your chosen adhesive should be suitable for both the solar panel and the mounting surface. It should also be designed for outdoor applications (with a wide temperature range, UV light protection etc). Pay attention to the application temperature and drying time requirements. The mounting surface must be even, clean (use a degreasing agent) and dry. The installation must be carried out with care and precision, as this permanent method does not allow for repositioning. Warning! Although preparing the roof surface for better adhesion is permitted (e.g. by removing the old paint, grinding, using a primer etc), you must not use any sand paper or other sharp or abrasive tools on the underside of the solar panel. There are two main options for application of the adhesive:1) Apply the adhesive to the underside of the solar panel in parallel beads broken in the middle of the solar panel. Depending on the application the edges of the solar panel can be sealed all the way round with the same adhesive at the end
of the installation.2) Cover the entire underside of the solar panel with a layer of adhesive, spreading it evenly with a trowel or a similar tool. The first option is recommended for smooth and even surfaces. If the surfaces are uneven (for example, roof ridges on a campervan) a larger contact area is recommended for adhesive and the second application option will be the best. For the default first application option, apply thick 10-12mm adhesive beads on the rear of the solar panel, in parallel to each other, as shown in the diagram and the photo below:

Break the adhesive lines in the middle of the solar panel with a gap of 70-100 mm. This will even the pressure and allow for additional escape routes for air and water if the edges of the solar panel are not sealed at the end of the installation.

The adhesive lines can be as close to each other as required (the number of lines depends on the strength your chosen adhesive), but a minimum gap of at least 70 mm between lines is recommended. In general, for most plastic / fibreglass / metal surfaces
and a good quality adhesive, a gap of 100 - 150 mm between parallel adhesive beads would form a strong bond. To adhere the glued solar panel to the mounting surface:• It is recommended to use two people, particularly for large solar panels.• Minimise bending of the solar panel when attaching it to the surface, keeping it as straight as possible.• When pressing down the solar panel to the mounting surface, we recommend using a cotton cloth or a hand-roller to evenly distribute the compacting pressure.• If not using a cloth or roller, use a flat hand to distribute the pressure (no point load) and press the solar panel gently in a wiping motion.
Important! For difficult shaped / curved surfaces where a rebounding motion of the solar panel is likely, use other means to secure the solar panel in place while the adhesive dries. This may involve using weights (distributed evenly across the solar panel) or strong industrial tape. If you decide to use tape, ensure that no residual glue is left on the solar panel surface after you remove the tape. If multiple solar panels are mounted on the same surface, or if the edges of the solar panel are close to other objects (such as a roof skylight), leave a gap between the solar panels (or between the solar panel and nearby objects) of at least 2mm to compensate for the linear expansion of material under different temperatures. Important! If mounting a solar panel on a non-horizontal façade or a difficult mounting surface (e.g. glass, wood, concrete, brick, canvas etc.) the instructions provided above are not applicable. Please seek special guidance for installations of this nature.
#
#
Fitting a solar panel with a rear junction box If your solar panel features a junction box on the underside (BJB, JBB and similar subseries), we do not recommend using a double-sided adhesive tape to mount it, especially on uneven surfaces with irregularities. This is because it will be harder to ensure that the cable entry hole (junction box recess) under the solar panel is fully waterproof. Please use a suitable adhesive instead. To fit a solar panel with a rear junction box:
• Most rear junction box solar panels come with a round junction box. Drill a round, appropriately sized hole in the mounting surface (typically 30 mm) so that the rear junction box fits in it well.
• Place the solar panel on a soft, non-abrasive surface with the rear side facing upwards, and apply the adhesive in beads as described above.
• Apply a thick adhesive ring (at least 12mm line diameter) around the junction box to form a closed seal around it, and bond the solar panel to the surface.
• Two people are recommended to perform this installation. Important! When positioning the cable coming from the rear junction box solar panel underneath the mounting surface, ensure that this cable is firmly fixed to this mounting surface from underneath with frequent fixing points, to avoid any slack, movement, gravity or any other force pulling the cable down or mechanically affecting itin any other way. This is especially important when mounting the solar panels on vehicles, boats, or any other applications which are prone to vibration. If the cable is left to hang without sufficient fixing points, it might cause regular movement of the cable around the junction box area and will ultimately break soldering joints in the junction box, reducing or stopping the energy output.
#
+++++++++++
.
There is loads of background to this . . . . . but for now here is a vid for you all. =]
25w = 1.5A
50W = 3A
100w = 6A
200w = 12A
300w = 18A
So if you're looking to trickle charge your starter battery then a smaller panel would be sufficient.
But if you are running kit/load from your battery then its a good idea get a setup that can supply all the load, plus a bit more to keep the battery charged.
So if your loads are 50W or 3Ah, then i would get the next size kit up. . . . 100W/6Ah
In the Tent camping example below, i was drawing up to 100w/6Amps from the battery . . . . . so i went for the next kit up that could deliver 200w/12Ah. That way the battery had a good chance of recharging during the day while the loads were running.
What actually happens is that the loads draw power from the panels and any extra the panels are providing goes into the battery...... it all depends on the voltage levels as to where the current is drawn from..... Its the solar chargers job to detect the battery voltage level and then switch the charging output on and charge it up.
As a reference the static 12v battery charged would be 12.6v
under load the same charged battery would drop to 12.2v
The solar controller would try to charge (Bulk) up to 13.6V
the solar controller will the cycle "Bulk/Absorb/Float" as required.
That means that even when the battery is under load @ 12.2V the chargers output @ 13.6v has enough potential/pressure to push a charge into the battery......(we now need to look into the current flow and internal resistance of the system..... but thats not for today)
Roof panel is nice fit and forget solution that will help you out 24/7 and keep power in the batteries. (though fit vinyl wrap first and sikaflex to that) you can then always add extra mobile panels as/when you need them . . . ie camping.
******************
These mobile solutions are great, but they are all MOBILE solutions meaning that you have to set up and put away every time you want to use/move the van.
so its great to have a temp dash solar . . . . but have to put it away.
its great to have a temp roof solar . . . . but have to put it away.
its great to have a temp floor solar . . . . but have to put it away.
all this will cause wear and tear on the panels, kit and socketrs etc . . . . . . . possible failures in the future?
******************
So if its long term solar you need/want - get a panel fitted on the roof.
if its fit-and-forget you want - get a panel fitted on the roof.
if you want to add more power just get a mobile panel and add it to you roof setup . . .
if you dont want to stick or cut your roof - get a mobile panel.
if you cant get cables to a controller due to conversion - get a mobile panel.
if you just want solar for camping or the odd trip -get a mobile panel.
***********************
for any fitting method, 50w - 300w is best power range. (3A - 18A charge rate) with 200W up (12A) or above, being the best power user choice
100w - 200w (6A - 12A) being the best all rounder to run loads and keep a battery topped up
50w (3a) being best for small loads and a battery maintainer
below 50W is only battery maintainer.
*********************************
Here are some sources:
12V solar panels charging kits for caravans, motorhomes, boats, yachts, marine
Solar Power Panels For Sale - ACOPower.com
Foldable solar kit
Lensun 100W 12V ETFE Flexible Folding Solar Panel Kit, Including 10A Solar Controller, 5m cables, Portable Foldable for RVs, Campers, 4WD, Outdoor Off Grid Charge
Solar Panels - Renogy Solar
Amazon.co.uk: 100w Foldable Solar Charger
100w Foldable Solar Charger | eBay
12V solar panels charging kits for caravans, motorhomes, boats, yachts, marine
.
SHOW US YOUR PANEL - If you have a mobile solar setup, share it with us all below.
more info:
***************************************************************************************************************************
EDIT#:
I Just found a Nice 50W & 100W foldup Solar kit (with Mono SolarWorld Cells)
50W, 100w, 120W Kit . . . .

BlueFusion Portable Folding Solar Panel Charger 50W, 100W, 120W | eBay
Flex Power 50W, 100W, 120W. Peak Power (Pmax): 50W 100W 120W. Premium Solar Panels and Accessory for Leisure and Marine Applications. Lightweight and Portable. Panel Model: MD1199/50W MD1199/100W MD1199/120W.
rover.ebay.com
Premium Solar Panels and Accessory for Leisure and Marine Applications
BlueFusion Portable Folding Solar Panel Charger 50W, 100W, 120W
Off Grid Applications
Flex Power 50W, 100W, 120W
- Manufactured from High Efficiency Monocrystalline cells by SolarWorld GmbH, Germany.
- 25 Year Power Output Warranty***
- A quality product, designed to be portable and withstand outdoor environments.
- Charge mobile devices and batteries on the go.
- Off-grid charging of batteries for Caravans & RV, Camping and Hiking Equipment, Electric Outboard Trolling Motor, and Residential use.
Inbuilt Charge Controller
Portable Folding Solar Panel with Integrated Charge Controller
- Integrated Charge Controller, concealed inside the panel.
- USB and Battery Charger outputs.
- Charge Phones and Devices from USB socket, 5V, 1.2 Amp.
- Charge 12V or 24V Battery. 2m Battery cable, fused and alligator clamps.
- Excellent low light capabilities.
- High conversion efficiency.
| Electrical Specification: | |||
| Panel Model: | MD1199/50W | MD1199/100W | MD1199/120W |
| Peak Power (Pmax): | 50W | 100W | 120W |
| USB Charger Socket (max): | 5V, 1.2A | ||
| Battery voltage (V) *: | 12V / 24V (Auto Detect) | ||
| Discharge Current Rated(Amp): | 10A | ||
| Output power Tolerance: | ±3% | ||
| Power Temperature Coefficient **: | -0.39%/°C | ||
| Operating Temperature(°C): | -35 to +55 | ||
| Panel Output, Voc (V)/ Imp(A): | 21.3V / 2.8A | 21.3V / 5.62A | 21.3V / 6.67A |
| * Compatible with Sealed, Gel, and Flooded Batteries. Battery connection required to operate controller. Battery not included. ** Based on standard testing conditions. |
| Specification: | |||
| Cells: | Monocrystalline silicon solar cell manufactured by SolarWorld GmbH | ||
| Controller | Integrated Charge Controller concealed in zipped pouch. | ||
| Included Cable: | 2m battery cable with integrated fuse and alligator clips | ||
| Folded Case dimension (cm), L x W x D | 36 x 30 x 5 cm | 36 x 30 x 7.5 cm | 54 x 54 x 5 cm |
| Unfolded Panel dimension (cm), L X W | 118 x 36 cm | 118 x 72 cm | 180 x 54 cm |
| Weight (kg) | 2.4 kg | 3.9 kg | 5.2 kg |
| Note: | Specification subject to change, manufacturing tolerance and product improvement. Can withstand some drizzle, protect from substantial rain. |
- 25 Year, 80% power output warranty
- 1 Year limited product warranty
********************************
lets see the panels i have to test: . . . . .
20w kit wish cack - x2 (40w) - 20W Solar | Wish
50w accopower foldable kit - Portable Solar Panels, Portable Fridge, Solar Freezer, Solar Generator
100w renogy frame suitcase kit. - Solar Power Kits & Equipment for Sale | Renogy
100w renogy flexable suitcase kit. - Solar Power Kits & Equipment for Sale | Renogy
160w renogy flexable panel. - Solar Power Kits & Equipment for Sale | Renogy
150W Photonic univers panel semi-flex - x2 (300w) - 12V solar panels charging kits for caravans, motorhomes, boats, yachts, marine
110w Lensun flexable panel. - x2 (220w) - Flexible solar panel
160w Photonic univers semi-flex panel - 12V solar panels charging kits for caravans, motorhomes, boats, yachts, marine
200w Lenusun fold kit. - Flexible solar panel
50w BlueFusion foldable kit *NEW*
120W BlueFusion foldable kit *NEW*
so thats effectively @ 1500W total . . . NICE =]
****************************************
Basics:
*****************
its assumed that ALL panels are same make/model/size.
different makes/models/sizes will effect results
****************
Series combining of solar panels:
you add up all the VOC voltages on the string . . . But the ISC current will stay the same as ONE panel
******************
Parallel combining of solar panels:
You add up all the ISC currents, but the Voltage VOC stays the same as ONE panel.
*****************
******************
BUT LOOK WHAT HAPPENS WHEN YOU USE DIS-SIMILAR PANELS . . . (IE DOWN RATING)
EG:
*********************
you can also series/parallel panels together like this:
to achieve a certain VOC or ISC . . .
*********************
Here's a Victron slide:
**********************************************************************************************************************************
EDIT March 2021 : New DOKIO Kits available.
These versions available now in 2021 : Working out about £1 per Watt, so start off with a kit like this . . Then look at upgrading the solar controller at a later date,
for example to a Victron MPPT 57/15 (or other) : Victron Energy MPPT 75|15
80w - DOKIO 80W
100w - DOKIO 100W
150w - DOKIO 150W
200w - DOKIO 200w
300w - DOKIO 300w
***
DOKIO 100W 12V Foldable Solar Panel Kit Monocrystalline with Solar Controller USB Output For Caravan RV Boat Camper Any Other Irregular Surface
NOTE: ALL BATTERY CONECTIONS MUST BE FUSED !
- So you will need to fit a inline fuse to the RED battery clamp / feed -
EDIT 2021 : - The RED battery connection MUST be FUSED - (all battery connections must be fused.)
you will need to add an inline 5/10/20A fuse to the RED battery connection !
Also be warned that the PWM controller has battery voltage at the SAE PV connection !!
DOKIO 100W 12V Foldable Solar Panel Kit Monocrystalline with Solar Controller USB Output For Caravan RV Boat Camper Any Other Irregular Surface: Amazon.co.uk: Business, Industry & Science

+
+++++++++++
Roof wrap for solar panel- whole roof or panel coverage?
if you are going to stick a panel to the roof then its a good idea to vinyl wrap that section of roof first . .
the stick, bond, velco et c etc to that . . .
that will save a you world of grief when you need to remove it !!!

Roof wrap for solar panel- whole roof or panel coverage?
Hi All, I'm going to fit a flexi solar panel in the next few weeks. For those in the know, will an oversize panel of wrap on the roof hold down a glued panel or would I need to have the whole roof wrapped?
View attachment 128626
+++++++++++
HOW TO FIT A SOLAR PANEL TO A ROOF. . . . .
copy of above attached to this thread.
quote from the guide:
The mounting surface for the solar panel should be smooth and even. If the surface is uneven, it is recommended to prepare it prior to the installation by filling in the gaps. For example, spaces between ridges on a vehicle roof can be filled in as the photos below show – this will make mounting easier and quality of bond better. When the gaps are filled in, a greater support surface area for the solar panel will reduce mechanical stress and improve solar panel longevity.

In case of bonding the solar panel, always ensure that your chosen adhesive forms a good bond with the substrate surface and the plastic back sheet of the solar panel. Before applying any adhesive to the underside of the solar panel, place the panel gently on a non-abrasive flat surface which will not cause any damage to the front side of the solar panel (e.g. its original carton box or foam packaging). Keep the solar panel as straight as possible whilst doing this (handle the solar panel like a sheet of plywood).

Note: take into account the rebounding straightening force of the solar panel. When mounting the solar panel on a curved surface, the panel must be fixed in a curved position
until the adhesive gets dry and forms a strong bond between the solar panel and the substrate surface.
Gluing with double-sided tape In general, gluing with double-sided tape is not recommended on curved surfaces because of the rebounding straightening force of the solar panel.
If bonding with tape is required, it is best to use an industrial grade porous (“foam”) tape for this application. Applying the tape across the entirety of the underside of the solar panel will improve the bond quality. When gluing with double-sided tape:
Apply the tape onto the solar panel first, by “unrolling” it on the solar panel. Use a soft cloth or a roller to gently apply pressure onto the tape (protective film side)to dispel all air from between the tape and the solar panel. Take care not to force the solar panel to bend underneath.• If the length / width of the tape exceeds the solar panel, cut the tape carefully around the edges of the solar panel.• Remove the protective film and stick the solar panel down on a clean and dry surface, keeping the solar panel as straight as possible up. While sticking it down, gently apply pressure on the solar panel with a soft cloth or a roller to ensure that no air is trapped underneath the solar panel (2 people are recommended for the installation).• Observe the required application temperature for the double-sided tape and the time for the glue to dry. Warning! Double-sided adhesive tape forms a very strong immediate bond with the contact material and does not allow for repositioning. Attempting to remove the solar panel, even if only partially attached, can seriously damage the solar cells.
Gluing with adhesive Your chosen adhesive should be suitable for both the solar panel and the mounting surface. It should also be designed for outdoor applications (with a wide temperature range, UV light protection etc). Pay attention to the application temperature and drying time requirements. The mounting surface must be even, clean (use a degreasing agent) and dry. The installation must be carried out with care and precision, as this permanent method does not allow for repositioning. Warning! Although preparing the roof surface for better adhesion is permitted (e.g. by removing the old paint, grinding, using a primer etc), you must not use any sand paper or other sharp or abrasive tools on the underside of the solar panel. There are two main options for application of the adhesive:1) Apply the adhesive to the underside of the solar panel in parallel beads broken in the middle of the solar panel. Depending on the application the edges of the solar panel can be sealed all the way round with the same adhesive at the end
of the installation.2) Cover the entire underside of the solar panel with a layer of adhesive, spreading it evenly with a trowel or a similar tool. The first option is recommended for smooth and even surfaces. If the surfaces are uneven (for example, roof ridges on a campervan) a larger contact area is recommended for adhesive and the second application option will be the best. For the default first application option, apply thick 10-12mm adhesive beads on the rear of the solar panel, in parallel to each other, as shown in the diagram and the photo below:

Break the adhesive lines in the middle of the solar panel with a gap of 70-100 mm. This will even the pressure and allow for additional escape routes for air and water if the edges of the solar panel are not sealed at the end of the installation.

The adhesive lines can be as close to each other as required (the number of lines depends on the strength your chosen adhesive), but a minimum gap of at least 70 mm between lines is recommended. In general, for most plastic / fibreglass / metal surfaces
and a good quality adhesive, a gap of 100 - 150 mm between parallel adhesive beads would form a strong bond. To adhere the glued solar panel to the mounting surface:• It is recommended to use two people, particularly for large solar panels.• Minimise bending of the solar panel when attaching it to the surface, keeping it as straight as possible.• When pressing down the solar panel to the mounting surface, we recommend using a cotton cloth or a hand-roller to evenly distribute the compacting pressure.• If not using a cloth or roller, use a flat hand to distribute the pressure (no point load) and press the solar panel gently in a wiping motion.
Important! For difficult shaped / curved surfaces where a rebounding motion of the solar panel is likely, use other means to secure the solar panel in place while the adhesive dries. This may involve using weights (distributed evenly across the solar panel) or strong industrial tape. If you decide to use tape, ensure that no residual glue is left on the solar panel surface after you remove the tape. If multiple solar panels are mounted on the same surface, or if the edges of the solar panel are close to other objects (such as a roof skylight), leave a gap between the solar panels (or between the solar panel and nearby objects) of at least 2mm to compensate for the linear expansion of material under different temperatures. Important! If mounting a solar panel on a non-horizontal façade or a difficult mounting surface (e.g. glass, wood, concrete, brick, canvas etc.) the instructions provided above are not applicable. Please seek special guidance for installations of this nature.
#
#
Fitting a solar panel with a rear junction box If your solar panel features a junction box on the underside (BJB, JBB and similar subseries), we do not recommend using a double-sided adhesive tape to mount it, especially on uneven surfaces with irregularities. This is because it will be harder to ensure that the cable entry hole (junction box recess) under the solar panel is fully waterproof. Please use a suitable adhesive instead. To fit a solar panel with a rear junction box:
• Most rear junction box solar panels come with a round junction box. Drill a round, appropriately sized hole in the mounting surface (typically 30 mm) so that the rear junction box fits in it well.
• Place the solar panel on a soft, non-abrasive surface with the rear side facing upwards, and apply the adhesive in beads as described above.
• Apply a thick adhesive ring (at least 12mm line diameter) around the junction box to form a closed seal around it, and bond the solar panel to the surface.
• Two people are recommended to perform this installation. Important! When positioning the cable coming from the rear junction box solar panel underneath the mounting surface, ensure that this cable is firmly fixed to this mounting surface from underneath with frequent fixing points, to avoid any slack, movement, gravity or any other force pulling the cable down or mechanically affecting itin any other way. This is especially important when mounting the solar panels on vehicles, boats, or any other applications which are prone to vibration. If the cable is left to hang without sufficient fixing points, it might cause regular movement of the cable around the junction box area and will ultimately break soldering joints in the junction box, reducing or stopping the energy output.
#
+++++++++++
.
Attachments
Last edited:


