Good day everyone,
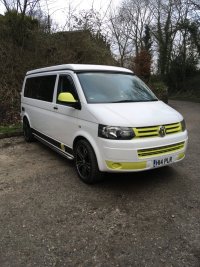
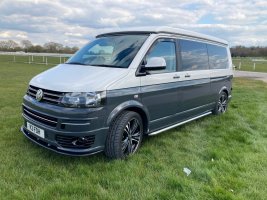
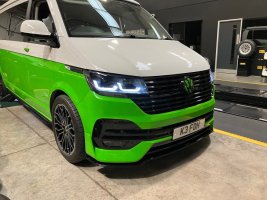
This is my attempt in writing a full guide on facelifting a T5.1 front to a T6.1 front with parking sensors, oem LED headlights and fog lights.
For this guide I am assuming you'll be using a painted front bumper with separate fog light trim parts and not the cheap plastic one-piece front bumper.
You need a lot of parts, patience and spare time.
I'll start off with a parts list, included are parts diagrams.
In the parts list there will be some parts that exist with different colours, the colour codes are as follows and you'll need to decide for yourself what works best.
Colour codes in part number will be Red
Satin Black = 9B9
High Chrome = 2ZZ
Front Bumper Section:
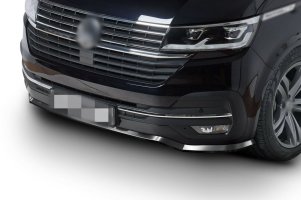 numbers (5 parts) are for the line that runs across the bumper grille (Chrome line in image to the right) --->
Grille section:
IFI :: Free services
Then go to CarProg2 --> TRCM Transporter/Campm./Multivan --> 2023 --> 7H-N-000 001>>Transp.Campm.
After gathering all these parts, I might have missed some, I'm sorry for that, It's time to start building.
Well, first of course you have to take off the bumper cover, side panels, bonnet, headlights, wheel housing liners, engine undertray, the whole lot.
After stripping everything down, assemble in the following order:
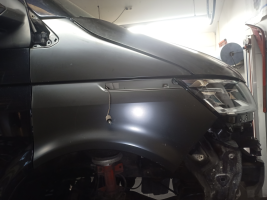
I started by putting on the side panels and aligning them with the door.
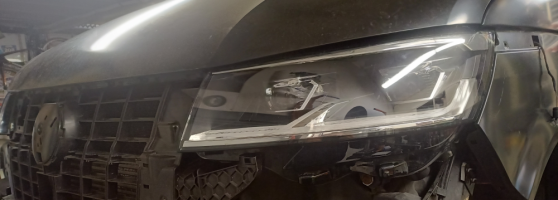
Then I put in the headlights, it took some adjusting to get them in a somewhat right position, the final adjustment will be done when everything is back together.
After the headlights the grill support was put in.
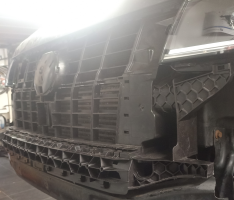
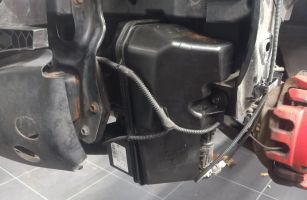
The windshield washer bottle and filler neck went in next, I glued off the hole for the headlight washers as I will not be using it, there is also an official bung to plug this off which is in the parts list.
You have to replace the washer bottle because the new bumper will not clear the old washer bottle.
Then I put in the wiring loom going from the left headlight, across the grille support, to the right side of the bumper where it connects to the wiring for the right headlight.
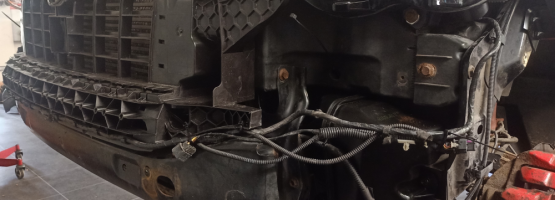

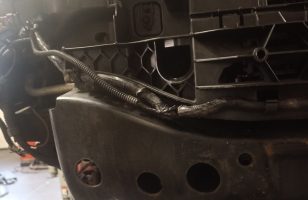
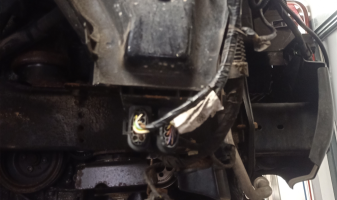
I used zip ties to tie off any loose wires for now as the van will be going to the painter before complete assembly.
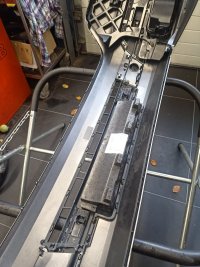
I prepared the bumper for reassembly by putting in the fog light guide profiles and cutting the holes for the fog lights. I also popped out all trim pieces from the bumper as they will be painted high gloss black.
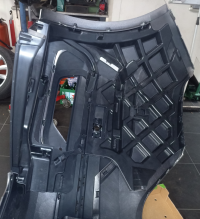
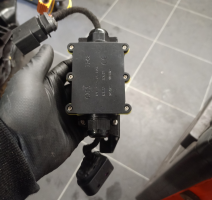
I connected up the headlights using the adapter module and I made custom support brackets for the module to sit on.
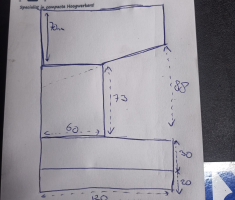
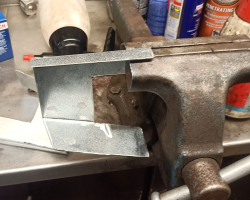
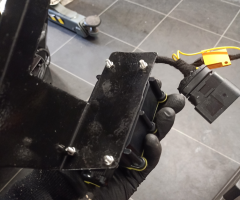
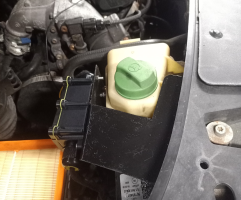
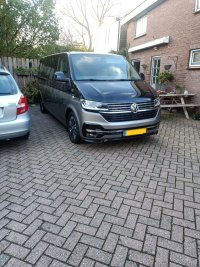
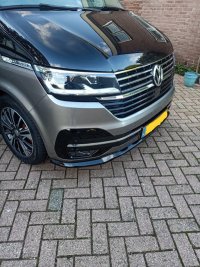
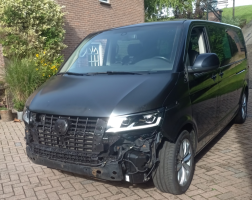
So that is it for right now, I'll be uploading more pictures and guides as I continue the project after the van is back from the painter. Right now it looks like this.
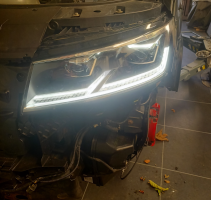
This is my attempt in writing a full guide on facelifting a T5.1 front to a T6.1 front with parking sensors, oem LED headlights and fog lights.
For this guide I am assuming you'll be using a painted front bumper with separate fog light trim parts and not the cheap plastic one-piece front bumper.
You need a lot of parts, patience and spare time.
I'll start off with a parts list, included are parts diagrams.
In the parts list there will be some parts that exist with different colours, the colour codes are as follows and you'll need to decide for yourself what works best.
Colour codes in part number will be Red
Satin Black = 9B9
High Chrome = 2ZZ
Front Bumper Section:
- Bumper: 7LA 807 217 B
- Fog Light trim left: 7LA 807 489 (B/C) (without letters at the end is no parking aid, B at the end is 4 parking sensors, C at the end is 6 parking sensors.)
- Fog Light trim right: 7LA 807 490 (B/C) (without letters at the end is no parking aid, B at the end is 4 parking sensors, C at the end is 6 parking sensors.)
- Towing eye cover: 7LA 807 241 A
- Licenceplate holder: 7LA 853 678 (A/B) (A is without parking aid, B is with parking aid.)
- Clips for fog light covers: 5x 1C0 867 388
- Foam insert: 7LA 807 551
- Left fog light guide profile: 7LA 807 177 B
- Right fog light guide profile: 7LA 807 178 C (You will have to cut a hole for the fog lights, this is OEM procedure)
- Protective film between bumper cover and side-panel left: 7LA 807 637
- Protective film between bumper cover and side-panel right: 7LA 807 638
- Plastic rivet for bumper to side-panel connection: 2x N90 558 401
- Screws for attaching fog light guide profile to bumper: 6x N90 974 701
- Clips for attaching fog light guide profile to bumper: 4x WHT 004 694
 numbers (5 parts) are for the line that runs across the bumper grille (Chrome line in image to the right) --->
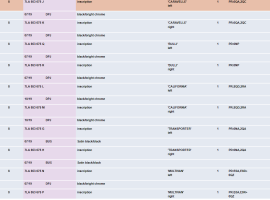
- Cover trim left: 7LA 853 065 9B9/2ZZ
- Cover trim right: 7LA 853 066 9B9/2ZZ
- Cover trim towing eye cover: 7LA 853 245 9B9/2ZZ
- Cover trim licenceplate holder left: 7LA 853 761 9B9/2ZZ
- Cover trim licenceplate holder right: 7LA 853 762 9B9/2ZZ
Grille section:
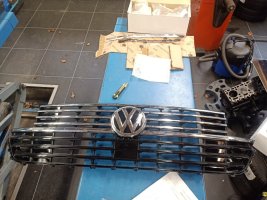
- Grille support element: 7LA 807 699 D
- Cup washers for mounting grille support: WHT 000 214
- Re-use screws for mounting grille support
- Grille: 7LA 853 651 (You have to pick the grille that you like the best. Black, one chrome line or all chrome lines.) Make sure you pick one with an emblem already attached
- Optional 4-motion emblem: 7LA 853 948 B
- Foam behind grille: 7LA 807 549

- Side-panel left: 7LA 821 101
- Side-panel right: 7LA821102
- Re-use old screws for side-panels
- Wheel housing liner left: 7LA 809 957 F
- Wheel housing liner right: 7LA 809 958 F
- Rubber plugs in wheel housing liner: 2x N02 002 41
- Set of attachment parts for wheel housing liner: 2x 7H0 898 625
- Optional mud flap left including screws: 7H0 898 809
- Optional mud flap right including screws: 7H0 898 810
- Side panel emblem: See picture ------------------------------------------------------->
- Guide profile between bumper and side-panel left: 7LA 807 183 A
- Guide profile between bumper and side-panel left: 7LA 807 184 A
- Screws attaching guide profile to side panel: 4x N90 974 701
- Covers next to mirror panel left: 7E0 857 537 A
- Covers next to mirror panel right: 7E0 857 538 A
- Bonnet: 7E0 823 033 H
- Old gas-strut is re-usable
- Stop buffer: 2x 3B0 823 499 C
- Stop buffer: 2x 7E0 823 499 A
- Old locking mechanism is re-usable
- Old bonnet-hinges are re-usable
- Bonnet seal on radiator support: 7E0 823 499 A
- Wiper Cowl: 7E0 819 403 A
- Sound dampening for bonnet: 7E0 863 835 B
- Clips for sound dampening: 10x 8E0 863 727 A (or use the old ones)
- Windshield washer left: 7E0 955 987 B (Without 'B' at the end is the heated version)
- Windshield washer right: 7E0 955 988 B (Without 'B' at the end is the heated version)
- Old windshield washer plumbing is re-usable

- Windshield washer reservoir: 7E0 955 453 D
- Windshield washer reservoir filler neck: 7E0 955 463 B
- Seal for headlight washer pump: 431 955 465 A
- Plug for headlight washer pump because we do not use it: 444 955 647
- Re-use old seal and pump for windshield washers
- Fog light left: 7LA 941 661 A
- Fog light right: 7LA 941 662 A
- Screws for attaching fog lights: 4x N91 090 701
- Side-panel indicator left: 7LA949101
- Side-panel indicator right: 7LA949102
- Side-panel indicator connectors: 2x 4F0 973 702
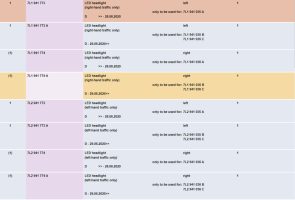
- OEM LED headlights: See picture--------------------------------------------------------------->
- Headlight adapter T5.1 to T6.1 LED. I sourced these adapter modules in Germany, I found them but they are expensive. When you get them, retrofitting the LED headlights is plug and play. I do not know where you can buy these and unfortunately I can not share the contact info of the person I bought them from. Hopefully some other people on this forum are able to help with that. If you wish to use Halogen headlights, that is of course possible.
- H11 connectors for fog lights: 2x 3D0 941 165 A
- Old wiring loom is re-usable
- Old parking-aid sensors are re-usable, they are the correct diameter, but not the right clipping mechanism. Using a single dab of CA glue they will be in there forever.
IFI :: Free services
Then go to CarProg2 --> TRCM Transporter/Campm./Multivan --> 2023 --> 7H-N-000 001>>Transp.Campm.
After gathering all these parts, I might have missed some, I'm sorry for that, It's time to start building.
Well, first of course you have to take off the bumper cover, side panels, bonnet, headlights, wheel housing liners, engine undertray, the whole lot.
After stripping everything down, assemble in the following order:
- Side panels
- Headlights
- Grille Support Panel
- Windshield washer reservoir and filler neck
- Wiring loom
- Grille
- Bumper cover
- Bonnet
I started by putting on the side panels and aligning them with the door.

Then I put in the headlights, it took some adjusting to get them in a somewhat right position, the final adjustment will be done when everything is back together.

After the headlights the grill support was put in.

The windshield washer bottle and filler neck went in next, I glued off the hole for the headlight washers as I will not be using it, there is also an official bung to plug this off which is in the parts list.
You have to replace the washer bottle because the new bumper will not clear the old washer bottle.

Then I put in the wiring loom going from the left headlight, across the grille support, to the right side of the bumper where it connects to the wiring for the right headlight.


I used zip ties to tie off any loose wires for now as the van will be going to the painter before complete assembly.
I prepared the bumper for reassembly by putting in the fog light guide profiles and cutting the holes for the fog lights. I also popped out all trim pieces from the bumper as they will be painted high gloss black.

I connected up the headlights using the adapter module and I made custom support brackets for the module to sit on.


So that is it for right now, I'll be uploading more pictures and guides as I continue the project after the van is back from the painter. Right now it looks like this.


