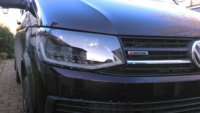
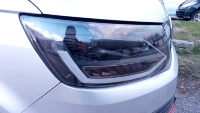
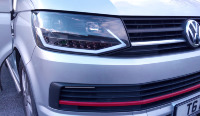
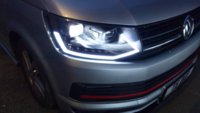
These Jun Yan lights were bought from Van Tech who are a very helpful and friendly company to deal with.
Having used these lights for a week now, I thought I’d share my experience with you…...and have started another thread as requested by a couple of members. Some of this content may be repeated from the other thread.
The units are well finished with all the wiring being hidden away inside the unit. For fitting, you move across the formed washer from the original units (this is where they mount just behind the main grill). There is a barrel type nut adjuster on the bottom of the units that use a 19mm spanner/socket. I used this to get a good fit of the light unit to the body…...more on this later! Once fitted you notice there is much more space to do bulb changes than the original H4 units which is a bonus too (you don’t need to slide the battery or remove the top of the air filter now).
They use a 65W H9 dipped and 55W H1 main bulbs and without any coding will operate both bulbs on main beam. This probably puts all the load on the vehicle wiring to the H1 bulb so I think it is still worth doing the VCDS coding as detailed in the H4 – H7 thread. The light output is comparable with other headlights of cars I’ve overtaken/been over taken by and perfectly adequate for seeing in the dark. I never used my H4 units with halogens so cannot compare directly. Main beam is particularly good. On dipped, the cut off line is very clear and there is a nice blue tint at the cut off too which you can make out on one of the photos I’ve included. Having seen the pictures posted of the ‘Transporter HQ / Travelin Lite’ provided light units I would suggest they may have a slightly brighter dipped beam but it’s hard to tell as road surface and bulb type fitted has a strong bearing on this and all the roads around here are covered in mud which doesn’t help with reflection.
On my late August 2016 Euro 5 there are no bulb warning lights that the sellers are warning about.
The DRL has a very even light so looks similar to modern Audis (it doesn’t look like a series of LEDs which are usually on older / cheaper cars). The colour is in the white to very slightly purple range. When dipped beam is turned on, the DRLs dim so that other road users don’t have to drive into a nasty glare which can be annoying.
The LED indicators are fed via a resistor so flash at the right speed. They look better in real life than photos would show and although not a fan of LED lights, they are growing on me. My only slight criticism here is that the units don’t dim the DRL when the indicators are on. You can still see the indicator okay, it’s just something I would rather have (I know there is a thread on this forum about using Carista to do this and someone was going to work out the VCDS code…..so all is not lost yet...apart from me locating that thread again!)
There is a single manual adjuster on the back of each unit and this changes the horizontal aim of the H1 bulb. Vertical adjustment of both is through the electric motor and both lenses are moved simultaneously. This is where my only criticism of these lights comes…... with the headlight load leveller control set so the headlights are at their highest, the range of dipped beam was only about 15 meters (this is a standard T32 140 4Motion with about 10kg in the back). Contacting the supplier, what they do is adjust the vertical aim using the adjuster at the bottom of the headlight (the one I used to get a good fit of light to wing) which means you need to do this before you refit the bumper. From my basic trigonometry, I worked out I would need a 4mm gap at the bottom of where the light meets the wing to get a ‘normal’ dipped beam light distance. Obviously this will vary from vehicle to vehicle depending on springs and load and mine is probably a worst case example.
A 4mm gap is actually very little and bearing mind these are aftermarket parts probably considered as acceptable, however I wanted perfect fitment and alignment so used a different solution. Removing the alignment motors is very easy, just rotate the motor slightly, pull it back and then unhook the ball of the motor from the groove of the light unit and release the electrical cable. Once you’ve done it a couple of times, you can do it in about 10 seconds, even whilst the units are fitted to the vehicle. I stripped the units down and then modified the rod that has the ball on the end so that it was 4mm longer by cutting out a short section of plastic, drilling through the ball and the rod and then fitted a coarse threaded rod to join them back up. The result is that I now have light units that fit perfectly, have correct (and manually adjustable) vertical alignment, and still have the full functionality of the load leveller inside the vehicle. I’m sure there will be motors available with a slightly longer rod too if you don’t feel as adventurous……..or just do what the fitters do and use the 19mm barrel nut before refitting the bumper.
(edited for typos)


Last edited:


