Leaking roof rail on HiLo - advice on repair?

kingkambo

Member
VIP Member
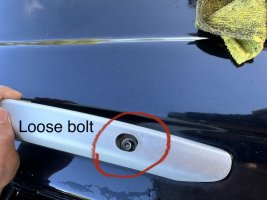
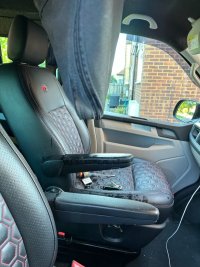
Morning all! Whilst during last night my kids noticed a big drip of water coming from the sliding hatch to access the pop top. Suspected the roof rail after reading some posts on here (thanks ). Have inspected this morning and as I slid the hatch open a lot of water came down. Sure enough the bracket on front driver side roof rail was very loose…. Have tightened this up with Allen key whilst also keeping bolt underneath secure. I had a good look around the roof area and noticed a few other issues.

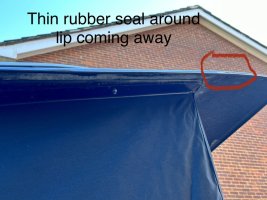
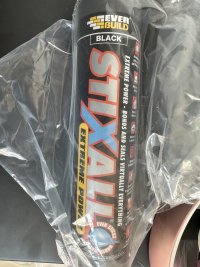
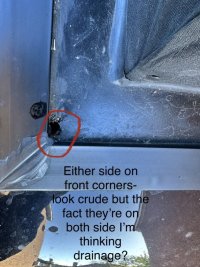
The small rubber seal around the lip of the roof is loose/coming away in places. There are two holes either side of the front of the frame attached to body of van (drainage holes?). Gap in the sealant where the roof meets the housing for the canvas. I bought some Everbuild Stixall bonding sealant for another DIY job at home but I think this would potentially be good to use to do the following:

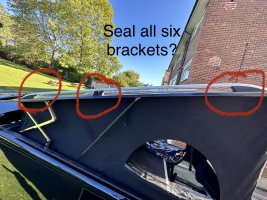
Seal the around the rubber gasket where the bracket of the roof rail meets the roof- maybe do all six? I have no intention of taking the rails off…

Reattach the rubber seal going around the lip of the roof

Seal the gap between bottom of roof where it meets the housing/frame for canvas.

Are the two holes drainage holes? Or should I fill?

I’d be grateful for any words of wisdom before I start my proposed fixes!

Some pics attached.

Thanks in advance for any advice.
IMG_5225.jpeg


IMG_5227.jpeg

IMG_5228.jpeg

IMG_5229.jpeg

IMG_5226.jpeg IMG_5231.jpeg
IMG_5230.jpeg
 
Personally I would remove the roof bars, clean the area below and re-fit with a good amount of sealant under the bars. This is a know area for leaks. Yes the front corner holes are drains. Check they are clear through to the wheel arch. The rubber around the lip is purely decorative and can be stuck back with contact adhesive.
 
Are the two holes drainage holes? Or should I fill?

I’ve got a HiLo with bars and have - touch wood - been fine for 6 years. A lot seems to depend on the fitter (XtremeVan here). Who fitted yours?

Mine (an early Sport) has four holes at each corner, these being drains. You should also have four plugs that you place within the fixing holes for when it rains - where these in use the last time you had the roof up? Was the roof completely dry when you put it down? I ask as I expected more water on reading your post but didn’t thing that on your seat was a lot.. so that left me wondering if it was an accumulation of rain-water / dew that has collected from a wet closure?

Your title will catch the eye of other HiLo owners standby for their input.

Also, I’m not sure what to suggest re: the UFO’s.
 
Morning all! Whilst during last night my kids noticed a big drip of water coming from the sliding hatch to access the pop top. Suspected the roof rail after reading some posts on here (thanks ). Have inspected this morning and as I slid the hatch open a lot of water came down. Sure enough the bracket on front driver side roof rail was very loose…. Have tightened this up with Allen key whilst also keeping bolt underneath secure. I had a good look around the roof area and noticed a few other issues.

The small rubber seal around the lip of the roof is loose/coming away in places. There are two holes either side of the front of the frame attached to body of van (drainage holes?). Gap in the sealant where the roof meets the housing for the canvas. I bought some Everbuild Stixall bonding sealant for another DIY job at home but I think this would potentially be good to use to do the following:

Seal the around the rubber gasket where the bracket of the roof rail meets the roof- maybe do all six? I have no intention of taking the rails off…

Reattach the rubber seal going around the lip of the roof

Seal the gap between bottom of roof where it meets the housing/frame for canvas.

Are the two holes drainage holes? Or should I fill?

I’d be grateful for any words of wisdom before I start my proposed fixes!

Some pics attached.

Thanks in advance for any advice.
View attachment 216937


View attachment 216939

View attachment 216940

View attachment 216942

View attachment 216938 View attachment 216941
View attachment 216943
I’ve got a HiLo with bars and have - touch wood - been fine for 6 years. A lot seems to depend on the fitter (XtremeVan here). Who fitted yours?

Mine (an early Sport) has four holes at each corner, these being drains. You should also have four plugs that you place within the fixing holes for when it rains - where these in use the last time you had the roof up? Was the roof completely dry when you put it down? I ask as I expected more water on reading your post but didn’t thing that on your seat was a lot.. so that left me wondering if it was an accumulation of rain-water / dew that has collected from a wet closure?

Your title will catch the eye of other HiLo owners standby for their input.

Also, I’m not sure what to suggest re: the UFO’s.
Just seen you’ve mentioned the (lack of) bungs elsewhere and that VTA was potentially your fitter?

If the roof was wet when it was last put away, even with the interior canvas being dry there’s every chance rain water has pushed past the zipper and pooled.

If it was put down bone dry then ignore me; you have a problem.
 
Hi Ads- bone dry when last put away- 80% sure the issue was the loose front roof rail. Still waiting on others to input before using the sealant! I’ve found blanking grommets on eBay- various sizes so hopefully straight forward fix on that front. I bought the van converted, paper work shows that Wakefield Van Works (WVW) done the initial installation in March 2019. Mentioned Vision tech as I was hoping they might be able to supply the 4 replacement plugs/blanking grommets.

Personally I would remove the roof bars, clean the area below and re-fit with a good amount of sealant under the bars. This is a know area for leaks. Yes the front corner holes are drains. Check they are clear through to the wheel arch. The rubber around the lip is purely decorative and can be stuck back with contact adhesive.
Thanks for the advice, much appreciated
 
Done this a while back, but thought this might help someone in the future if they have the same/similar set up as my van. The leak has been resolved… no water ingress for the last 4 weeks, even with heavy rain. It was fairly straightforward once I’d built up the confidence to give it a go! Lift roof slightly to access bolts holding roof bars and remove existing bolts, replace with new threaded bar cut to right size, EPDM washers and nyloc nuts top and bottom. Used information in the below thread as a guide.

Roof Rail Leak Free Fixing.

IMG_8032.jpeg
 
  • Like
Reactions: CAB
Back
Top