You are using an out of date browser. It may not display this or other websites correctly.
You should upgrade or use an alternative browser.
You should upgrade or use an alternative browser.
Leisure Battery - Is it faulty? BM2
- Thread starter IestynD
- Start date
-
- Tags
- leisure battery
**************************************************
Dellmassive`s -- "how I Done It" -- Thread
**************************************************
Kit List And Stuff -- How I Done It & What I Use --
**************************************************
VIP Membership | VW T6 Forum - The Dedicated VW Transporter T6 Forum
************************************************
For Sale - Summer-weekend-t6f Limited Edition External Stickers
For Sale - T6F Flags
**************************************************
In order to assist others i wanted to try and keep this thread up to date.
I managed to buy a Victron Smart Shunt, and a decent multimeter.
I started off looking at the main starter battery - the static ampage leak was
296Mili amps.
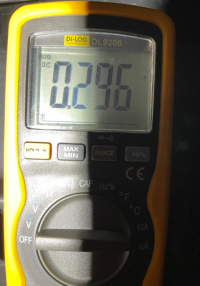
This is after letting is sit with the door locked for about 15 minutes.... Thats pretty high!!
As you can see here i looped the tester inline with the negative..
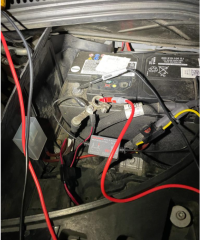
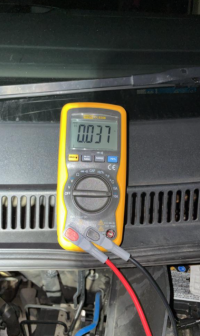
I decided to rule out the DashCam as that was where my suspicion was... Dashcam disconected:
This shows just 37 miliamps... it actually stabalised at 22miliamps. (I didn't get a picture)
So time to mess about with the DashCam settings as i am pretty sure 296miliamps is enough to drain my starter battery in a few days...
Today i managed to test the Leisure battery.
First things first get a reading with everything off:
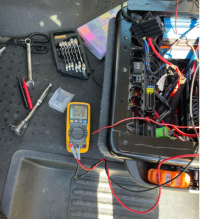
Well i thought everything was off... This seemed high considering everything was off...
I pulled fuses and realised if i pulled the fuse that fed the USB ports (x 3 in the rear of the van - al be it, nothing connected to them) it dropped to
11miliamps... which is probably about right (all other fuses were connected so things like the receiver for the Webasto diesel heater was on, the tiny LEDs in the light switches were on.
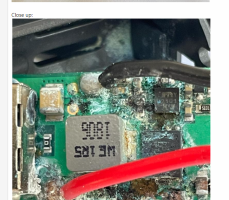
I pulled appart two of the USB ports that had intermitant problems and this is what the inside looked like:
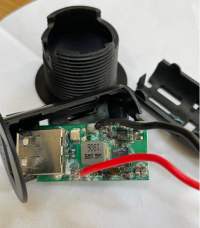
Close up:
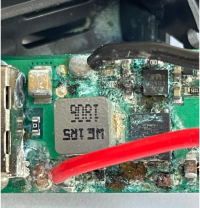
These are obviously the cheapest of the cheap and any condensation has just ruined them. With these two USB sockets removed the amp draw stablaised to 11 milliamps:
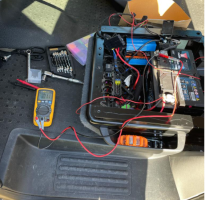
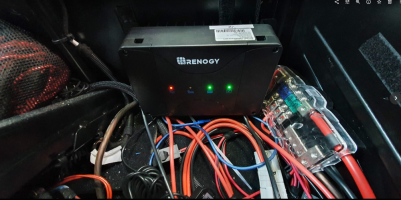
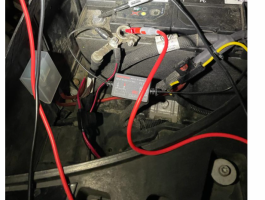
So, now i know i'm pretty happy with how its all going i thought it was time to fit the new Victron Smart Shunt. I made up a fly lead on some pretty meaty 10mm ring terminals and used some 16mm wire... heat shrinked on it for neatness.
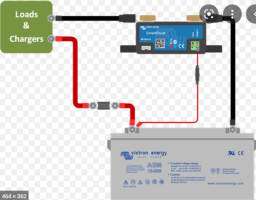
So as the picture shows, a fly lead from battery negative to smart shunt, a small cable from shunt to positive, and then all the other negative cables go to the other side of hte smart shunt.
Easy install really...
Picture from manual:
My install. Shunt is screwed to a bit of MRMDF which has been stuck to the seat base with some instant grab adhesive.
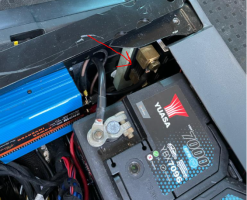
My seat base now looks like this - i want to spend some time tidying the wires but other than that its ok. I realised there is probably enough room to fit a decent DC to DC in charger in front of the battery if i can sort the wires out properly.
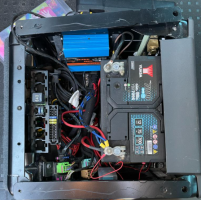
Finally - a massive thank you to everyone who has helped and given me the confidence to have a go. I'll update some SmartShunt screen shots in my next update. I need to replace some USB sockets as well. New ones ordered from 12V world hopefully here tomorrow.
I managed to buy a Victron Smart Shunt, and a decent multimeter.
I started off looking at the main starter battery - the static ampage leak was
296Mili amps.

This is after letting is sit with the door locked for about 15 minutes.... Thats pretty high!!
As you can see here i looped the tester inline with the negative..

I decided to rule out the DashCam as that was where my suspicion was... Dashcam disconected:
This shows just 37 miliamps... it actually stabalised at 22miliamps. (I didn't get a picture)

So time to mess about with the DashCam settings as i am pretty sure 296miliamps is enough to drain my starter battery in a few days...
Today i managed to test the Leisure battery.
First things first get a reading with everything off:

Well i thought everything was off... This seemed high considering everything was off...
I pulled fuses and realised if i pulled the fuse that fed the USB ports (x 3 in the rear of the van - al be it, nothing connected to them) it dropped to
11miliamps... which is probably about right (all other fuses were connected so things like the receiver for the Webasto diesel heater was on, the tiny LEDs in the light switches were on.
I pulled appart two of the USB ports that had intermitant problems and this is what the inside looked like:

Close up:

These are obviously the cheapest of the cheap and any condensation has just ruined them. With these two USB sockets removed the amp draw stablaised to 11 milliamps:

So, now i know i'm pretty happy with how its all going i thought it was time to fit the new Victron Smart Shunt. I made up a fly lead on some pretty meaty 10mm ring terminals and used some 16mm wire... heat shrinked on it for neatness.
So as the picture shows, a fly lead from battery negative to smart shunt, a small cable from shunt to positive, and then all the other negative cables go to the other side of hte smart shunt.
Easy install really...
Picture from manual:

My install. Shunt is screwed to a bit of MRMDF which has been stuck to the seat base with some instant grab adhesive.

My seat base now looks like this - i want to spend some time tidying the wires but other than that its ok. I realised there is probably enough room to fit a decent DC to DC in charger in front of the battery if i can sort the wires out properly.

Finally - a massive thank you to everyone who has helped and given me the confidence to have a go. I'll update some SmartShunt screen shots in my next update. I need to replace some USB sockets as well. New ones ordered from 12V world hopefully here tomorrow.
Last edited:
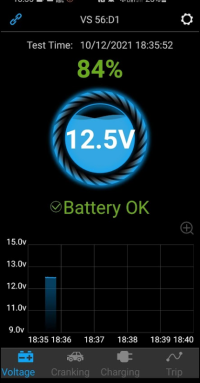
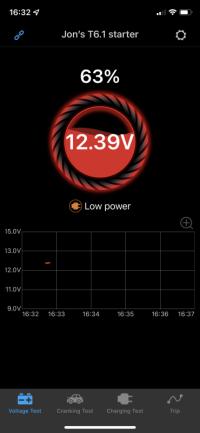
Sorry to jump in and go a bit off topic. However my starter battery never gets up to the readings in these. I fact it always says Low Power. Any Ideas?FYI . . .
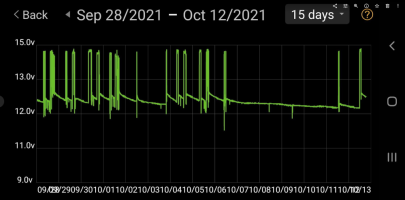
this is my BM2 plot - 14days from the T6 Starter battery (EFB)
battery rest voltage doesn't drop below 12.2v
View attachment 132891View attachment 132892
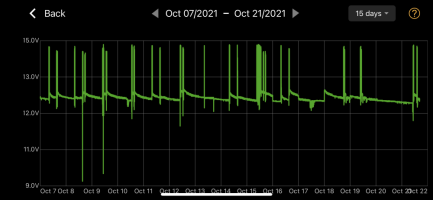
And the 15 day plot. I've no idea what the 2 big downward peaks are.
@lestynD
these are the classic signs of the "green snotts" and water/moisture damage.
well done a good work.
i see your battery doesnt have the Battery Shunt module sensor for stop start vans.
FYI the expected MAX current when the van is sleeping is 50mA.
vans with the battery sensor will flag a fault code when you have more than 50mA over a 24hr period.
...
And for anyone else trying this . . .
when you do this method you are limited to the MAX CURRENT the meter can take on 12v dc - this is normally only 10A.
go above 10A and you will blow the meter internal fuse. (I've done this loads in the past)
so no trying to start the van or run windows etc . . . . .
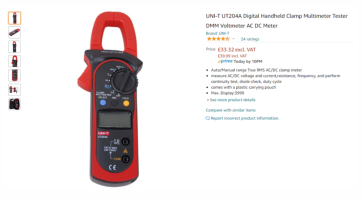
the alternative approach is to use "clamp meters" that wrap around the cable and give you the reading. (though it may not be as accurate as the above method)
see here about clamp meters ---> Clamp Meters
+++++++++++++
also worth noting that if you need to use electronics is a damp area you can coat them in conformal coating. (if you wanted to protect the new USB charger pcb from the same fate)
its a waterproof plastic layer that you spray over the internal pcb. - we used to use it on external covert cameras.
here is an example:

these are the classic signs of the "green snotts" and water/moisture damage.
well done a good work.
i see your battery doesnt have the Battery Shunt module sensor for stop start vans.
FYI the expected MAX current when the van is sleeping is 50mA.
vans with the battery sensor will flag a fault code when you have more than 50mA over a 24hr period.

...
And for anyone else trying this . . .
when you do this method you are limited to the MAX CURRENT the meter can take on 12v dc - this is normally only 10A.
go above 10A and you will blow the meter internal fuse. (I've done this loads in the past)
so no trying to start the van or run windows etc . . . . .

the alternative approach is to use "clamp meters" that wrap around the cable and give you the reading. (though it may not be as accurate as the above method)
see here about clamp meters ---> Clamp Meters

+++++++++++++
also worth noting that if you need to use electronics is a damp area you can coat them in conformal coating. (if you wanted to protect the new USB charger pcb from the same fate)
its a waterproof plastic layer that you spray over the internal pcb. - we used to use it on external covert cameras.
here is an example:
Ambersil 30235 Clear Acrylic Protective Film 400Ml : Amazon.co.uk: DIY & Tools
Shop Ambersil 30235 Clear Acrylic Protective Film 400Ml. Free delivery on eligible orders of £20 or more.
amzn.to

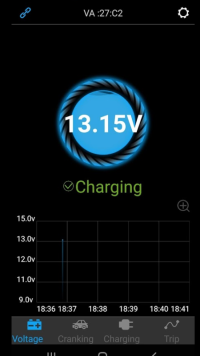
Sorry to jump in and go a bit off topic. However my starter battery never gets up to the readings in these. I fact it always says Low Power. Any Ideas?
View attachment 134272
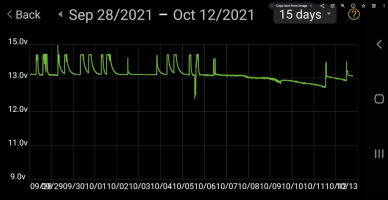
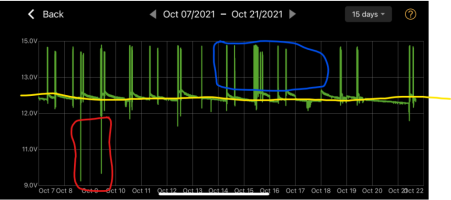
And the 15 day plot. I've no idea what the 2 big downward peaks are.
View attachment 134273
@Skyliner33
don't worry about the wording or the SOC % from the BM2 as its based on standard SLA battery's.
your T6.1 will have an AGM battery most likely . .
whats more important is the BM2 reading over time.
your starter battery avaerage over 15 day looks to be a constant 12.4v shown in yellow.
the RED dips will be BM2 samples that happened when the van was starting (starter motor) - down to 9.0V
and the BLUE blips are 14.8v charging when driving.
all looks perfectly normal and a healthy 12v starter system.
.
a week battery or parasitic load will show a rapid drop in the yellow line after a drive cycle that will continue to drop untill the battery is flat - below 10v.
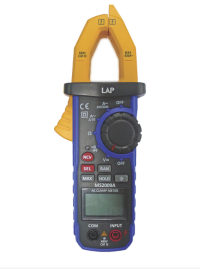
I bought a clamp meter from ScrewFix just there cheap LAP version - the colours make it look like fisherprice made it! It says it can do DC current on teh website, i brought it home and selected current mode but there was no selection for dc current mode. Anyway, i'm pleased to report it worked and was actually really accurate with the inline method. So another clamp meter recomendation for anyone wanting one same day!...
And for anyone else trying this . . .
when you do this method you are limited to the MAX CURRENT the meter can take on 12v dc - this is normally only 10A.
go above 10A and you will blow the meter internal fuse. (I've done this loads in the past)
so no trying to start the van or run windows etc . . . . .
View attachment 134364
the alternative approach is to use "clamp meters" that wrap around the cable and give you the reading. (though it may not be as accurate as the above method)
see here about clamp meters ---> Clamp Meters
View attachment 134366

This product is genius!+++++++++++++
also worth noting that if you need to use electronics is a damp area you can coat them in conformal coating. (if you wanted to protect the new USB charger pcb from the same fate)
its a waterproof plastic layer that you spray over the internal pcb. - we used to use it on external covert cameras.
here is an example:
Ambersil 30235 Clear Acrylic Protective Film 400Ml : Amazon.co.uk: DIY & Tools
Shop Ambersil 30235 Clear Acrylic Protective Film 400Ml. Free delivery on eligible orders of £20 or more.amzn.to
View attachment 134365
Thanks @Dellmassive
glad you like it.

yes thats a catch for new players.
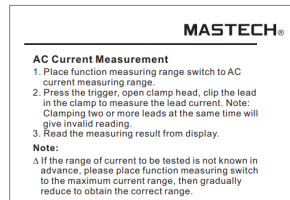
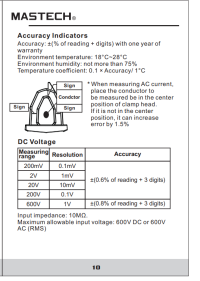
cheaper clamp meters do AC current ONLY.
you NEED to make sure the one you get will do DC current in clamp mode.
some meters will have a function button to switch between AC and DC modes.
and all will have a ZERO Z button to Zero the meter before taking a reading.
yes thats a catch for new players.
cheaper clamp meters do AC current ONLY.
you NEED to make sure the one you get will do DC current in clamp mode.
some meters will have a function button to switch between AC and DC modes.
and all will have a ZERO Z button to Zero the meter before taking a reading.
Similar threads
- Replies
- 3
- Views
- 313
- Replies
- 38
- Views
- 2K
- Replies
- 11
- Views
- 664

