You are using an out of date browser. It may not display this or other websites correctly.
You should upgrade or use an alternative browser.
You should upgrade or use an alternative browser.
T6 204 DSG 4Motion DPF removal
- Thread starter Cog Head
- Start date
what year is it?
time for the Vortex MAP Gas?
time for the Vortex MAP Gas?
2017, it’s done 117k
I’ve had it since new
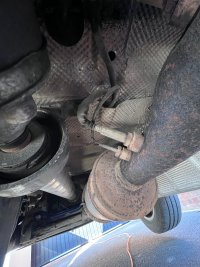
The V-bank clamp fixing the cat to the DPF pipe is sized solid too, think I can just about get a grinder in there to mutilate it into submission
The two bolts holding the DPF to not support bracket have sheared
I’ve had it since new
The V-bank clamp fixing the cat to the DPF pipe is sized solid too, think I can just about get a grinder in there to mutilate it into submission
The two bolts holding the DPF to not support bracket have sheared
Jeez, what work are you doing?
Ie why DPF off?
Ie why DPF off?
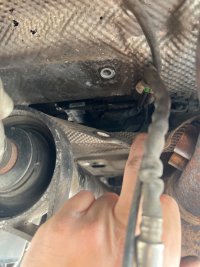
My connects were on the left of the prop and the wiring are clipped in with shit clips on the heat shield. There should be 2 pipes to disconnect to the right of the electrical conectord aswell. The sleeve and v band are common size so just take it to a local exhaust place to purchase them or the place where you are having it back washed should do them Once fitted don't forget to reset the dpf parameters or like me I was changing the oil every 1k because it was consistently doing regens.
Thanks for your reply
I’ll do some more grovelling under the van again later on, see how many times I can bank my head this time!
Anyone know the best way to remove the prop shaft? Do I have to drop the whole assembly? Or can the front section come away on its own?
I removed the bolts and give it a good shake, but it didn’t want to budge, will the gearbox and diff empty themselves?
Sleeve clamp fasteners look terrible

The sleeve clamp bolts are shot, brushed the rust away there’s nothing for a socket to grip… grinder

DPF front mount fasteners look ok, till they both sheared off
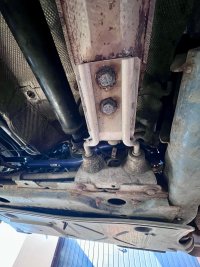
CAT to DPF V-band clamp appears to be stainless, with the H5 bolt head facing upwards… genious!
Seized, the H5 cap head rounded… grinder will fix that
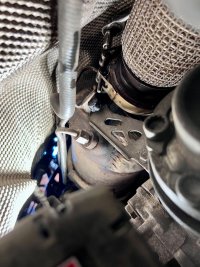
Needless to say I’ll be replacing all of the fasteners with stainless steel with copious amounts of copper grease.
Knowing how tight everything is under there, I’ll getting it up higher today.
I’ll do some more grovelling under the van again later on, see how many times I can bank my head this time!
Anyone know the best way to remove the prop shaft? Do I have to drop the whole assembly? Or can the front section come away on its own?
I removed the bolts and give it a good shake, but it didn’t want to budge, will the gearbox and diff empty themselves?
Sleeve clamp fasteners look terrible

The sleeve clamp bolts are shot, brushed the rust away there’s nothing for a socket to grip… grinder

DPF front mount fasteners look ok, till they both sheared off

CAT to DPF V-band clamp appears to be stainless, with the H5 bolt head facing upwards… genious!
Seized, the H5 cap head rounded… grinder will fix that

Needless to say I’ll be replacing all of the fasteners with stainless steel with copious amounts of copper grease.
Knowing how tight everything is under there, I’ll getting it up higher today.
A workshop manual might be helpful - found on siteAnyone know the best way to remove the prop shaft?
PS. Seems to throw message "Access denied" in Forum preview every now and then -
 - but still opens correct page
Yes, it has been tricky lately - must allow cookies, can't use ad-blockers etc.I can’t open that page at all
You don't need to remove the propshaft. I just ground the bolts off for the sleeve and all the rest moved with abit of wd40. Took me 20-25 mins to do it. But I was on a ramp.
That’s the plan for later on, grind what doesn’t move, loads of lube and a rubber mallet to break the joints.
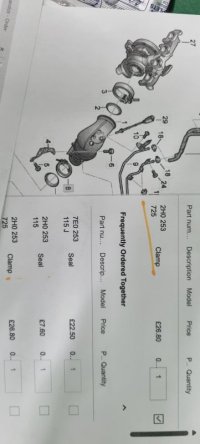
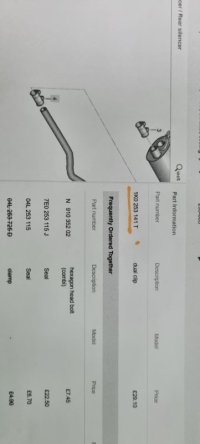
Just working out the part numbers for what I’m going to need to replace.
There appear to be multiple part numbers for the CAT to DPF V-Band clamp and the double sleeve clamp joining the DPF rear clamp to the rest of the exhaust.
Just working out the part numbers for what I’m going to need to replace.
There appear to be multiple part numbers for the CAT to DPF V-Band clamp and the double sleeve clamp joining the DPF rear clamp to the rest of the exhaust.
Can't you drop the dpf as far as it goes without damaging the wiring and drop thar side of the heatsheld to get access?
I tired to do that, but it didn't help as the prop was the limiting factor for the heat shield.
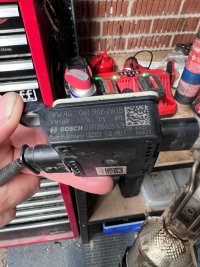
I ended up dropping the prop front bearing carrier, then moving the Heather as far over to the off side as possible, plus a little manipulation, eventually got it, you have to take the particulate sensor and the electrical module off together, the sensor doesn’t come away from the controller without damaging it.
I got it off, eventually, rinsed it out with hot water only to find it is absolutely clagged up internally, i filled the thing up with all the sensor holes blocked, with barely a trickle coming out the other end, it’s currently stood upright in the garage full of Wynn’s DPF cleaner, I’ll have another go at it tomorrow, hopefully it’s loosened up and I can clear the ash and soot out of it, of that doesn’t work, there will be a spot of grinding and welding.
Once I got it off, I decided to attempt getting the rear particulate sensor out while it was easily accessible, it was seized solid, so I warmed it up a bit, didn't work, then I warmed it up a lot, didn't work, so the mole grips come out, which resulted it the bush disintegrating, oh bother I said…
Then I had the unenviable task of grinding off the sensor and digging out the ceramic core to allow me to drip an chisel out what remained of the threaded part, which I’ve not leaned costs £150, the morel of this story is… if it ain’t broken, for the love of god, do not fix it!
This is the van hoiked up in the air with axle stands up front and a set of caravan ramps to support the rear end.

This is the rear particulate sensor with the hexagonal collar disintegrated

The remnants of said collar

This is the part hat now needs replacing
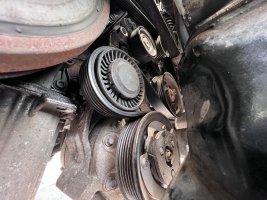
While it was up in the air, I decided to finally get the aux belt tensioner and belt replaced, it squeals like a pig in the mornings… not anymore
I ended up dropping the prop front bearing carrier, then moving the Heather as far over to the off side as possible, plus a little manipulation, eventually got it, you have to take the particulate sensor and the electrical module off together, the sensor doesn’t come away from the controller without damaging it.
I got it off, eventually, rinsed it out with hot water only to find it is absolutely clagged up internally, i filled the thing up with all the sensor holes blocked, with barely a trickle coming out the other end, it’s currently stood upright in the garage full of Wynn’s DPF cleaner, I’ll have another go at it tomorrow, hopefully it’s loosened up and I can clear the ash and soot out of it, of that doesn’t work, there will be a spot of grinding and welding.
Once I got it off, I decided to attempt getting the rear particulate sensor out while it was easily accessible, it was seized solid, so I warmed it up a bit, didn't work, then I warmed it up a lot, didn't work, so the mole grips come out, which resulted it the bush disintegrating, oh bother I said…
Then I had the unenviable task of grinding off the sensor and digging out the ceramic core to allow me to drip an chisel out what remained of the threaded part, which I’ve not leaned costs £150, the morel of this story is… if it ain’t broken, for the love of god, do not fix it!
This is the van hoiked up in the air with axle stands up front and a set of caravan ramps to support the rear end.

This is the rear particulate sensor with the hexagonal collar disintegrated

The remnants of said collar

This is the part hat now needs replacing

While it was up in the air, I decided to finally get the aux belt tensioner and belt replaced, it squeals like a pig in the mornings… not anymore

Oh God that was alot harder than mine. Mine was all easily accessible. I just gave mine to a garage that back flushed it with all the sensors in for less than 150 because I removed it myself. There's a bloke on YouTube that uses bleach to clean don't k ow how effective it would be
Similar threads
- Replies
- 0
- Views
- 307
- Replies
- 6
- Views
- 755
- Replies
- 5
- Views
- 760
- Replies
- 14
- Views
- 2K
- Replies
- 5
- Views
- 1K

