You are using an out of date browser. It may not display this or other websites correctly.
You should upgrade or use an alternative browser.
You should upgrade or use an alternative browser.
What Have You Done To Your Van Today?
- Thread starter Daneeyre
- Start date
-
- Tags
- mod modification mods retrofit
Very nice great job .
where did you get the ply bits from. Are they easy to fit and do you carpet after they are fitted
where did you get the 2 pelmet bits from and are they easy to fit
Hi @lucas3232, thanks, can’t believe it put it off for so long.
I got 3 sheets of 3.6 ply (8*4) from Travis, wasn’t fussed about a 1 piece roof, I used two to cut roof panels and one for the 2 pelmets. I had the carpet and lin8ng left
Before removing the roof panels I marked where the cover strips were for future reference. Once the panels were removed I used them as templates, marking all the holes and transferring the cover strip lines from earlier. Doing it again I’d take maybe a couple of mm off all round to allow for covering.
To make the pelmets, make one side then use this to make the other. On the 3rd sheet of ply along one long edge I struck a line 10mm in from one the edge to make them bigger than the roof panels (might not need to do this but seemed like a good idea at the time). Then mark a second line 135mm in from that one, this will be the internal edge.
Starting with the rear, I lined the roof panel up with the 10mm line and rear edge of the sheet, clamped and marked the round corner and holes, and transferred the mark from the joint strip, added XXmm for the strip then repeated for the forward panel. I took a flyer marking the internal curves at the rear, spent a long time looking at Pinterest and @Absolut5 (love his work!) to gauge this.
I used strips of 12mm MRMDF, 15mm in from the front edge as a packer for the LEDs to go, but don’t think I put it far enough back as I can see the LEDs, it maybe go 25-30mm next time.
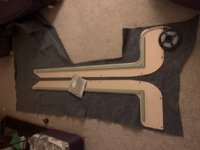
Once everything is cut, test fit, remove, cover, then final install, roof panels and joint strips, then pelmets with the long hidden clips and bingo!
Quick edit: I used some Velcro in a couple of spots between the 12mm packer and head. liner. I prefer the 3m single sided interlocking stuff but the Velcro took straight to the headliner.
There’s a company selling one piece roof and halo kits on eBay and facebook, they have some nice shots of the clips etc for reference
Last edited:
Thank you so much for that great help.Hi @lucas3232, thanks, can’t believe it put it off for so long.
I got 3 sheets of 3.6 ply (8*4) from Travis, wasn’t fussed about a 1 piece roof, I used two to cut roof panels and one for the 2 pelmets. I had the carpet and lin8ng left
Before removing the roof panels I marked where the cover strips were for future reference. Once the panels were removed I used them as templates, marking all the holes and transferring the cover strip lines from earlier. Doing it again I’d take maybe a couple of mm off all round to allow for covering.
To make the pelmets, make one side then use this to make the other. On the 3rd sheet of ply along one long edge I struck a line 10mm in from one the edge to make them bigger than the roof panels (might not need to do this but seemed like a good idea at the time). Then mark a second line 135mm in from that one, this will be the internal edge.
Starting with the rear, I lined the roof panel up with the 10mm line and rear edge of the sheet, clamped and marked the round corner and holes, and transferred the mark from the joint strip, added XXmm for the strip then repeated for the forward panel. I took a flyer marking the internal curves at the rear, spent a long time looking at Pinterest and @Absolut5 (love his work!) to gauge this.
I used strips of 12mm MRMDF, 15mm in from the front edge as a packer for the LEDs to go, but don’t think I put it far enough back as I can see the LEDs, it maybe go 25-30mm next time.
View attachment 65086
Once everything is cut, test fit, remove, cover, then final install, roof panels and joint strips, then pelmets with the long hidden clips and bingo!
Quick edit: I used some Velcro in a couple of spots between the 12mm packer and head. liner. I prefer the 3m single sided interlocking stuff but the Velcro took straight to the headliner.
There’s a company selling one piece roof and halo kits on eBay and facebook, they have some nice shots of the clips etc for reference
No worries, wished I’d taken more photos or videoed it.Thank you so much for that great help.
Continued my quest towards team tango and added a little highlight to my mirrors, oh and put my forum stickers on.Had to do the front logo. Had a bit of vinyl from an aborted attempt to put some stripes on the side. Thought I’d put it to use, it’s not perfect as there are a couple of small bubbles but you have to be close to see them. It’ll do for now
View attachment 64714
View attachment 64715
View attachment 64716
View attachment 64717
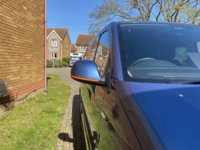
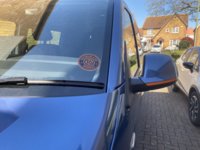
You mean you don’t do it every time you clean the rest?
That looks cool are the parts from Vw ? And do you mind me asking what the cost wasChanged from this,
View attachment 65055
To this...
View attachment 65056
Very pleased with the new ‘velle look, I even managed to save the cigarette lighter and not mess up the floor cutting, the guides on the forum proved invaluable

Changed from this,
View attachment 65055
To this...
View attachment 65056
Very pleased with the new ‘velle look, I even managed to save the cigarette lighter and not mess up the floor cutting, the guides on the forum proved invaluable
Looks great. Quick question, Do you know of the seat foams are different on caravelle seats or is it just the Leather/Alcantara covers?
Thanks
The seat foams are differentLooks great. Quick question, Do you know of the seat foams are different on caravelle seats or is it just the Leather/Alcantara covers?
Thanks
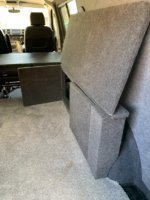
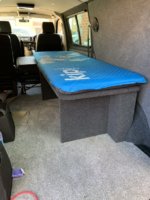
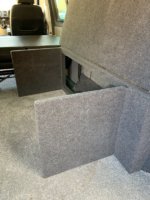

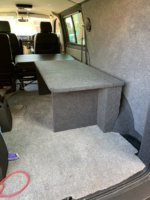
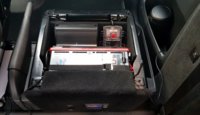
Got the day to finish off my Kombi bed , decided to carpet line it . Glad I did , very pleased with the result . Just meet to add a gas strut to hold the lid open when required.Finally made a start on a single Kombi bed I’ve been thinking about for ages .
I normally just have the mattress on the floor when taking the MTB away for a trip . But being elevated gives me the storage underneath
Completely freestanding as I didn’t want to fix to anything and it needed to be easily removed .
Still need add piano hinge to the lid .
The ply legs will be hinged also so it stores virtually flat In The garage . Fancy carpeting it ? Or paint grey .View attachment 63644

Love this idea, great work fella.View attachment 65205 View attachment 65204 View attachment 65203 View attachment 65203 View attachment 65202
Got the day to finish off my Kombi bed , decided to carpet line it . Glad I did , very pleased with the result . Just meet to add a gas strut to hold the lid open when required.
View attachment 65202
@Loz have you seen these? Not sure if they’re your thing, but thought they might suit the Panamerica mouldingsFitted the side protection trims and front and rear Panamerica trims from RG Mouldings.
View attachment 64604
Textured Black ABS Rear Bumper Corner Protectors - VW T6 15 - Vanstyle
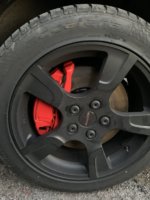
Front brake calipers painted, pleased with the results. Used the E tech kit as per @Dellmassive helpful YouTube vid.

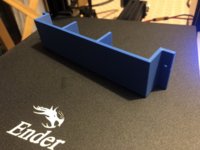
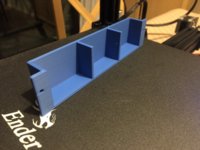
I love seeing all the innovative things people are 3D printing, just impressed ever time! Good job!Designed and 3D printed this knick-knack storage tray to go on the inside of a locker door on our camper.
Pretty happy with how it’s come out.
Pete
View attachment 65248 View attachment 65249
Rukahs
New Member
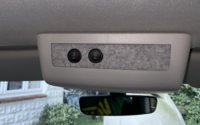
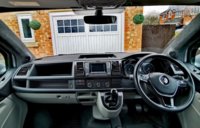
Fitted my switches today. View attachment 65336 Tomorrow’s job...maybe wrap my B pillars with the remaining headlining material. Just can decide if I should do the A pillars too...
Did my A pillars
Similar threads
- Replies
- 1
- Views
- 369
- Replies
- 3
- Views
- 701
- Replies
- 117
- Views
- 14K


