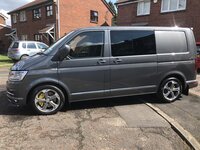
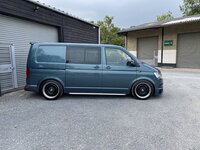
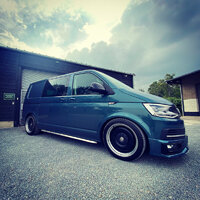
Big Green - 204bhp Bamboo Green Vanworx - Day van conversion

68martin68

Senior Member
T6 Guru
Thought I'd start a build thread as I have finally actually started doing some bits on my van after year of ownership!

Picked it up in May last year as I needed a work van and my A4 estate was well and truly on its last legs after being used for all manner of building material transport during the renovation of our house.

Spec wise, I was after very high spec, so LED's, heated seats and DSG were a must! I really wanted 4motion and originally was looking at White or Chestnut Brown, but when I saw this advertised I called straight away and after getting them to give me 2k for my Audi (which had a piece of earth cable hanging out of the boot to open it :think smile bounce: ) I paid the deposit without even seeing it!

Being an ex managers van at a Marshall's dealership and only being 6 months old, I figured it couldn't be too bad...
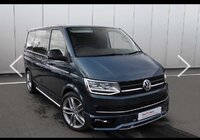
fullsizeoutput_1897.jpeg

Annoyingly in the pictures of the van it was the Vanworx Thruxton Sports Van Spec, so had 20" BBS SX, but they had since changed the wheels to a set of 18" Sportlines (no doubt to see the BBS SX to make more on the van!). I also asked if they would take the Kombi bulkhead out as I didn't want/need it, but the dealer reckoned it would take his technicians "at least an hour" to do which they didn't want to do... yea 4 screws takes an hour :think smile bounce:.
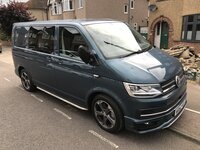
IMG_7003.jpg

The plan was alway to be able to go away in the van as well as use it for work, but since getting it I have been flat out like a lizard drinking with work, but when COVID came along, it literally left me with no work, as my work relies on bars and clubs being open...

So I decided to put my time to good use and start converting the van to a more useful day van/semi camper...
 
Started by prototyping the pull out kitchen/bed setup I wanted to make for the rear of the van.

There are other products on the market and I considered some of these, but at the end of the day, there was always a compromised somewhere or to have custom work done by someone else just became prohibitively expensive! So I just thought sod it, I have time at the moment, so ill make my own.

Designed it all on Autocad and had it CNC cut in 3mm ply, just to check the sit/design and highlight any issues/things which wouldn't work... very glad I did this as it highlighted quite a few things that you just don't think of/see until you have the physical panels in front of you!

61159678320__758DA729-91B3-4377-B9B4-398B077783A8.jpg

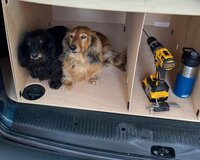
The dogs approved...

IMG_1838.jpg
 
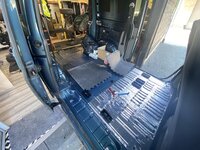
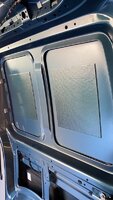
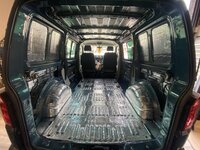
Then started pulling out the interior, sound deadening with 2mm silent coat and insulation with 7mm dense foam insulation..

Start of floor:

IMG_1881.jpg

A little bit of factory sound deadening:

2DE12630-C342-4D50-A495-DD98E035894B.jpg

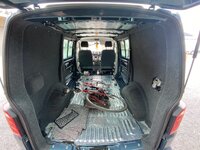
Sound deadening done:

IMG_1889.jpg
 
Tackled 4 way stretch carpet for the first time... that was scary! Got a pretty good finish though (well Im happy with it!) Managed to get each side done in one hit, with no joins etc and carpeted all the panels. Ceiling etc is yet to go back in and I am now waiting on all the electrics to turn up this week so I can get them done before re-assembling everything.

I have also fitted swivel plates to both front seats, but I forgot to take a photo of them at the time..

IMG_1915.jpg
 
Whilst I wait to do the electrics etc, I finalised the design on the kitchen/bed setup, got the material for it (which was a massive pain in the ass!) and got the parts cut... no going back now :eek:


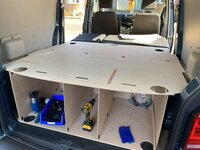
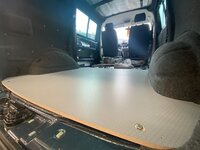
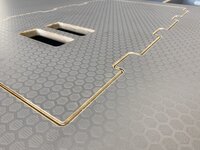
It started with the floor panel... I decided to ditch the idea of keeping the lashing loops accessible as the rear most ones would end up under drawers, so wouldn't really be usable. So I used the T6 VW Bodybuilder drawings to move the holes and make them smaller to just be able to secure the floor panel down on the 4 mounting points, It was a bit of a risk, as taking measurements from a scale drawing doesn't always work out... but luckily they lined up perfectly... RESULT!

IMG_1923.jpg


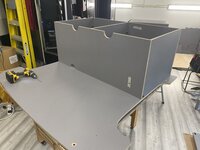
Next up was assembling some of the upright panels which form the storage boxes behind the Kombi seats:

IMG_1927.jpg


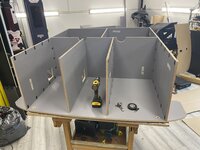
Then the rearmost section uprights, which form the spaces for the pull out kitchen, water tank, 12v cool/fridge box and some more storage:

IMG_1931.jpg

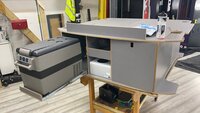
Cool Box and water tank in place, piece on top is to hold the mattress in place when it is set up as a seat. I will post more on this once I have it fully sorted...

C2635C70-6EB6-428A-A409-F2682791C98A.jpg


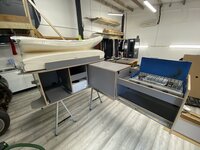
Pull out kitchen in action and testing the mattress size..

IMG_1964.jpg


Thats pretty much all for now... I have picked up some nice new wheels today, but I need to decide what I am doing with them before sharing more on these and I have some coil-overs waiting to go on when I do the wheels :cool:

Peace out for now!
 
Ha, yes very similar by the looks of it! Not for long though ;) If COVID hadn't of came along, I'd have just bought one of the various pods available and made some adjustments maybe, but as I say, plenty of time on my hands at the moment ha!
That said..giving your skills I’d be doing what you do...diy does not give you access to some great tools ...but I did build this with just a skill saw and corded drill ....my tool range has moved on since then and would love to do what your doing with sheet material :)

E49417A0-DA06-4429-82B7-171045ED5497.jpeg8AB9E59A-59BE-4B73-A989-26410598B6DC.jpeg3C56A3AA-B6F7-4348-A8DC-363FE6A1D578.jpeg
it progressed over the years
 
Thought I'd post a little update on here as well to keep it all together.

Started routing and sanding the edges today ready to be sealed with Osmo to make sure they are hard wearing! Makes the parts which slot in look so much nicer!

IMG_1980.jpg
 
Hi, are you going to put any 'edging' on the outside of the bed frame to stop it rubbing on the wall carpet - I've got a ply bed set-up and as I move stuff around in the back it scrapes on sides in places so I'm looking at putting a bit of pipe insulation on the corners
 
Hi, are you going to put any 'edging' on the outside of the bed frame to stop it rubbing on the wall carpet - I've got a ply bed set-up and as I move stuff around in the back it scrapes on sides in places so I'm looking at putting a bit of pipe insulation on the corners

The design enables the whole unit to be bolted down to 4 of the mounting points in the rear of the van, so it won’t be able to move/rub against the sides cheers for the heads up though
 
I do like hex-a-grip board.

It is lovely stuff! I wanted it in black really, but 15mm in black is literally impossible to find! Unless you are buying a whole pallet, which I don’t need right now!

Will see how the grey wears, I can see it getting quite grubby in places potentially, just need to find the right cleaning method!
 
Progress update!

Did some spannering today for the first time in an age! Enjoyed it!

Stance + Ultra’s with 19” banded steels (ex tourershine)

Going to give it a week or so to settle, then might have a little further adjustment. I won’t go too much lower as I want to use it as a camper and will be making it off grid capable eventually, so country lanes need to be accessible!

Electrics should arrive tomorrow hopefully so I can crack on with them, and I finally have all the parts for the camper setup, so I can do the final test assembly of that, then get it striped down and ready to go in!

Before:

3A064AC3-4B78-4673-9167-982584F7DAF5.jpeg

1BF4FC7D-18E0-459E-AF80-AF70EA4F5128.jpeg
 
That’s a cracking looking van on the outside and I’ve got a feeling it’s going to be very nicely finished on the inside. I’m looking forward to following this thread and seeing the finished article.
 
That’s a cracking looking van on the outside and I’ve got a feeling it’s going to be very nicely finished on the inside. I’m looking forward to following this thread and seeing the finished article.

Cheers dude slowly getting there!
 
Whilst I wait to do the electrics etc, I finalised the design on the kitchen/bed setup, got the material for it (which was a massive pain in the ass!) and got the parts cut... no going back now :eek:


It started with the floor panel... I decided to ditch the idea of keeping the lashing loops accessible as the rear most ones would end up under drawers, so wouldn't really be usable. So I used the T6 VW Bodybuilder drawings to move the holes and make them smaller to just be able to secure the floor panel down on the 4 mounting points, It was a bit of a risk, as taking measurements from a scale drawing doesn't always work out... but luckily they lined up perfectly... RESULT!

View attachment 73840


Next up was assembling some of the upright panels which form the storage boxes behind the Kombi seats:

View attachment 73841


Then the rearmost section uprights, which form the spaces for the pull out kitchen, water tank, 12v cool/fridge box and some more storage:

View attachment 73842

Cool Box and water tank in place, piece on top is to hold the mattress in place when it is set up as a seat. I will post more on this once I have it fully sorted...

View attachment 73843


Pull out kitchen in action and testing the mattress size..

View attachment 73844


Thats pretty much all for now... I have picked up some nice new wheels today, but I need to decide what I am doing with them before sharing more on these and I have some coil-overs waiting to go on when I do the wheels :cool:

Peace out for now!

What are the black things fitted into the edge of the ply - some sort of fixing?

Lovely build - carpentry is stunning. I’d thought of a set of modular ply boxes for a bed base which can be removed easily - its just storing them when not in use!

Keep the updates coming!

Regards
Ian
 
Back
Top