You are using an out of date browser. It may not display this or other websites correctly.
You should upgrade or use an alternative browser.
You should upgrade or use an alternative browser.
California with solar panel
- Thread starter Cooper
- Start date
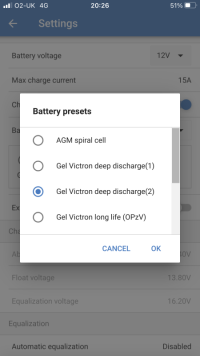
that pre-set id ok for a SLA AGM battery.
post a few pics of your setup and battery / connections and well have a look.
post a few pics of your setup and battery / connections and well have a look.
Ok I’ve left it on the Gel Victron deep discharge (2)
I’ve just unplugged the EHU and got it out of the garage and into some brilliant sunshine. Also turned the fridge on and set it to MAX to give the system something to do.
The onboard display says this….
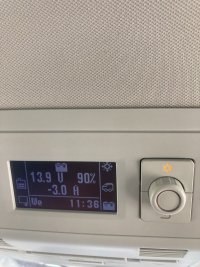
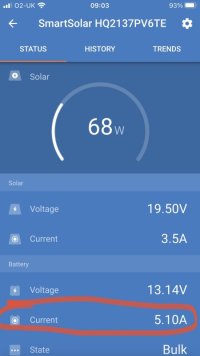
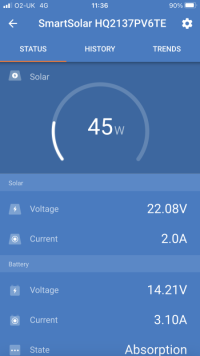
The victronconnect app says this
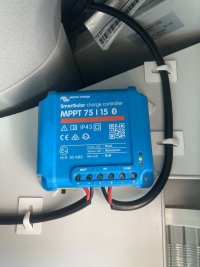
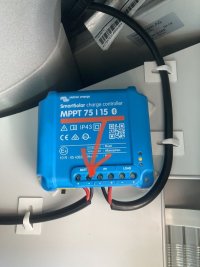
I’ve got this MPPT
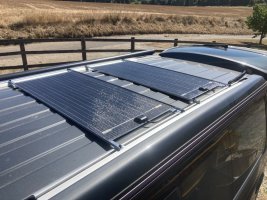
And these pannles. 100w each.
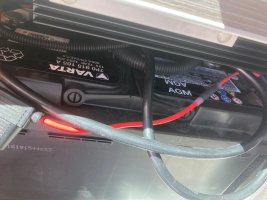
This is the leisure battery it’s connected to.
All from solar solutions.
Do my displays look about right? I was expecting to see more “W’s” from the solar panels.
I’ve just unplugged the EHU and got it out of the garage and into some brilliant sunshine. Also turned the fridge on and set it to MAX to give the system something to do.
The onboard display says this….

The victronconnect app says this

I’ve got this MPPT

And these pannles. 100w each.

This is the leisure battery it’s connected to.

All from solar solutions.
Do my displays look about right? I was expecting to see more “W’s” from the solar panels.
Gotcha...
Your mppt is showing its in "absorption" stage ... Which is decreasing current for a fixed voltage. (14.2v )
That's why your seeing low wattage.
Basically your battery is full.
You need to turn on more loads.....
Or drain the battery down more.....
This will then kick your charger into "bulk" mode,. That will make the mppt go into max mode and pull all the power it can from solar.
No (well sort of). In red is 5.10A that is being produced by your solar and going to the battery.
That will be going into charging the battery and running the fridge/loads.
Try switching off the FF ridge to see how that effect s the reading .
I'd expec the reading to drop.
That will be going into charging the battery and running the fridge/loads.
Try switching off the FF ridge to see how that effect s the reading .
I'd expec the reading to drop.
You battery is showing 13.14v so still almost full...
That's why your still showing low solar yeild.... Also notice the solar is in bulk mode.
That's why your still showing low solar yeild.... Also notice the solar is in bulk mode.
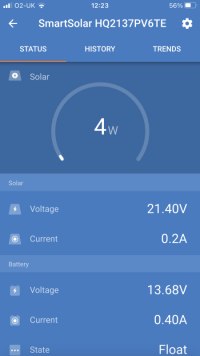
Yes your batterys are full and charger in float mode .... So low solar watts shown.
****
If you have 2 leisure battery and they are directly connected to each other..... Then you can use 1 bm2 unit.
Then fit a second one to the starter battery.
****
If you have 2 leisure battery and they are directly connected to each other..... Then you can use 1 bm2 unit.
Then fit a second one to the starter battery.
You need to connect the negative to chassis if you want the camper display to show the draw correctly, as you have connected the negative direct to the battery it is not going through the shunt.Ok I’ve left it on the Gel Victron deep discharge (2)
I’ve just unplugged the EHU and got it out of the garage and into some brilliant sunshine. Also turned the fridge on and set it to MAX to give the system something to do.
The onboard display says this….
I’ve got this MPPT
This is the leisure battery it’s connected to.
View attachment 168339
All from solar solutions.
Do my displays look about right? I was expecting to see more “W’s” from the solar panels.
If you have mounted the victron in the top rear cupboard there is a nice chassis bolt in there you can use.
@Dellmassive and its a Lensun...My 100w semi-flexible panel has never produced over 30W in bulk mode
I have also connected my negative from my new MPPT controller direct to the battery (Bilbo’s with Sargent EC328) so would it be better if I connected neg to chassis or doesn’t it really make a difference?You need to connect the negative to chassis if you want the camper display to show the draw correctly, as you have connected the negative direct to the battery it is not going through the shunt.
If you have mounted the victron in the top rear cupboard there is a nice chassis bolt in there you can use.
@Loz 30w from a 100w panel sounds low.@Dellmassive and its a Lensun...
I'd expect 50-80w.
Have you tried metering the OCV, then ISC seperate with a meter.?
...
While we have good weather.... Try disconect panel from the mppt and read volts in direct sunlight. ( VOC )
Then dead sort the panel and meter the Amps...
You should get the rated ISC, example, 5A , 8A etc.
Post your readings....
I've got a couple of 100w lensuns, I'll do the same and compare results.
If you have a shunt for battery monitoring (as the Cali does) then all charging devices should have the negative connected to the chassis (or chassis side of the shunt)I have also connected my negative from my new MPPT controller direct to the battery (Bilbo’s with Sargent EC328) so would it be better if I connected neg to chassis or doesn’t it really make a difference?
To get a measure of what your panels will generate, you need a load on the MPPT output, if the batteries are fully charged, it won't do much.
Try plugging something into the inverter which maxes it out, then put a max load on every socket in the living area of the van, all lights on, fridge on full etc. ... aiming for about 16A draw from the batteries - then point the back of the van at the sun and put the roof up.
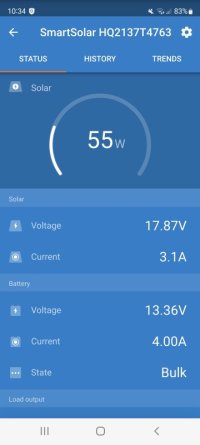
From the 3 weeks since my installation, my van uses about 0,4kWh from the solar each day, so my 310W array is a bit of overkill - best yield so far was 0,78kWh after it was shut in a ferry for 17 hours with the fridge on.
Highest output was 214W.
Would you be referring to this bolt?You need to connect the negative to chassis if you want the camper display to show the draw correctly, as you have connected the negative direct to the battery it is not going through the shunt.
If you have mounted the victron in the top rear cupboard there is a nice chassis bolt in there you can use.
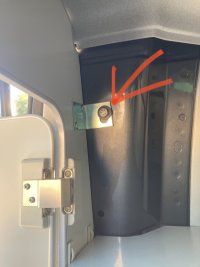
Do I just need to run this wire to the above bolt rather than the Batt - terminal? Or a link between the Batt - terminal and the bolt?
Behind the panel holding the circuit breakers for the external 240V is an earth point on the rear pillar. The plastic panel with the circuit breakers is held on by double-sided adhesive strips, constant pulling will peel them away and to re-fit just clean it up and fit new strips. This is the earth point where the 240V earth is connected, just don't drop your ring-spanner down the wheel-well like I did - took me ages to fish it out with a coat hanger.Would you be referring to this bolt?
View attachment 168548
Do I just need to run this wire to the above bolt rather than the Batt - terminal? Or a link between the Batt - terminal and the bolt?
View attachment 168550
Another top-tip is remove all the shelves and their plastic support clips - 2 fell into the wheel well on my van and they cost €9 each!!!.
You can also get at the earth through the external 240V socket on the side of the van (4 screws) but you need to be a trained gynaecologist to connect anything.
PS: Yes, it's the batt -ve that you run to the earth point.
From that terminal to that bolt yes, just disconnect the one to the battery.Would you be referring to this bolt?
View attachment 168548
Do I just need to run this wire to the above bolt rather than the Batt - terminal? Or a link between the Batt - terminal and the bolt?
View attachment 168550
Similar threads
- Replies
- 5
- Views
- 241
- Replies
- 8
- Views
- 402
- Replies
- 13
- Views
- 354

