Deaky’s Kombi to Camper journey

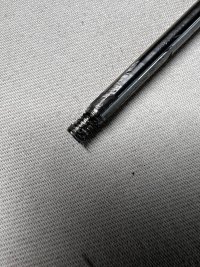
I've had a rattle from my roof for a while, I thought it was the power rams I'd fitted knocking on the metal roof cassette so tried fitting a rubber stopper under them. This made no difference. Eventually I traced the issue to the solid meta rods that hold the cantilever roof bed up in my HiLo. When the bed is dropped down and the rods have no load on them they rattle on the studs. On closer inspection I noticed that one of the ball stud sockets was loose and the thread on the rod chewed up. I tried to screw the sockets on to shorten the length of the rods and put them under tension when the bed was dropped but it didn't work.

This is the state of the threads.
IMG_0733.jpg

I'd been mulling over swapping them for gas struts for a while and while at Camper Jam I noticed other roofs with the same solution. The new 'HiLo' has gas struts instead of fixed rods. A cheeky pic got a similar spec.

My fixed rods are 610mm long center - center, from my 'research' if needed 8mm rods. Closest I could get to that length is a 280mm stroke strut with a 325mm body giving a total length of 605mm, by adding a 18mm ball joint socket to each end makes a total length of 641mm center - center. So when I drop the bed it compresses the springs by 30mm resulting in no more rattles. I went for 250N spring force. Works perfect.
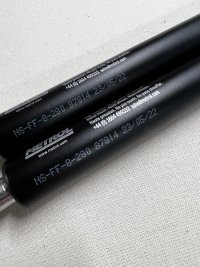
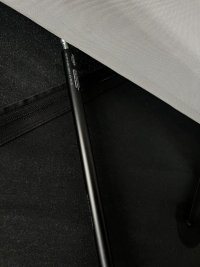
IMG_0728.jpg

IMG_0730.jpg
 
I didn't realise they had made changes throughout, but it does explain the difference in fiberglass over the metal frame too on mine. If you want me to check anything on my roof let me know :thumbsup:
 
@Deaky when you say 'new Hilo' are you referring to the Horizon roof?
@Cswminty who fitted your roof and is it Horizon or an original Hilo?
 
I purchased a USB retention kit from @Absolut5 when I brought my new head unit. It replaces one OEM USB in the dash, but I have 2 and a splitter box……. So I hatched a cunning plan.

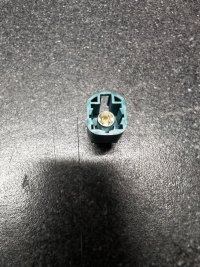
I got myself a fakra socket, the same as the one on the old head unit and connect that to the USB output on the new HU. At the same I’ve I’m replacing the wireless charger I fitted in the cubby hole, it’s old tech and even though I have it connected to a 10a 12v-5v buck convertor it won’t reliably charge my power hungry iPhone.

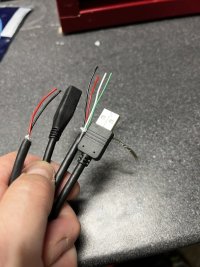
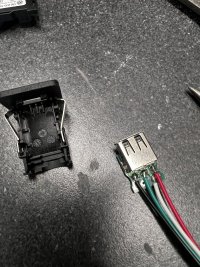
I found a USB extension lead in my cables box and cut it in half. The socket will connect to the buck convertor and the plug to the new HU and fakra socket

IMG_0752.jpeg
IMG_0748.jpeg

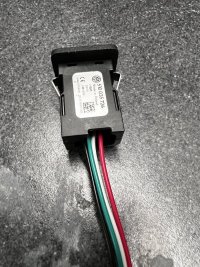
I found the pin outs for the USB fakra on the discover media (1 data+, 3 data- and 4 -ve) +5v comes through the quadloc to the USB splitter and not down the fakra cable, so I added a pin in the quadloc to send +5v from the buck converter that would have originally come from the discover media

IMG_0754.jpeg

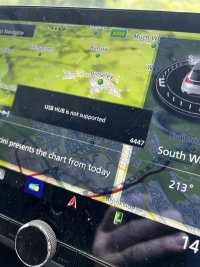
after a bit of fiddly soldering I was ready to plug it all in only to see this message

IMG_0755.jpeg

Shite….
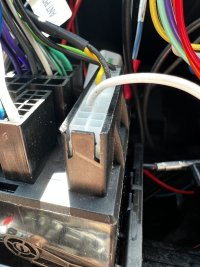
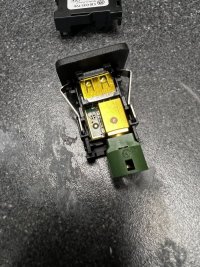
So I’ve gone back to the USB retention kit. Simple to fit, remove the pcb from the dash socket and replace it with a new one

IMG_0758.jpeg
IMG_0757.jpeg

The new pcb needed a minor bit of fettling to fit

IMG_0759.jpeg

now I have a fully functioning OEM USB in the centre dash and as I left the 5v in place the USB in the glove box will still charge.

I've fitted a small mous mag mount charger to the bottom of the centre cubby and as I’d added a USB socket to the buck convertor this has plugged straight in without having to make any modifications

Not quite the result I was hoping for but you never know if you don’t try :p
 
Last edited:
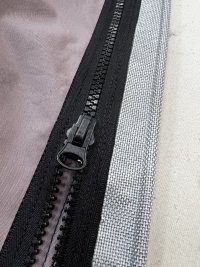
Added a second zip off Kador strip to the Railsail. Off to Cornwall this weekend and want to drive the van away. Rather than completely dismantle the sail I had an idea to add a couple more guy ropes to it to enable the poles to stand on their own then unzip the sail from the van. Then zip it back on when we get back. I'll report if it works in a few days :cry:

IMG_0815.jpg
 
  • Like
Reactions: CAB
Added a second zip off Kador strip to the Railsail. Off to Cornwall this weekend and want to drive the van away. Rather than completely dismantle the sail I had an idea to add a couple more guy ropes to it to enable the poles to stand on their own then unzip the sail from the van. Then zip it back on when we get back. I'll report if it works in a few days :cry:

View attachment 207902
Nice sewing @Deaky - how many more talents are there, that we don't yet know about? :cool:
Enjoy you Cornish getaway...:thumbsup:
 
Nice sewing @Deaky - how many more talents are there, that we don't yet know about? :cool:
Enjoy you Cornish getaway...:thumbsup:
:cry: I had to have the machine on real slow. If our machinists had seen me do it they'd of really ripped the pi$$
 
A little more work on the hookup today. I’ve sent the original charger back. It was a 30a 3 output Victron charger. My original idea was to use it to charge my leisure battery and should I require it the starter battery too. I assumed that I’d be able to control the outputs using the Victron app. You can’t. Also, any batteries connected to it have to be the same type, you can’t charge an AGM starter and a lithium leisure battery. So I’ve brought 2 separate chargers a 4a and 15a Victron bluesmart IP65.

These have a much higher IP rating so I’m happy to fit these under the bonnet.

The 4 amp is for the starter, it’s smaller than the 15a and tucks nicely behind the battery.

View attachment 64044

View attachment 64045

I’ve fitted the leisure battery charger under the scuttle panel, there is loads of room under there and because the charger is IP65 rated, it doesn’t matter if it gets wet.

View attachment 64046

View attachment 64047

There is an earth point under the scuttle so I’ve connected the -ve outputs of both chargers to this and also added an earth bond from the consumer unit.

View attachment 64048

Because I now have two chargers I’ve added another breaker so I can switch them on independently.

View attachment 64049

View attachment 64050

I’ve drilled another hole into the van as the plenum grommet is full with the drain from the Hilo. The +ve for the leisure charger is fed through to the inside, ready for me to continue tomorrow..

View attachment 64051
Hi @Deaky
Did you use a buss bar in the mini consumer unit at all?
 
Hi @Deaky
Did you use a buss bar in the mini consumer unit at all?
Nah, I used wago connectors. You can see them in this pic

1d5ef4a2-407b-4813-9a53-ddd13a5c0c6a-jpeg.64049
 
Back
Top