I’ve just fitted one of these and found this guy’s video very useful for working out which fuse to piggy back on, where to conveniently pick up the earth point and also routing the wiring.
Big thanks to Del (massive) for his very informative thread about picking up power
LINKY

My cable route was
Camera mounted just to the n/s of the rear view mirror
Cable along the headlining/ screen join
Down the inside of the N/S A pillar
Behind the black airbag panel - pick up the earth there as per video
Red cable then down to bottom of passenger glove box assembly
Along the join with the black vent panel,
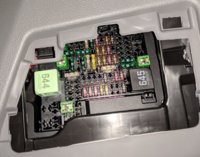
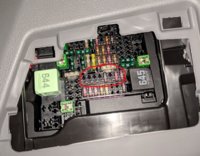
Tuck inside the fuse box cover
Viola!
Check out the vid first and then these points to notewill make more sense.
1. Use proper trim tools. Some of the plastics are quite a tight fit and need a hefty tug, using a blunt metal tool as I’ve always previously done WILL damage your panels.
2. The headlining can be gently prized away from the screen and the wire easily tucked beneath the join
3. Take a pic of the fuse board beforehand!
4. The centre column of fuses are switched, I used the top one, a 15amp, to piggy back from.
5. You don’t have to remove the nearside A pillar completely, but you need to take the grab handle off to obtain the flex in the panel to tuck the cable under.
6. I bundled the cable together and zip tied the bundle, wedging it in the soundproofing- make sure the excess cable won’t rattle or fall out.
7. With care you can feed the positive cable under the black plastic vent panel that abuts up to the grey passenger glove box assembly
DO NOT SWITCH THE IGNITION ON IF YOUVE DISCONNECTED THE SIRBAG CONNECTOR (and you can carefully work with it connected anyway!)
Big thanks to Del (massive) for his very informative thread about picking up power
LINKY

My cable route was
Camera mounted just to the n/s of the rear view mirror
Cable along the headlining/ screen join
Down the inside of the N/S A pillar
Behind the black airbag panel - pick up the earth there as per video
Red cable then down to bottom of passenger glove box assembly
Along the join with the black vent panel,
Tuck inside the fuse box cover
Viola!
Check out the vid first and then these points to notewill make more sense.
1. Use proper trim tools. Some of the plastics are quite a tight fit and need a hefty tug, using a blunt metal tool as I’ve always previously done WILL damage your panels.
2. The headlining can be gently prized away from the screen and the wire easily tucked beneath the join
3. Take a pic of the fuse board beforehand!
4. The centre column of fuses are switched, I used the top one, a 15amp, to piggy back from.
5. You don’t have to remove the nearside A pillar completely, but you need to take the grab handle off to obtain the flex in the panel to tuck the cable under.
6. I bundled the cable together and zip tied the bundle, wedging it in the soundproofing- make sure the excess cable won’t rattle or fall out.
7. With care you can feed the positive cable under the black plastic vent panel that abuts up to the grey passenger glove box assembly
DO NOT SWITCH THE IGNITION ON IF YOUVE DISCONNECTED THE SIRBAG CONNECTOR (and you can carefully work with it connected anyway!)


