Thanks to @Robert and others on this thread:

 www.t6forum.com
Fitting retrofit LED mini-projectors to H4's is now completely doable, and very good value for the light output: (H4 LED mini-projector on the left, H4 halogen reflector on the right)
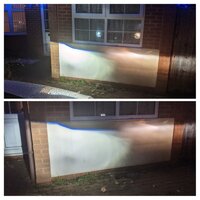
The projectors I used are these ones: Bi-LED Projector Lens Car Headlight 1.5’’ H4 9003 Canbus Cooling Fan Retrofit | eBay
I test-fitted the passenger side on the van but to fit the ballast you need to remove the headlights from the van.
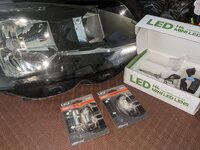
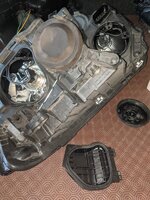
I started by fitting Osram LEDs for the DRLs:
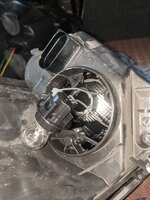
I did a comparison of Osram and Philips replacement LED lamps, to get the DRL out you twist the fitting a quarter turn anti-clockwise and it pops out.
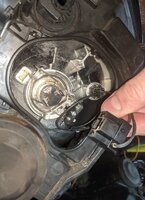
On to the main event, first remove the halogen H4 bulb by pulling the connector off the back, pushing the spring clip in and to the side and remove the bulb.
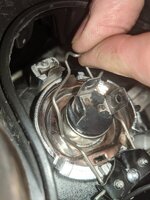
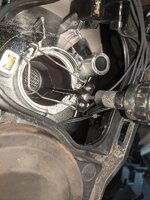
Now you need to remove the lamp guard with a small torx bit.
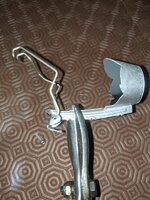
Then cut off the guard to retain the mount for the spring clip. It doesn't matter how far in you cut, it still falls apart as it's not soldered together.
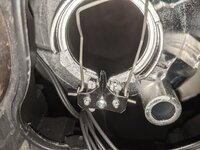
It re-attaches to the reflector which holds the two parts back together. While we're on the subject, try not to let any dirt or debris fall into the headlight. If it does, turn it upside down and shake it back out.
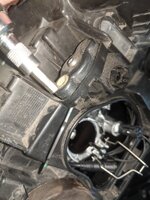
Now we need to squeeze the ballast into the housing in the void behind the reflector. Wind the adjustment screws using a cross head or hex driver until the ballast slides in. I had to shave a tiny piece of plastic off one part of the housing on one side, using insulating tape as a sticky trap to catch the debris.
I've fitted the ballast with the H4 connector end wrapped over the top of the (in-out) adjustment screw post.
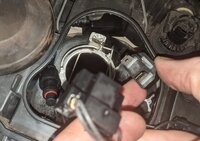
Attach the H4 connector to the standard wiring and push the connectors into the space on the outer side of the headlight.
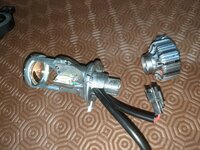
Next move to the mini-projector. Remove the fan module from the end of the bulb assembly, after disconnecting it.
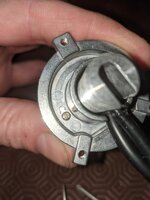
Undo the two screws holding the H4 template to the assembly and move to the anti-clockwise setting. This makes the following change on this kit:
Now insert the bulb into the headlight and thread the cables through the spring clip:
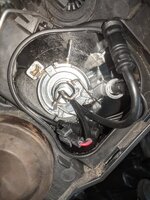
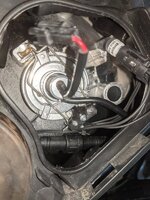
Fully seat the bulb and latch the spring clip onto the hook.
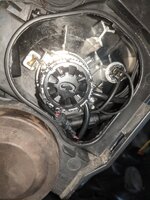
Connect the bulb connector to the ballast and screw on the fan module and reconnect to the bulb. Tuck all the wiring away (I used the sidelight wiring to keep the bulb wiring hooked down).
On a side note, the side light LED has polarity so you won't know if it's connected right until you put the headlight back on the van. Be ready to test it before bolting in the headlight.
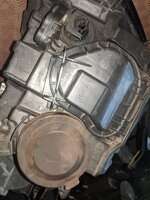
Close the cap on the back of the headlight and it's ready to fit back on the van.
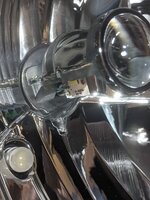
Here's the interior of the headlight with the cut down headlamp guard peaking out.
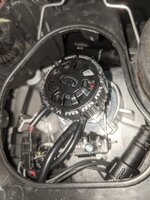
Here's the passenger side headlight, a mirror image of the set above.
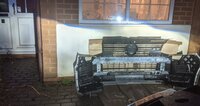
Here's the dipped beam pattern after a quick adjustment. A visit to an MOT centre should sort it out later.
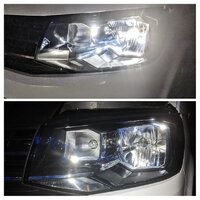
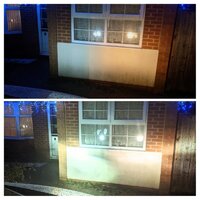
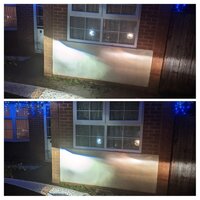
This is the LED full beam pattern (on left) with halogen H4 on the right. And DRL with sidelights comparison above (LED vs incandescent).
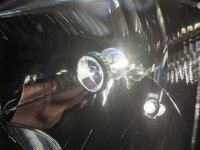
Good, huh?
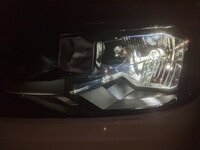
Can't have too many pictures, I'm sure!
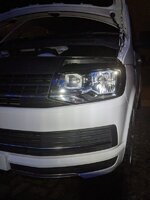

Bi Xenon Or Led Projector Retrofit
I think if I knew this before I have done my T6 LED retrofit I would reconsider the whole thing. €140 doesn't equal €1400 :eek: But anyways I don't regret :cool:. Experience is experience, worth every penny ;)
Fitting retrofit LED mini-projectors to H4's is now completely doable, and very good value for the light output: (H4 LED mini-projector on the left, H4 halogen reflector on the right)

The projectors I used are these ones: Bi-LED Projector Lens Car Headlight 1.5’’ H4 9003 Canbus Cooling Fan Retrofit | eBay
I test-fitted the passenger side on the van but to fit the ballast you need to remove the headlights from the van.


I started by fitting Osram LEDs for the DRLs:

I did a comparison of Osram and Philips replacement LED lamps, to get the DRL out you twist the fitting a quarter turn anti-clockwise and it pops out.

On to the main event, first remove the halogen H4 bulb by pulling the connector off the back, pushing the spring clip in and to the side and remove the bulb.


Now you need to remove the lamp guard with a small torx bit.

Then cut off the guard to retain the mount for the spring clip. It doesn't matter how far in you cut, it still falls apart as it's not soldered together.

It re-attaches to the reflector which holds the two parts back together. While we're on the subject, try not to let any dirt or debris fall into the headlight. If it does, turn it upside down and shake it back out.

Now we need to squeeze the ballast into the housing in the void behind the reflector. Wind the adjustment screws using a cross head or hex driver until the ballast slides in. I had to shave a tiny piece of plastic off one part of the housing on one side, using insulating tape as a sticky trap to catch the debris.
I've fitted the ballast with the H4 connector end wrapped over the top of the (in-out) adjustment screw post.

Attach the H4 connector to the standard wiring and push the connectors into the space on the outer side of the headlight.

Next move to the mini-projector. Remove the fan module from the end of the bulb assembly, after disconnecting it.

Undo the two screws holding the H4 template to the assembly and move to the anti-clockwise setting. This makes the following change on this kit:

Now insert the bulb into the headlight and thread the cables through the spring clip:


Fully seat the bulb and latch the spring clip onto the hook.

Connect the bulb connector to the ballast and screw on the fan module and reconnect to the bulb. Tuck all the wiring away (I used the sidelight wiring to keep the bulb wiring hooked down).
On a side note, the side light LED has polarity so you won't know if it's connected right until you put the headlight back on the van. Be ready to test it before bolting in the headlight.

Close the cap on the back of the headlight and it's ready to fit back on the van.

Here's the interior of the headlight with the cut down headlamp guard peaking out.

Here's the passenger side headlight, a mirror image of the set above.

Here's the dipped beam pattern after a quick adjustment. A visit to an MOT centre should sort it out later.


This is the LED full beam pattern (on left) with halogen H4 on the right. And DRL with sidelights comparison above (LED vs incandescent).

Good, huh?

Can't have too many pictures, I'm sure!


