You are using an out of date browser. It may not display this or other websites correctly.
You should upgrade or use an alternative browser.
You should upgrade or use an alternative browser.
Mojave conversion
- Thread starter drew_greenday
- Start date
So when I was sorting out the electrics, ensuring I had everything ready for when I have the units, I done a mock build of the inverter. I have bought a relay to switch on and off the inverter remotely. I wired it up without the instructions as they hadn't come with the kit. It worked perfectly. Then I received the instructions and changed the wiring to how it was explained. Unknown to me the kit had been sent out with an on on switch, causing two blown fuses and a bit of smoke. After some continuity checking and head scratching I spoke to the kit seller and he is replacing all of the low voltage wires and the switch with a correct one.
Hopefully that will be all the sparks I see.
Hopefully that will be all the sparks I see.
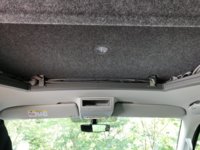
Touch led fitted for when I'm up in the roof, will be independent to the main lights
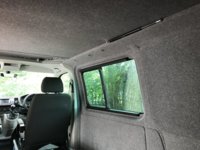
Internal view of the OEM window, far more light than an aftermarket version, and looks a lot better.
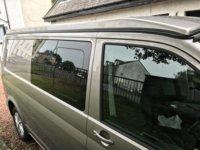
Outside view, will keep it nice and clean to avoid any potential leaks.
I pick up the units tomorrow so will be busy over the weekend.
The guy who fitted the roof had one lying about. Not the answer you were after sorry. I would imagine tps could be the place, or get in touch with exploriaHi Drew. Good work so far. Just a quick one - where did you source the OEM window?
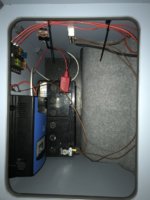
Been a busy three days, picked up the units from the depot on Friday morning and haven't stopped since. Been worth it. Units are fully in and everything works! Above is the battery cupboard, all the electrics will be hidden in there.
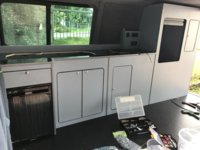
Units screwed down and fitted to the side of the van. Fridge fitted, screwed through the side of the fridge under the four blanks. Nice and tight and doesn't move at all. Switch panel fitted and all wired correctly. Battery monitor installed, twin USB and three pin sockets.
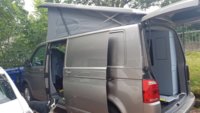
Here's an outside view with the roof up.
I've gone at it full time for three days as I'm offshore tomorrow and needed space in my dining room! Knees are knackered and I have cuts everywhere.
When I'm back in two weeks or so I'll fit the hob and sink and sort the niggly things with the build. Then will head away for a weekend in it.
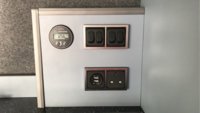
The switch panel all connected and working, was a bit of a pain in the ass to get square and tight! I hope I don't need to go in anytime soon I have a switch for lights, USB, pump and inverter. The victory battery monitor is great also loads of information
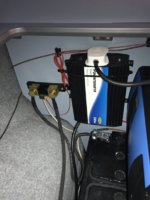
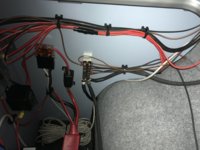
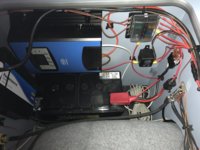
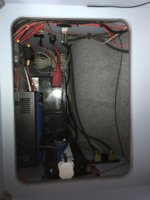
Been a busy day since coming back from offshore. The battery bay is finished I think, it is a very busy area and trying to find out how to route everything and it look near as tough.
DC-DC charger and fuse box fitted on the near side. Inverter and shunt on the right wall. Earth block, inverter relay and dc-dc fuse on the left wall. I will hide all the cables that are in the cupboard with some spywrap.
Will upload some pictures of the units when they are all finished, screwed down, straight and clean!
Fitting the Alec unit tomorrow and gas install ready for a quick night away over the weekend.
Finally finished the unit install, been a long slog and anyone that says two days for the units doesn't include all the other parts, gas, electric, curtains etc. Either I was really slow or it takes about four in total.
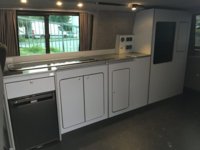
Really happy with the design and colour, my partner picked the work too and we paid a bit more as it's non standard, goes well with the floor and black fridge/tambour door.
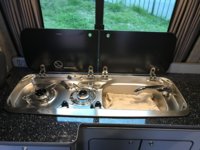
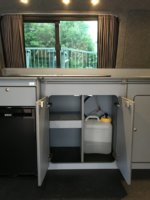
Smev 9222 installed, takes up less space than I originally thought, the depth of the sink is the same as the space above the door. Obviously you need a water bottle inside but that is negligible.
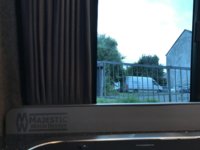
Plug for the designer. Wasn't going to sticker up this build but he deserves a few, plus it matches the curtain/carpet colour.
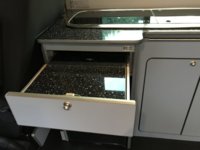
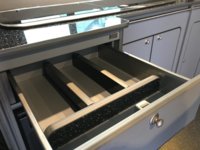
Drawer has pre-made spacers for cutlery and a chopping board fitted to the top!
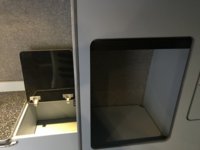
Gas bottle is under the lift lid via a fake shelf! Easily accessible from inside for turning on and off. The battery bay is inside the tambour door space via another fake shelf.
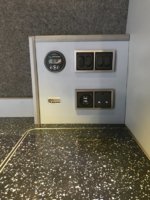
Switch panel fitted. I will hopefully fit the heater timer in the space where the sticker is. 240v socket is raised to allow plugs with wires from the bottom to fit. This is linked to the inverter as I haven't got a outside supply yet.

Really happy with the design and colour, my partner picked the work too and we paid a bit more as it's non standard, goes well with the floor and black fridge/tambour door.

Smev 9222 installed, takes up less space than I originally thought, the depth of the sink is the same as the space above the door. Obviously you need a water bottle inside but that is negligible.

Plug for the designer. Wasn't going to sticker up this build but he deserves a few, plus it matches the curtain/carpet colour.


Drawer has pre-made spacers for cutlery and a chopping board fitted to the top!


Gas bottle is under the lift lid via a fake shelf! Easily accessible from inside for turning on and off. The battery bay is inside the tambour door space via another fake shelf.

Switch panel fitted. I will hopefully fit the heater timer in the space where the sticker is. 240v socket is raised to allow plugs with wires from the bottom to fit. This is linked to the inverter as I haven't got a outside supply yet.
Last edited by a moderator:
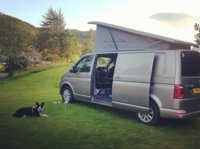
Went for a weekend away with the girlfriend and dog! Took the scenic drive up to Oban, stopped off to do some climbing in the way then stayed up at Roseview campsite.
Took a walk up two munro's the following day in the rain.
Was great to get out and enjoy the conversion. Looking forward to Kiravans getting RIB's back in stock though.
Yip, he is savage!
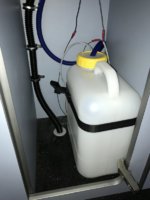
Been doing a few small jobs on the van while I see them. I've fitted the waste water pipe out the van. I had a look and measured where it would poke out, then controversially drilled from the bottom up as I could get as close to the chassis as I wanted. I knew I wouldn't hit any of the units. I fitted a gas drop out vent as a surround to the pipe. The waste pipe fitted perfectly.
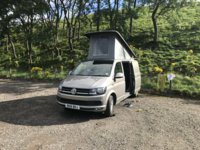
Had a night away last night up in glen clova before a spot of climbing today. Was great with the window down in the pop top being woken up by the sun and seeing hills all around.
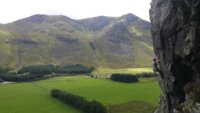
Great place to climb, quiet and no mobile reception! Weather was hit and miss, standard Scottish summer.
Great job, looks fantastic
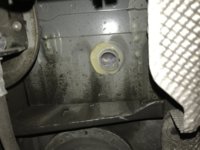
Drilled the gas drop out vent this afternoon, sits nicely in the middle of the gas cupboard. I drilled a 32mm hole, cleaned up the edges, applied anti rust paint then pushed the gas drop out vent together with some sealant/adhesive to the underside to stop it possibly falling off.
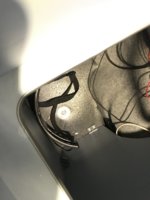
We're away tonight in ge van and unfortunately the weather is predicted to be biblical rain. Oh well. Best get the waterproofs out.


We're away tonight in ge van and unfortunately the weather is predicted to be biblical rain. Oh well. Best get the waterproofs out.
Last edited by a moderator:
The first photo in this set really shows the extra space you can utilise in a LWB T6, very spacious.Finally finished the unit install, been a long slog and anyone that says two days for the units doesn't include all the other parts, gas, electric, curtains etc. Either I was really slow or it takes about four in total.
View attachment 11507
Really happy with the design and colour, my partner picked the work too and we paid a bit more as it's non standard, goes well with the floor and black fridge/tambour door.
View attachment 11506
Smev 9222 installed, takes up less space than I originally thought, the depth of the sink is the same as the space above the door. Obviously you need a water bottle inside but that is negligible.
View attachment 11505
Plug for the designer. Wasn't going to sticker up this build but he deserves a few, plus it matches the curtain/carpet colour.
View attachment 11504
View attachment 11503
Drawer has pre-made spacers for cutlery and a chopping board fitted to the top!
View attachment 11502 View attachment 11500
Gas bottle is under the lift lid via a fake shelf! Easily accessible from inside for turning on and off. The battery bay is inside the tambour door space via another fake shelf.
View attachment 11499
Switch panel fitted. I will hopefully fit the heater timer in the space where the sticker is. 240v socket is raised to allow plugs with wires from the bottom to fit. This is linked to the inverter as I haven't got a outside supply yet.
Love the laminate choice and flooring. I have just had a polyfloor put down in a spa room at work, chose the dark grey/black similar to yours and it really gives it a classy look.

The first photo in this set really shows the extra space you can utilise in a LWB T6, very spacious.
Love the laminate choice and flooring. I have just had a polyfloor put down in a spa room at work, chose the dark grey/black similar to yours and it really gives it a classy look.
The design of the units has utilised all the space. We have 'spare' cupboards at the moment and don't even have the under bed storage yet! LWB is the way to go definetly.
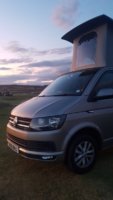
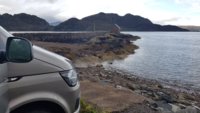
Took a trip up north this last week, getting used to the van now and not found that many issues. The oem window leaked, but the rain and wind were horrific. I cleaned it up and applied some more Vaseline and it worked for the remaining days.
Still waiting on a RIB, hopefully be in stock somewhere soon.
Similar threads
- Replies
- 13
- Views
- 2K
- Replies
- 1
- Views
- 1K

