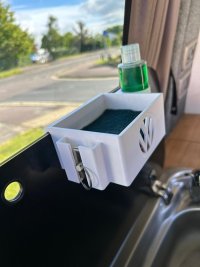
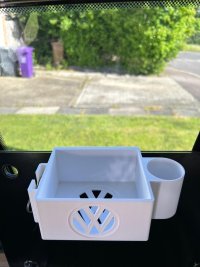
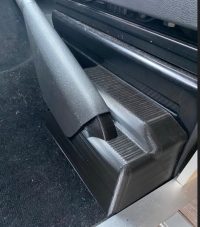
Show us your 3D printed modifications

Morning

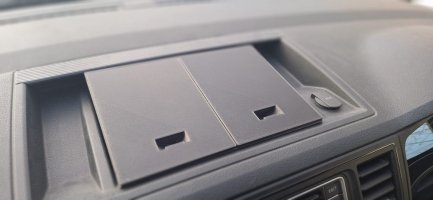
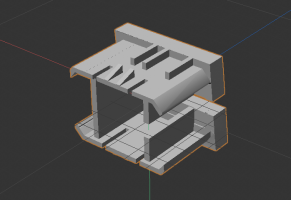
Here's an STL (change the suffix from .txt to .stl) for the T6's top middle button blank with a side slide-in cable slot. This is useful if you find yourself in the same situation as me, where I had to go direct with a USB cable from the head unit to the dash-mounted phone without passing through a USB socket (which the new generation of iPhones don't seem to like).

Go ahead and install your cable by leaving the OEM blank out - this blank can be fitted later without having to take everything apart. I refined the geometry of this and it snaps in beautifully and doesn't budge. Would recommend black PETG for the filament. PLA would probably work for a couple of years before it decays. If you're after a 100% match with finish, use a matt black spray layer over the top.

It's optimised for a USB cable diameter that measures 3.28mm when compressed slightly. If you're keen to get the right compression fitting, I used a Belkin Boost Charge Pro Flex cable.

Cura reports a missing polygon but it slices OK if you put the face pointing downward. I can't be bothered to find the missing polygon since it works.

Enjoy!

Screenshot 2024-02-25 at 09.26.05.pngScreenshot 2024-02-25 at 09.26.16.png
 

Attachments

Hi All,

Was told to add this here.

I don't know about you but shoving the straps into the canvas never fit well with me. I've seen loads of these pop top spool holders online which looked good, I made my own.


image2.jpeg

image0.jpeg


For anyone who has a 3d printer I've made the file available for free on the below link. For anyone looking to buy them then there is loads of different ones on Etsy. Just google VW Pop Top, I myself have no interest in selling anything.

3D printer Link : Printables

Regards,
SkyeCamper
 
Has anyone printed the california heat adaptor to send heat to the pop top? I dont have a printer so looked at some online printing companies but it was rather expensive!

What would something like this cost if you had a printer?

 
Has anyone printed the california heat adaptor to send heat to the pop top? I dont have a printer so looked at some online printing companies but it was rather expensive!

What would something like this cost if you had a printer?

I think you'd need to use ABS to handle the heat. It's more difficult to print with and needs a printer enclosure and fume extraction (so I'm told, never actually tried).
Once things were set up I'd expect it to take up to 24hrs to print all those parts, then it's a faff to buy magnets, tape, hose etc and assemble. I think if someone made them semi-commercially they would be over £100, my guess.

How much is a VW one?
PETG in my opinion would be fine. It doesn't come in contact with the heating element. Worst case you print in PETG it warps a little and then you re print in ABS. Defo not in PLA that will warp
 
I do like a good 3D printed gadget, but that pipe looks like an ugly solution to a problem that doesn’t exist. Warm air is quite good at rising to the poptop without the assistance of a pipe.
 
  • Like
Reactions: Bav
And I think you could replicate quite close with off the shelf cooker hood parts - at least to see if it works:


Solvent weld those, add some sticky foam and bolt some form of hook to it to hang from the top.

If you want to get fancy you can put a kink in with these:


3D printing is neat, but there are a lot of mass produced parts in plumbing and ventilation that can be hardware hacked much quicker and cheaper if you want ducting.
 
Designed myself. I saw something like it and said I like that and off I went ha ha. I sold a few there last week to some lads who wanted one.
 
  • Like
Reactions: Jay
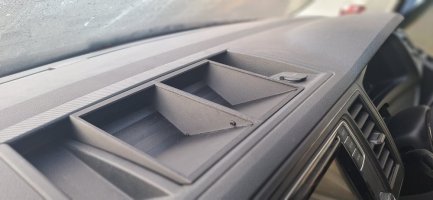
T6 Dash Tray

3.1.jpg

4.jpg

 
Morning

Here's an STL (change the suffix from .txt to .stl) for the T6's top middle button blank with a side slide-in cable slot. This is useful if you find yourself in the same situation as me, where I had to go direct with a USB cable from the head unit to the dash-mounted phone without passing through a USB socket (which the new generation of iPhones don't seem to like).

Go ahead and install your cable by leaving the OEM blank out - this blank can be fitted later without having to take everything apart. I refined the geometry of this and it snaps in beautifully and doesn't budge. Would recommend black PETG for the filament. PLA would probably work for a couple of years before it decays. If you're after a 100% match with finish, use a matt black spray layer over the top.

It's optimised for a USB cable diameter that measures 3.28mm when compressed slightly. If you're keen to get the right compression fitting, I used a Belkin Boost Charge Pro Flex cable.

Cura reports a missing polygon but it slices OK if you put the face pointing downward. I can't be bothered to find the missing polygon since it works.

Enjoy!
View attachment 230758View attachment 230759
I don't suppose you have a design for the ones on the right (top and bottom)?
 
I saw someone mounting the phone to some hidden metal plate behind the trim on facebook. I couldn't figure out where and how it fit with the rest of the trim so I designed and printed a little spacer that evens out the curved A pillar trim and allowed me to mount quadlock phone charger. It requires drilling two holes through the trim.

It worked so great that I did the same on the other side. The print can be done in any material, I used half PETG half some leftover flexible material. I went with flex because it was soooo painful to get the curvature right so in the end I settled on "good enough" and let the flex take care of any imperfections. The mount wobbles no more than your regular vent or arm mount.

The caveat is that mounting the trim back on the pillar is quite finnicky - you have to aim 3 push pins that have slight wiggle at the same time which is not easy. I lost one which fell down behind all the trims and was not recovered and despite that it holds ok on 2 remaining ones.

Later I also took 2m braided usb cable and placed it behind the dash trim and connected via some usb c charger and fuse piggyback so the only wires visible are the wireless charger end. Also used 90deg usb c adapter from china and its even better now than on the picture. Super happy and proud of the result.


1742833200713.png
 
excactly what I am planing to do now, just with different text.
Would you mind sharing the files? Source would be absolutely briliant :)
I've been looking for personalised 6.1 wing badges but never found them
 
I've been looking for personalised 6.1 wing badges but never found them
If I had an exact profile of original one (blueprint or 3d scan) I could design a blank or even try to create a customizable element on thingiverse (never done that but there is such an option, where you could change length and text).
 
Back
Top