Stockwell Camper - Van conversion

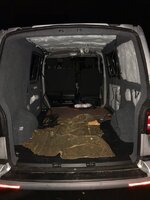
Not looking quite so pretty at the moment but we continue with running the various electrical cables. 12v fuse box is held temporarily in place and cables are run up the drivers side D pillar in to the roof space for the down lights and also the double USB socket we are putting on the small panel on the C pillar.

We have also investigated the cable run to the passenger side C pillar and after plenty of fishing managed to route some protective conduit in to this area, will there be any issue with running a cable for my USB socket next to a 240 cable for a single socket in this conduit?
57003D92-CFF6-4041-9822-D50CA95D500E.jpeg

A3704F8A-5EAD-4F26-B7BF-29A798380F3C.jpeg
 
Great write up and skills. I would love to have the practical skills to be able to do this, but know my limits and get the professionals to do it
 
Really enjoying your updates. I have an identical van but I am a few steps behind you. So far I have removed the bulkhead, got the windows in, sound proofed and insulated and fitted folding bracket to front bench seat today. I’ve bought the same side steps as you to fit and thinking they will go in tomorrow while the front bench is out. However not even thought about the lighting !

Do you have any more information you can give me on the wiring? You mention connecting them to the lights in the rear of the van. Did you connect all 3 steps wires together first before wiring into the lighting circuit?
 
@fidav we are really happy with the steps and their quality, all pretty easy to fit in place. The main side step is the one that maybe doesn’t fit quite so well as it doesn’t have as many retaining clips so we may have to revisit how we secure it in.

As for wiring we soldered new extended wires on to each step joining the two lights together with a separate wire on the big step. We then used piggy back crimp connectors to join in to the wiring loom and connect all 3 steps together. Ran the wires for all steps down the B pillars either side from the loom above sliding door.

Hope my rubbish explanation helps :)
 
We got a few more of the panels carpeted this weekend and a USB socket and 240v plug installed in the small panel on the C pillar, these are yet to be wired up but we are getting close.

Due to needing to wait another 6-8 weeks for our kitchen units we are thinking we will run the wires for the down lights and temporarily fix the headlining panels up with our old trim clips so that we can enjoy the van whilst we wait.

422F0DE7-21F0-4D91-927D-785FC1C307CD.jpeg

A3E21F8E-41CA-4AF2-B0A2-1CADCE52FF2B.jpeg
 
Thanks for the reply. Sorry to ask you more questions but what colour of wire did you connect the white and black to ?
 
I used some 0.5mm2 twin core wire from eBay, so this has a red and a black wire running through it with an extra layer on insulation. I used the black to connect to the black on the steps and the red to the white and then tested the light function with a motorcycle battery.

Just remember to double check which wires in the lighting harness you need to tap in to, I got the info from this forum but out of the 3 wires in the factory lights I think it was the solid brown one that I left untouched as this is a permanent earth.
Thanks ! Where did you get your USB socket?
 
Last edited:
Great thread, really enjoying following your updates. Your conversion looks top notch so far! I’m taking the significantly more expensive option, and dropped my van off this morning for the first phase of its conversion. Will keep an eye on the rest of your build, best of luck with it!
 
Great write up so far. I have been watching with great interest as I’m quite a bit behind you but want same results. At present I have sound deadened, insulated, floor battens down, windows are in. I am all for having a go to fitting the carpet lining to the metalwork but have never done it before. Did you have any issues? I have watched several you tube vids but the professionals make it look easy. Steps look great by the way.
 
Thanks for more positive feedback :)

Carpeting the panels is pretty straightforward, we lay the panel on the carpet and cut around with a good amount of excess, then glued the face of the panel and the carpet and stuck it. This then allowed us to go back round the edge and reduce the excess and cut triangles out in various places to make it easier to fold round and also reduce the amount of carpet where the clips are (getting the clips in is a different story, this is proving quite difficult!)

The van body itself took us a weekend and having 2 people was useful as one sprayed the glue and the other stuck the carpet on, it was way more forgiving than we thought and it didnt stick and set instantly like we feared it might. You are able to pull the carpet back away from the metal if you dont get it right, you may just need to spray more glue on to one of the surfaces.

The videos on YouTube do make it look easy, we mainly followed Coombe Valley's video for guidance starting at the top front corner and working down.
 
First question I have is, I have used an existing power feed from the main battery that was under my passenger seat and rerouted it here, on inspection I believe it is connected to a 50A fuse in the E Box, is it important that I change this to a 30A fuse? I have used 10mm2 cable throughout so this is spec’d higher than the fuse.

I used this way on my T5, the battery went flat when something was left on and the fuse blew, then had to remove the battery to get to the E box to replace it, (40 amp ) I wouldn‘t fit it this way again as it’s a pain to get at, or use a smaller fuse from the point you have connected under the seat so it’s basically sacrificial and easier to access, also yes I would want a more secure fixing on the earth pole to the battery

great build thread
 
@fidav we are really happy with the steps and their quality, all pretty easy to fit in place. The main side step is the one that maybe doesn’t fit quite so well as it doesn’t have as many retaining clips so we may have to revisit how we secure it in.

As for wiring we soldered new extended wires on to each step joining the two lights together with a separate wire on the big step. We then used piggy back crimp connectors to join in to the wiring loom and connect all 3 steps together. Ran the wires for all steps down the B pillars either side from the loom above sliding door.

Hope my rubbish explanation helps :)

Hi, how did you get on with the side step. I’m having bother getting it to fit. The front 2 went in no bother as well !
 
@fidav we found the same to some extent, the front steps reuse the original VW clips and therefore seem to click in to place properly whereas the side step doesn’t. It was a bit of a faff to get it in but it is now sitting pretty well, only the lip that goes over the floor isn’t as flush as we’d like so may end up sticking this down to get the best finish.

Did you manage to wire it all in ok?
 
We had some issues with our barn doors not opening from the inside after we had insulated and fit the new panel, after some concern and research that it could be something sinister we found that one of the connecting rods had come loose and wasn’t sitting properly. A couple of well placed zip ties and some adjustment seems to have solved the issue!

9A15DC4F-96A6-4FEB-BEEE-380F09B1036B.jpeg

BA5C8681-B1AC-4338-ADBB-D6F6A4B7F4BB.jpeg
 
  • Like
Reactions: CAB
We were itching to get some of the 12v components wired in to check it is all working ok and take a step towards a converted van feel, the USB socket is wired in and working on the C pillar and we have made the wiring loom up for the down lighters and all seems to be functioning correctly.

7A63F561-82EB-403C-A6BE-37B00A22D372.jpeg
Roof panels are just thrown up at the moment with the clips we had to hand as it will need to come back down when fitting the kitchen. Turns out there is a bit of a knack to getting these panels up, start on the middle clips and work outwards! This is why the red panel is not fitting as well as the front panel at this stage.

60058F2D-7A40-44F9-BFE4-7425737ECD79.jpeg
 
  • Like
Reactions: CAB
Did you manage to wire it all in ok?
[/QUOTE]
Eventually yes.
Wired all the black to black then the red to white together then switched them on and only one out the 4 lights worked.
Swapped black to white and red to black for the 3 steps then they all worked !!
 
Great build, brings back so many memories.
Over a year later and I'm still converting mine, I hope yours is somewhat quicker. Parts supply is a real challenge right now.
 
Back
Top