Next step. Leisure battery and dc-dc charger arrived from @travelvolts with the dedicated loom. Very happy with this.
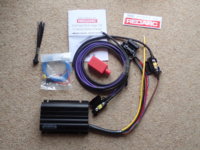
90_redarc.JPG

So yesterday I decided to have a go at the installation, following the instructions on travel volts website.
First job was to feed the lead that connects from the Redarc to the starter battery positive. All was going well until I discovered both grommets suggested in the instructions were already occupied.
Quick chat on the phone and a new route was planned.
So bonnet open, wiper blades off, scuttle plate removed:
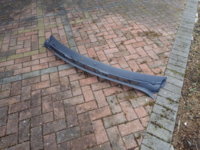
91_scuttle.JPG

Next removed the metal plate behind the battery to locate another grommet. Hot nail to burn a hole in it and I could pass the purple wire through:
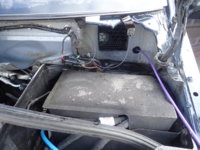
92_redarc_bat_lead.JPG

At the same time I cleaned out a load of dead leaves etc from around the suspension top.

Next fed the wire through the grommet with the OEM loom, tight fit but managed it in the end:
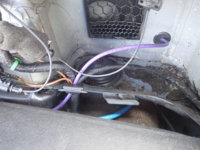
94_under_bonnet.JPG

Then connected the purple lead to a fuse and then to the positive of battery. (note to self -insert pic)

Then back inside and feeding the purple wire under the carpet alongside the OEM loom and blue hookup cable:
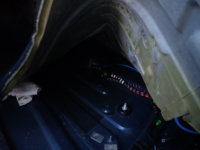
95_under_carpet.JPG

Late afternoon and it started to rain and get cold so I put the carpets back and then wondered why it wouldn't sit flat. Took it back up again and found the white towel you can just see in the pic still there. Removed, carpet back seats all fitted then realised I had forgotten to feed the switching cable to the fuse box. Doh!!! Will all have to come out again.

Had a few non van related things to do this morning. Set off in the van - Oh no Airbag warning light on :(

Got back from jobs, plugged in vcds. Some of the sections were not being detected. Went inside, quick call to Gandan and tried it whilst on the phone. All now working, it seems if you leave the ignition on a while some of the modules go to sleep and the vcds can't talk to them. Anyway reset warning light and all is fine (glad I bought the vcds now).

Weather is cold and wet again so Im going to put off any work today, as Im still watching the battery charge:
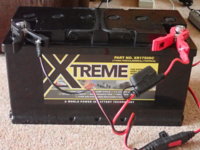
100_leisure_battery.JPG
 
Battery charged and a bit warmer this weekend so a few more bits done.

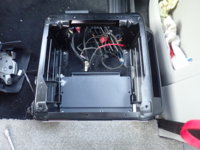
Decided to go for under the drivers seat. (less wires to deal with).

Put a plate in to hold the leisure battery, had make a slight adjustment to both (with an angle grinder) and painted with rust protector.

P4060066.JPG

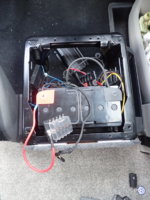
Battery in place and all wired up. Just need to tidy the wires up.
Put the seta back and went to pickup some fuses and test.
Got home lights all the Redarc and everything seems to be working.
Out of interest anyone know what the black box is for just above the positive of the battery?

P4070068.JPG

Next job is to connect a voltmeter. Need to have a think of how to wire a voltmeter to measure both batteries (with an on-off-on 3 way switch). Hints welcome :unsure:

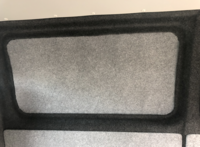
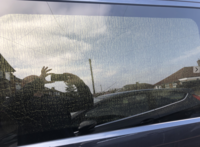
A bit of spare time so decided to use a few of the odds and ends left over from lining the van and come up with some temporary solution until I fit blinds/curtains.

Inside:
Screenshot 2019-04-07 at 16.04.02.png

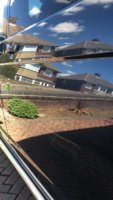
Outside:
Screenshot 2019-04-07 at 16.04.32.png

Quite please with the result. Just needs an edging stitching on. Started ones for the other side window and Tailgate now.
 
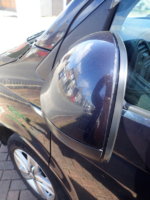
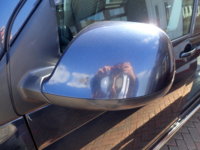
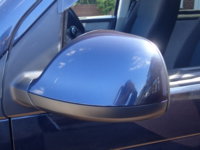
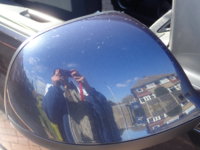
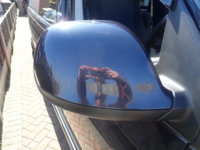
After the surprise of my near side mirror cover falling off in the strong winds a couple weeks ago, I bought new covers for both sides (they were stone chipped anyway).

100_damaged mirror.JPG 101_damagedMirror.JPG

Reasonable weather so decided to have a go.
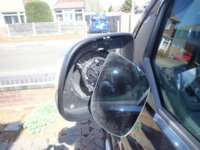
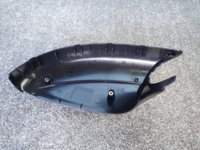
Managed to get the upper off easily, then realised I couldn't get to the T10 screws that held on the lowers without removing the glass. So mirrors adjusted up to get fingers under glass. Came off easier than expected.

103_mirror internals.JPG

Removed the screws, new lower cover on and screws back in place.

104_lower cover on.JPG

Upper cover on carefully, hopefully no clips broken!

105_uppercoveron.JPG

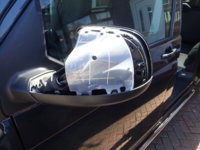
Same on off side, old cover:

106_oldcover.JPG

Same process and new cover on:

107_newcover.JPG

Hardest part for me was getting the T10 screws back in straight.

This is just to show where the inside clips are:
102_newlowercover.JPG
 
You didn’t break any clips!? Right I’m calling at your house next time I need some doing, I never fail :cry: :D
Not on the new covers going on.
The ones that came off didn't have enough clips left to break any :slow rofl:
 
Not much done these last few days apart from researching the next steps on the net.
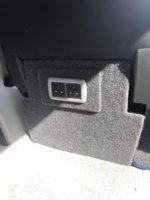
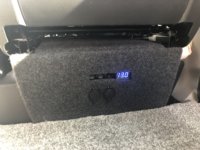
However I did manage to tidy up the trims I made for the under seat electrics. Still might try and squeeze the consumer unit under the driver seat leaving room for audio under the passenger.
AF9C11C0-5076-43BA-96A6-1A26A7614344.jpeg 1B1C2E69-823F-4DF4-8FA9-3399B1579024.jpeg
 
Decided to make a few alterations to the ply panel on the tailgate. Really I should have done these before carpet lining and the job would have been a bit easier.

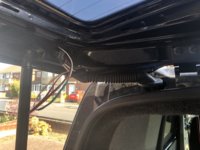
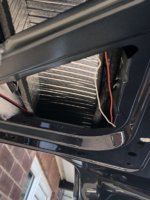
Firstly I fed 2 sets of cables from the roof into the tailgate via the rubber pipe. This was a tight fit as there is already all the cables for the rear lights camera, heated window etc.

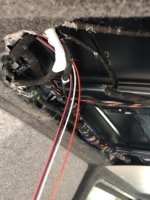
With a combination of a nylon electricians tool and a chopped up and bent coat hanger I managed to get these wires down into the tailgate:JgmOXN0ESlWmbl0p0LU5QA.jpg tjws+Z7pTcOvkTeKKE+Xag.jpg

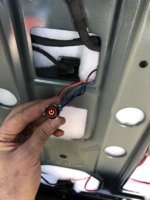
The red and white wires to the right are a feed from the courtesy lights to an illuminated momentary switch to release the tailgate from inside. The 2 wires to the left are power wires for the LEDs.
O2U9MqZQRyKCiYP4bb02oQ.jpg


The switch was then connected to the wires from the outside release handle:
Jy0a9UIeSv2IFlIHYHTHmg.jpg

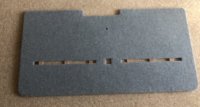
Next job was to cut into the tailgate ply lining.
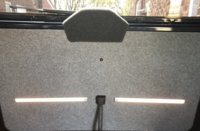
Small circular hole dor the switch and the long slots for some aluminium channels to put in some RGBWW LED strips.
fullsizeoutput_230.jpeg

So test to see if the aluminium light strips fit then on to a bit of a nerve racking part.
fullsizeoutput_22f.jpeg
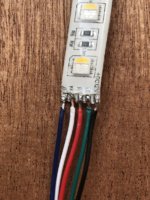
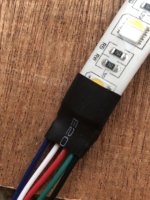
Soldering iron arrived from Amazon this morning, nah, lets not bother practising it looks easy on the youtube videos. So scissors at the ready I cut up my new LED strips. Cut away a bit of the rubber to reveal the electrical connections.
Plug in the new soldering iron Tip fails to get warm, but I can smell the iron is hot. Hmmm noob error, that tips is mostly plastic and must just be for transit. Unplug let it cool and put a metal tip in.

Well for my first real go I was quite pleased and not bad connections so I shrink wrapped the joint. (cutting away where I had partially covered an LED.

+SYlcxN+RM613NJNGN3fqw.jpg BmEir4uGQlSYuplyy5IKFQ.jpg

Fitted the LEDs into the housings and tested with a 9V battery. OMG all connections seemed to be working.
IMG_1247.JPG


Fitted ply panel back into tailgate and connected up, momentary switch lights up with the courtesy lights and the release works.

LEDs are currently temporarily fitted to a simple switch from the leisure battery. Need to get some RF controllers to get full RGBWW functionality as currently only the WW LEDs are connected.

fullsizeoutput_235.jpeg

Quite pleased with the result as its the first time I have attempted anything remotely like this.

Next step is to get a roof panel and fit the rest of the LED strip.
Getting nearly ready for Bala, although at the moment I will be sleeping on a blow up mattress on the floor.
 
Also have been playing with the vcds lead I bought. I now have folding mirrors

Can you explain this to a newbie? You just switched this on? Is there a separate setting on those with folding mirrors to switch on the mirror joystick?
 
Thank you - However, I still might be missing something here...…….All this presumes there are motors fitted in the mirrors or do VW fit them for the hell of it and just leave them because I have no control on the door panel for folding mirrors and the original post was...

Also have been playing with the vcds lead I bought. I now have folding mirrors

This to me implies there wasn't even folding mirrors on the mirror adjustment selection???

Or have we gone of tangent and implied if they are there they can fold automatically?

Sorry, that may have been a bit unclear. I though in . the previous posts I had explained better, however I already had electrically folding mirrors, but changed the coding so that the fold on the remote and auto unfold on ignition.
 
Phew - thought I was missing something but all clear now, had a few of us at work scratching our heads on that one for a while...……… good luck with the build.
 
Put finishing touches to the Tailgate LEDs, installed a controller and tidied up the electrics under the drivers seat.

I had temporarily used velcro for the strip LED channels. I wasnt happy with this so drilled a few holes in the channelling, and screwed it to some ply 'bridges' stuck to the back of the panel.

Then took a feed from the fusebox for the leisure battery under the drivers seat up the b pillar, along the roof and down the c pillar behind the slider. Not too bad a job except for some reason the wires kept snagging and getting stuck at the top of the c pillar. I made a tool our of a wire coat hanger to push down along the channelling above the slider to free up the wire when it got stuck.

Cut a hole in the small ply panel to install the controller. Quite pleased with the result.

Now to decide how to ply panel the roof, but dont think that will happen before Bala.

5e757bb9-643f-4d7a-b9b7-d03961ab073e-jpeg.43627

43b2b251-e8d8-4aa6-9922-bfc9964dcc25-jpeg.43628

b2917c7e-ed87-4aaa-941f-5662427b95de-jpeg.43629

e1a241da-6938-492d-a6ed-11762d5d9f71-jpeg.43630
 
Damn. Damn. Damn.

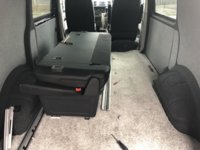
Fitted a floor and bed in the van. Couldn't find my 10mm spline tool. First drive out I know where it is now. Rolling around under the floor Bugger bugger bugger.

I know my next job now. Seat out; floor out; find the little bugger and then replace :(
 
Well, I've been a bit lax with this thread.

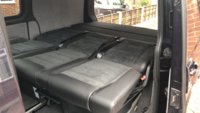
SO a brief update. I decided that I didnt want a RIB bed after sitting in @ROMANY TAMPIN 's van. Not that his was not great, just the lack of headroom it gave me.

After looking round a lot of great vans at Bala I decided that I would go the Caravelle conversion route.
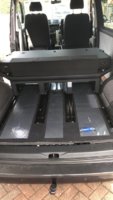
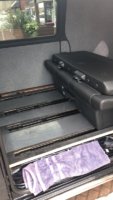
After hours trawling the net I sourced a triple seat, rails, floor and side step.


After collection I fitted these with the help of this thread Fitting Caravelle seat rails that @Coradia63 wrote about his installation. No need for me to write it all here. Only thing to add was I was seriously regretting sticking the ply batons I had made down so well. The bonus was I hadn't fastened the 12mm 1 piece ply floor down (which is now in the for sale section), although it might get chopped up and put to alternative uses.

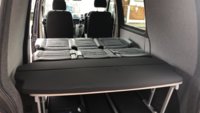
More trawling the net for a flexboard. It finally was ordered and arrived today. Fitted that. Floor still needs finishing and I think I will need a mattress topper. :/ Does it ever stop.


icBSQzxjQs2NpN1EIrvjyg.jpg IMG_1529.JPG IMG_1530.JPG

As it is today after putting the Flexboard in.


IMG_1612.JPG IMG_1613.JPG

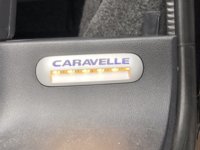
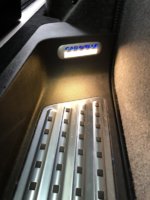
Caravelle step, with light now converted to warm white LED (credit to @Deaky ), however Im not happy with this so as its a RGBWW strip in there i might re solder the wires to have it cool white or red (as that would be simpler.)

RYznHQE5QKWpTO7C3yqxyQ.jpg g62NeztMRy+7m8%HDzne1A.jpg
 
Back
Top