Windsurfing Dream Van

Farnorthsurfer

Senior Member
VCDS User
VIP Member
T6 Guru
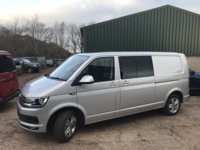
Finally got the chance to build the van I really want. It will be used for surfing, cycling, camping and hopefully some epic trips abroad. Retiring this year so want to get it sorted in time for the summer.
It started out as a LWB Kombi 4Motion with an EU5 180 engine. Most powerful vehicle I have owned since I sold the Sunbeam Lotus!!
List of stuff;
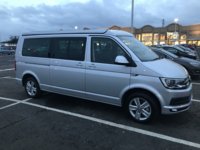
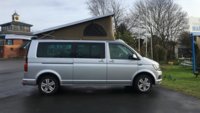
Jerba - Poptop, rear windows and carpeting
Westward Leisure - Reimo 3000 with floor
Own work - Sound proof and insulate, first fix electrics, H7 headlights, Sounds like a golf door seals.
To fit, RIB Swivels, TN Power 100ah Lithium, 160w solar panel, 240v EHU, Kiravans Door store, camper lights n stuff.
To buy, Top loading fridge, Hob and Sink, all the stuff to make the furniture, towbar bike rack.
And a load of other bits! Thanks to all who have contributed to this project from the forum
 
Last edited:
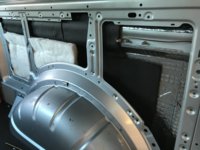
Got the interior soundproofed and insulated with Silentcoat, Armaflex and B&Q Recycled plastic wool.
upload_2020-2-15_21-42-54.jpeg
 
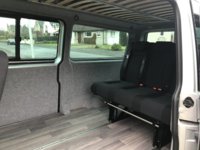
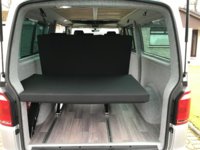
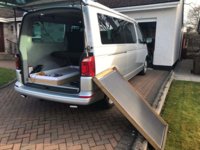
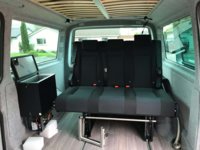
Right after the pop top fit we drove all the way down to North Devon for Westward Leisure to fit a Reimo 3000 Variotech seat with bonded power rails. This was to get maximum use of the space in the rear for days at the beach.
upload_2020-2-15_21-56-47.jpeg
upload_2020-2-15_21-58-14.jpeg
upload_2020-2-15_21-59-32.jpeg
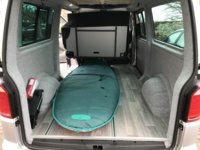
An 8’ Starboard Hypernut Surf SUP Foil board testing the space
 
The floor is getting Caravelle sidesteps and rear threshold as I hate the silver edging. Any tips on fitting the threshold?
 
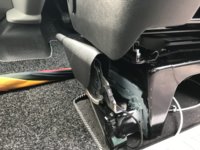
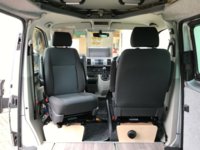
Got round to fitting the modified drivers seat base and RIB swivel.
To avoid using the spacers provided with the swivels I drilled off the handbrake bracket and welded it back 20mm lower.
Fits fine, just a few turns on the handbrake adjustment required.
upload_2020-3-7_14-8-4.jpeg
Looks a bit rough with the grey primer and I need to cut down the cover.
Swivel clears fine at about mid height adjustment.
 
The Van is looking good!
Thanks @hoggle still a work in progress. Garage is full of parts to be fitted like heaters and fridges and the second fix electrics. Taking a week off in April to hopefully make some meaningful progress but don’t think I will have time to make the furniture then. That will have to be done another time but the layout is coming together.
Hopefully be seen parked at Moray Firth beaches this summer:)
 
Hopefully a week will see a lot of progress for you. I still want to do loads. And i will keep a look out for you.. :)
 
Spent all day working on the van today and after putting it back together you can see absolutely no visible progress!
Ah well I know what’s fitted even if no one else can see it.
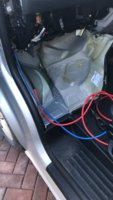
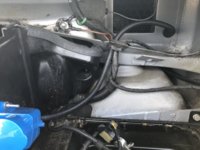
Electric Hook Up fitted in the classic under bonnet location with a cable through the plenum grommet.
Found a VW cable in the top grommet behind the glovebox and used the lower one to fit a 16mm DC-DC cable.
Loomed both down behind the dash and under the centre protection panel to the under seat locations.
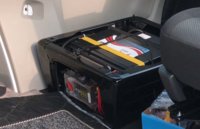
Consumer unit will be under drivers seat and the leisure battery on the passenger side with Renogy DC-DC and fuse box.
Spent some time working out how to bolt everything in. Good to make some headway.
upload_2020-3-14_19-41-9.jpeg
Starting the looming
upload_2020-3-14_19-42-8.jpeg
EHU through plenum grommet (thanks to @travelvolts as he sent the how to to my mate who passed on the secret)
 
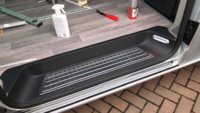
Today’s job was getting the side door Kombi steps replaced with deeper Caravelle steps to match the Reimo floor.
When the Variotech seat was fitted by Westward Leisure I asked them to leave the outside floor panels loose so I could do this job. Floor still needs bonding down. Also fitted the plugs to match the Caravelle step lights.
I did lots of research on the forum to work out if this would work. It’s all good, the height of the Caravelle step is perfect with the power rail floor.
The steps are shaped to match the Caravelle interior trim so don’t go all the way to the edges and I had to trim off small upstands on the top at either end. Under the flat portions of the step there are moulded ribs to grip the caravelle carpet. I just sliced these off with a sharp chisel to get the flanges to sit flat on the boards.
IMHO this looks loads better than aluminium trim stuck on the edge.
Hope that helps someone.
upload_2020-3-21_22-18-28.jpeg
 
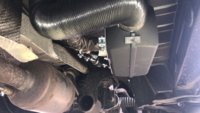
So its about time I posted an update to the van adventure. The weekend after the sidesteps I installed a Planar 2D heater below the drivers side floor. This took longer than expected and it was really cold out on the drive that weekend but anyway it got done in the end. Bought a trolley jack and axle stands for this job from SGS Engineering which are recommended. The control unit sits just above the drivers seatbelt fitting where it can be reached from the drivers seat and the back of the van. It has the remote control fitted with a GiffGaff SIM card.
I cut and remade the fuel pump loom and power loom to the right length as it was just daft to run about with 4 meters of cable under the van. Some advice from @oldiebut goodie was very useful confirming that the english Planar instructions are wrong about the fuel pump feed distances.
All works fine both on the internal control and the remote.
A76BFEAF-8D3D-45DF-BD85-6E799BFF0B9E.jpgIMG_0805.jpg
In the seat photo you can see the heater pipe coming into the van, it has a Webasto joining connector bonded into the chassis to make sealing and fitting the vent pipe easier. Outlet is to the usual seat base louvre.
 
Good work! :thumbsup: My heater has been well worth adding to the Van. And it's especially rewarding doing all the work yourself!
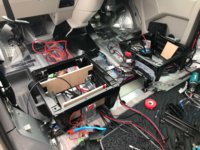
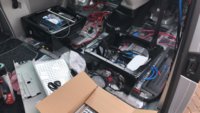
 
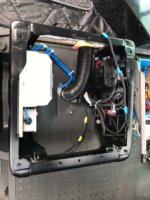
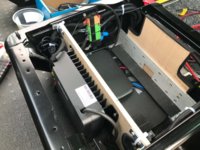
A week off work to do the electrics. Started work on the rest of the camper electrics under the front seats. Out came the seats and floor mat, first job was Silentcoat on the floor and sorting out the VW looms. In the first photo at teh bottom you can see the mess of wiring that VW fit if you have the towbar fit. I reloomed this into one fuseholder and cut down the supply cable so it fits neatly next to the camper fusebox and is accessible through the seat panel. The Renogy DC-DC is at the front with a TN100 Lithium Battery in the middle.
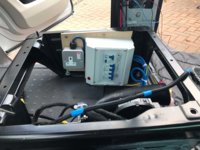
The drivers seat has the trailer control unit, heater supply and EHU with a single socket for the Victron Battery Charger. This is connected to the Leisure battery with a plug so the charger can be pulled in and out as required.
60778059450__A2D319F1-F299-439A-B056-694AD56583D5.jpg 86789A11-7DAF-40BE-9080-FF4FD1EF0AFA.jpg
What a mess
IMG_0810.jpg IMG_0807.jpg
Drivers seatbase EHU, Battery Charger sits in the space at the front
VQZN4639.jpg IMG_0900.jpg
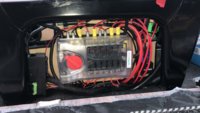
Fusebox before fuses, the VW fuses are hidden on the left with relay
 
The fuse box has two busbars as standard and I have set them up to be 'switched' and 'unswitched'. The top row is unswitched and has the fridge, Planar heater, Drivers seat base USB and 12vdc outlets fitted. The lower has the camper lighting more USB, the hob ignition and sink pump.
I fitted a small switch in the LH and RH B Pillars that operate the relay just to the right of the fusebox and this controls the 'switched' bus.
Getting in and out I can now turn the camper electrics on and off from either switch.
 
Next @Dellmassive prompted me to try out the solar panel which was still in the box since delivery. I had already loomed in the solar cabling and put a cut off switch (in the right place second time round:mad:) on the B pillar. The good news is that it all worked fine or seemed to and the Renogy DC-DC is doing its thing with both the alternator and the solar panel. The panel was a recommendation from @Dieseldonkey and has concealed connections.
IMG_0856.jpg IMG_0855.jpg
Its not fitted because there is a small problem with the Jerba Pop Top and its getting replaced by Jerba who have handled my issue very professionally but are of course on stop because of the virus. I drove around with it just lying on the parcel shelf and it actually seemed to get some power into the battery from there during the day. :)
 
The next job is the furniture which is still in planning. Its going to be a low line unit in two parts with the a chest fridge in teh rear fixed part and possibly a removeable front part with sink and hob. The low line is so that SUP surfboards will fit in on top and the sink/hob can be lifted out for daily use or into an awning. Thats the plan anyway.
Here are a few interior shots. Lights are fitted, seat swivels in and temporary seats panels. The Vitrifrigo fridge is testing the space, as is the table leg.
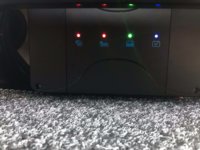
The observant will see the B pillar services switch, the solar cut off and the heater control opposite.
I feel a bit under equipped in the flash LED light and suede trim department but this is being built to go windsurfing in the wilds of Scotland so I don't think anyone will notice.
IMG_0839.jpg IMG_0838.jpg
 
Back
Top