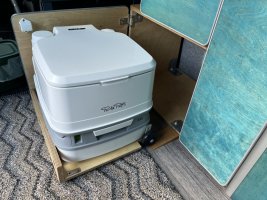
The furniture was a DIY job as I couldn't find any that fitted what I wanted and 'the virus' was making it hard to source the panels and for a while other parts.
Decided to go with 15mm Baltic Birch ply and do my own finish. Lots of thought went in to the build but in truth there are no plans at all. Everything was made on sight with the van.
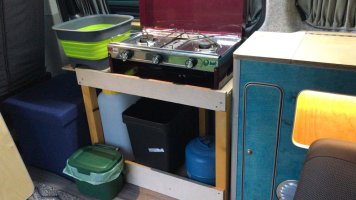
There is going to be a removeable forward unit with hob/sink/pottie/gas and water. But this isn't started yet.
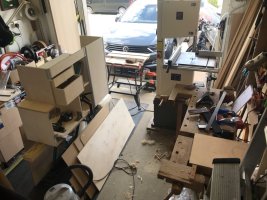
The job took ages, partly because I am working out of a small garage and needed good weather to work on the drive, partly because it took ages to scribe the shapes to fit the van and get everything to fit properly. Although you can't really see it in the photos the clearance to the sliding seat is less than 2mm at the closest point and no more than 4mm for the length of the slide. This was to maximise the space for the furniture. The chest fridge also dictated many of the bulkhead and door positions. With a seat that slides all the way its not really possible to have doors that work in all configurations so I have a lifting lid worksurface and long door that works in the bed position.
The advantage of birch ply is that it is realtively cheap and if I want something different I will do it again. The ply sheets were about £55 each but there is a lot more work to finish them which you dont have with laminate.
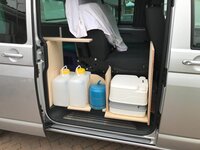
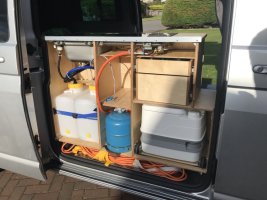
Planning out the forward unit. There will be no drop vent before anyone asks as it won't fit, instead it will be 'Gas Off' every trip and a gas alarm.
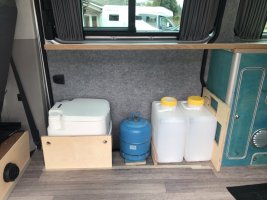
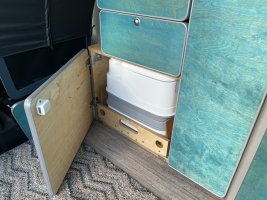
The pottie just fits and will be pulled out for nights out, what fun
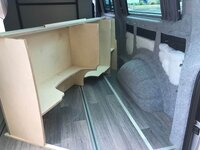
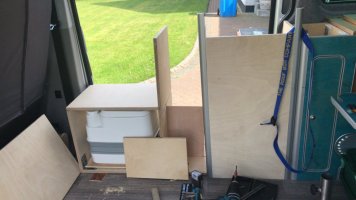
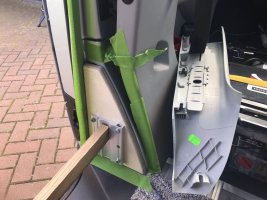
In build at the back, low level unit. Have never liked the usual self tapper random fixing to the van that most conversions use so have fitted rivnuts to original holes and picked these up for fixings. In the floor I drilled and fitted 30mm x 8mm threaded furniture inserts which you screw in with an allan key. These are well strong as they go in two layers of birch ply boded to the floor of the van. No extra holes in the van, except the curtains and Reimo Multirail.
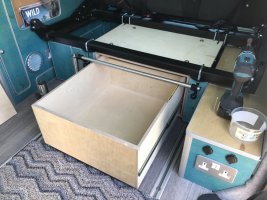
The units are slot tenon construction glued and screwed where required. Loads of router work that can't be seen.
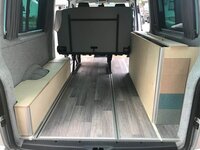
Those in the know will spot that its a bit of a Riemo copy job but nothing wrong with that. Testing colours on the right, dont worry about the gaps on the left its not bolted in yet.
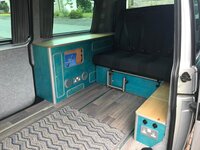
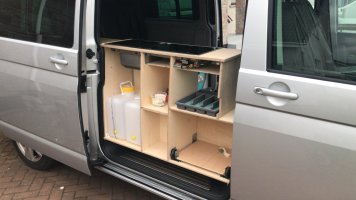
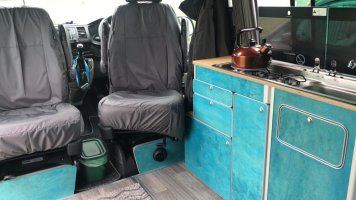
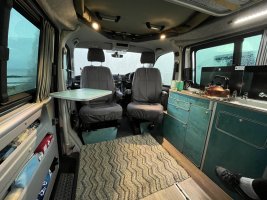
The left hand side is plain lids with magnetic catches, very simple but effective, one hatch at the back one at the front. Mains USB and 12vdc sockets.
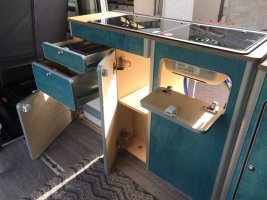
The Right hand is a foward unit with two compartments the fridge access lifing lid behind 'magazine rack' illuminated with LED strip internally and fridge controls and four USB sockets one with voltage display. Below that is mains and vents for the fridge heat exchanger. Below that is a locked compartment big enough for documents and ipads etc. Aft of that is the big storage with two doors for smaller storage below. Not all of the doors work all of the time but at all time you can get into all of the spaces, if that makes sense.
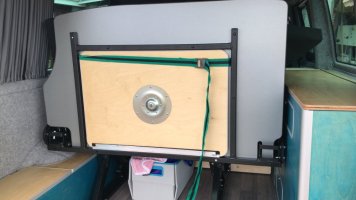
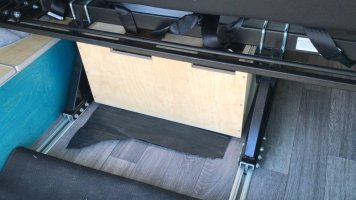
One the Reimo seat is a front panel with removable front and permanent table leg support.
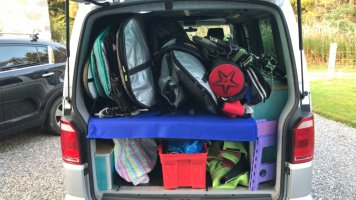
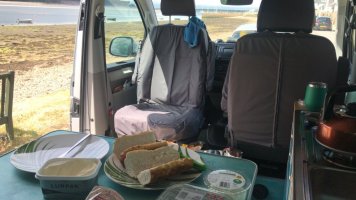
Its been used for camping and windsurfing, all works well. Have made a large waterproof cover for the seat so it can be laid out and used to carry bigger boards on single days out windsurfing.
Decided to go with 15mm Baltic Birch ply and do my own finish. Lots of thought went in to the build but in truth there are no plans at all. Everything was made on sight with the van.
There is going to be a removeable forward unit with hob/sink/pottie/gas and water. But this isn't started yet.
The job took ages, partly because I am working out of a small garage and needed good weather to work on the drive, partly because it took ages to scribe the shapes to fit the van and get everything to fit properly. Although you can't really see it in the photos the clearance to the sliding seat is less than 2mm at the closest point and no more than 4mm for the length of the slide. This was to maximise the space for the furniture. The chest fridge also dictated many of the bulkhead and door positions. With a seat that slides all the way its not really possible to have doors that work in all configurations so I have a lifting lid worksurface and long door that works in the bed position.
The advantage of birch ply is that it is realtively cheap and if I want something different I will do it again. The ply sheets were about £55 each but there is a lot more work to finish them which you dont have with laminate.

Planning out the forward unit. There will be no drop vent before anyone asks as it won't fit, instead it will be 'Gas Off' every trip and a gas alarm.
The pottie just fits and will be pulled out for nights out, what fun

In build at the back, low level unit. Have never liked the usual self tapper random fixing to the van that most conversions use so have fitted rivnuts to original holes and picked these up for fixings. In the floor I drilled and fitted 30mm x 8mm threaded furniture inserts which you screw in with an allan key. These are well strong as they go in two layers of birch ply boded to the floor of the van. No extra holes in the van, except the curtains and Reimo Multirail.
The units are slot tenon construction glued and screwed where required. Loads of router work that can't be seen.

Those in the know will spot that its a bit of a Riemo copy job but nothing wrong with that. Testing colours on the right, dont worry about the gaps on the left its not bolted in yet.

The left hand side is plain lids with magnetic catches, very simple but effective, one hatch at the back one at the front. Mains USB and 12vdc sockets.
The Right hand is a foward unit with two compartments the fridge access lifing lid behind 'magazine rack' illuminated with LED strip internally and fridge controls and four USB sockets one with voltage display. Below that is mains and vents for the fridge heat exchanger. Below that is a locked compartment big enough for documents and ipads etc. Aft of that is the big storage with two doors for smaller storage below. Not all of the doors work all of the time but at all time you can get into all of the spaces, if that makes sense.
One the Reimo seat is a front panel with removable front and permanent table leg support.
Its been used for camping and windsurfing, all works well. Have made a large waterproof cover for the seat so it can be laid out and used to carry bigger boards on single days out windsurfing.

