Awkward it's an old T5 not a T6

Damn she's a f-i-i-i-ne cook should be the size of a cow .but graft too 'ard:(

Stick bits of wood together and cut out with holesaw
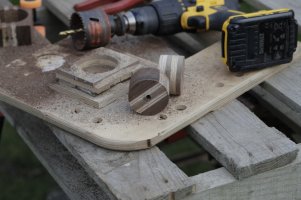
51727666230_775966d336_o.jpg_S2I0840 by Stuart Philpott, on Flickr

when sticking bits of wood together use big clamps that apply loadsa pressure
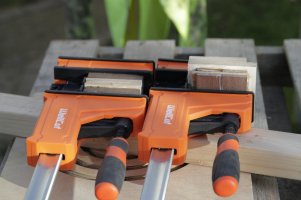
51727668415_dd0fb6880b_o.jpg_S2I0834 by Stuart Philpott, on Flickr

to flatten off bits of wood so they stick together well one can make a router sled then use trusty router to do the do
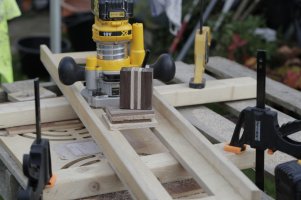
51727030933_7940572320_o.jpg_S2I0838 by Stuart Philpott, on Flickr

added in a round over bit and got to here
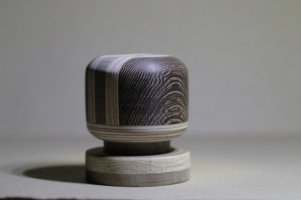
51712762792_5753f11d4e_o.jpg_S2I0847 by Stuart Philpott, on Flickr

didn't work.too deep

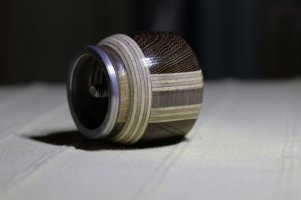
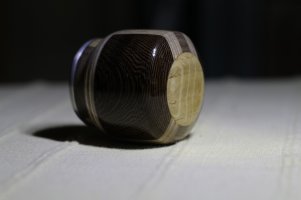
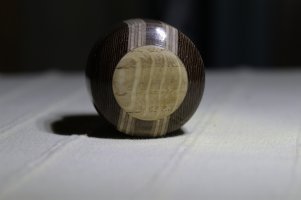
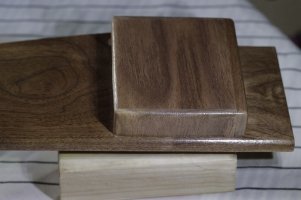
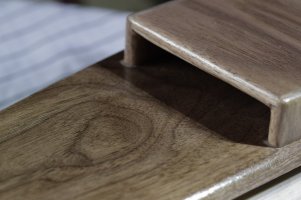
again used router sled to cut base off kiiinda accurate like.................. an then added a tad of ali......came out here..........hmmm ok sunk into the top inlet a bolt expoxied that in place and then let in some preddy bonfire "maybe it's called "quilted" oak as a cap.............and ended up here...it's much of a muchness init:rolleyes::D


51780344595_c8a32df250_o.jpg_S2I0868 by Stuart Philpott, on Flickr

51778642222_1e9da5182b_o.jpg_S2I0867 by Stuart Philpott, on Flickr

51779709978_f28365e617_o.jpg_S2I0866 by Stuart Philpott, on Flickr

Oh and the finish....well it's superglue.........and this is where just for a few moments I'll stop being a lunatic and get VERY serious.................this is eye protection mask protection hand protection...no IF's NO but's......

this whole build has been safety glasses ears plugs and a good mask there is a shed load of dust here.........but once one turns to cyano acrylate ( I'm sorry I can't spell very well it IS how I'm made).............. it is VERY serious !!

One is VERY careful very very very careful......Finish was applied with gear knob mounted in spinning drill.can't stress how much care.................... glue applied with a rag.don't go there without care for you your eyes etc etc


finish is rock hard and sure maybe not mastered.I polished it mounted on a drill with care and wet 'n' dry an it's ok..but it's not quite there....... might revisit this

take care

stu
 
she said it was bigger than she expected.....I feel undone:(

:D:rofl:
Damn she's a f-i-i-i-ne cook should be the size of a cow .but graft too 'ard:(

Stick bits of wood together and cut out with holesaw

View attachment 164852_S2I0840 by Stuart Philpott, on Flickr

when sticking bits of wood together use big clamps that apply loadsa pressure

View attachment 164853_S2I0834 by Stuart Philpott, on Flickr

to flatten off bits of wood so they stick together well one can make a router sled then use trusty router to do the do

View attachment 164854_S2I0838 by Stuart Philpott, on Flickr

added in a round over bit and got to here

View attachment 164855_S2I0847 by Stuart Philpott, on Flickr

didn't work.too deep

again used router sled to cut base off kiiinda accurate like.................. an then added a tad of ali......came out here..........hmmm ok sunk into the top inlet a bolt expoxied that in place and then let in some preddy bonfire "maybe it's called "quilted" oak as a cap.............and ended up here...it's much of a muchness init:rolleyes::D


View attachment 164856_S2I0868 by Stuart Philpott, on Flickr

View attachment 164857_S2I0867 by Stuart Philpott, on Flickr

View attachment 164858_S2I0866 by Stuart Philpott, on Flickr

Oh and the finish....well it's superglue.........and this is where just for a few moments I'll stop being a lunatic and get VERY serious.................this is eye protection mask protection hand protection...no IF's NO but's......

this whole build has been safety glasses ears plugs and a good mask there is a shed load of dust here.........but once one turns to cyano acrylate ( I'm sorry I can't spell very well it IS how I'm made).............. it is VERY serious !!

One is VERY careful very very very careful......Finish was applied with gear knob mounted in spinning drill.can't stress how much care.................... glue applied with a rag.don't go there without care for you your eyes etc etc


finish is rock hard and sure maybe not mastered.I polished it mounted on a drill with care and wet 'n' dry an it's ok..but it's not quite there....... might revisit this

take care

stu
The detail in that is incredible, really impressive Stu.
 
The detail in that is incredible, really impressive Stu.
AKG..they make some fine microphones huh :)............. thanks for the lovely words......the gear knob was sort of a distraction a I can screw up here and not much will be lost. when one is eons into a breadbin there's much at stake.sure that's all in one's head ,but it's ever present My mindset was 2 fold find a method for the lads 'n' lasses to make sommit unique for thier busses..and tie everything together and add sommit for me own......I had this bit of wood pulled from bonfire ok two bits ....that sliver of quilted oak stuff IE the cap and the bit I thought was zebra wood....but a T4 owner and proper chippy( cabinet maker Graham) reckons it's called Wenge.

There is something very simple very lovely about driving and using a gear shift that fits smack on in your hand that you actually made.hard to pop into little words but it is a lovely thing..so really and honestly the goal was in part that another would understand that.

guys most of what you have seen is in a raw unfinished state...I've mentioned with some seriousness the gear shift finish... For the rest I've used rustin's outdoor varnish to finish.. tis water based,,,,,,,for far I'm impressed. The base method is flat wood with 240grit add first coat....................hmmm hold up

Do you guys know about raising the grain? When wood gets wet.ie first ocat of varnish the grain raises in different levels.........so one wets wood slightly let's it dry flatts it and maybe repeat..........so when ya apply first varnish coat the grain can't raise so much as one has already taken that out...this means when we scratch that coat.......with say 320grit.to make a grippy surface,we are lesslikely to sand through the varnish........it's' the ickle fings init :)

by the way the lockers/breadbins are held on place by 6 M8 rivit nuts. They seen rock solid when fixed,they need to be. !!

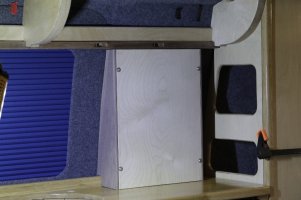
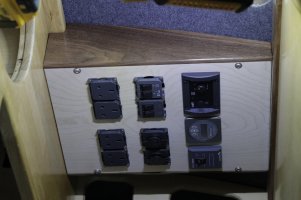
Between the oak Wt and the breadbins is what I call the plinth............it's basically our control panel

It looked like this the front panel is removable in an early stage

51870401068_112d96cd43_o.jpg_S2I1139 by Stuart Philpott, on Flickr

then like this with gizmos in situ

51889651121_91f55cae78_o.jpg_S2I1140 by Stuart Philpott, on Flickr

I decided I could be sneaky and have a safe place for poppet's phone to charge so nicked that in as well

51889648746_9e06a55837_o.jpg_S2I1153 by Stuart Philpott, on Flickr

damn that bonfire walnut is lovely to work with it's also incredibly pretty to look at

51889648166_89083b44af_o.jpg_S2I1156 by Stuart Philpott, on Flickr

another brutally long day that's ya lot for the mo

take care out there guys

stu

ps blue blind is from vanshades.one of the few they do with colour both sides.hopefully has thermal properties we'll see huh
 
With all the solid wood you’re using, how much weight do you think you’ll add to your van?
 
I'm unsure at this time Jog......I picked up all the ply in one hit and stashed all the sheets down the side of the RIB which is already fitted so basically all the weight as far to the offside as it could possibly be and then made a point of looking at the van and suspension wheel arch gaps etc.... couldn't see any difference it is a concern though as obviously there is a weight limit to adhere too. Obviously I've taken a lot of wood out of most of the larger panels with the circular "vents" but sure it isn't the light weight 15mm ply conventionally used The oak WT was the thinnest I could find............Think I've read somewhere around 30kilo over standard poplar ply...that firgure I believe comes from one of the conversion companies that use Birch ply.....The curved locker doors are incredibly strong ( much to my disbelief) and light. Essentially when I saw Cambee's builds I thought I'd be ok to press on .......but it's complex, is weight, bar the ceiling !!

Maybe I've been naive Jog time will tell..................along side this I know of folks running 200AH lead acid batteries where as I was always going Li Fe POA..... which frankly I figured would off set the extra weight by using the wood I have chosen to use

Incidentally and this is silly stupidly exciting....................Chris from roamer contacted us tonight we should have our new SB batt on Wed or thursday at latest.........ha it's almost karma..................I haven't had time to show ya yet,but I'm literally on the home stretch, hopefully, of the SB leccy................I've had the front seats and cab mat and lower dash out for weeks now wiring and figuring and scheming. I've been ponderously slow with the whole build really so have probably been trying to get my head around off grid leccy for 2 years now. Gradually buying the bit's as I ground out the pennies..........it's been a long hard road dude a long road

So to finally be heading towards having the last cog here in the leccy wheel is a thing of joy......and then slowly ( if I don't graft meself into the ground first) I'll finally be able to assemble all this blummiin wood and see if I've been a moron or it actually does what it's meant to............hopefully in a few weeks we might finally have our little dream camper van.ha it's bonkers it's an utter pipe dream and it's seemingly in reaching distance.

God soz for being so serious for so long..I try not to be

Ha funny as...........fitting a roamer battery an isolator a midi/mega FB MPPT and the dub comfort module into a SB has been a monster head ache .naturally I made a dummy out of wood:thumbsup:.....jees I hope my measurements are sound :rofl:
 
Amazing chippy skills in this thread. I'd love to see more pictures of this interior.
 
Amazing chippy skills in this thread. I'd love to see more pictures of this interior.
Ta Sam....as above it's just making bits 'o' wood smaller..the art is in the right amount ;)

TBH it isn't furpect Sam,it's got all my failings written all over it ,but then that's ok I'm good with that Fink it as good as I could do and that's enough for a scattterbrain

. The 2 things I'll take from this is how much respect I have for proper cabinet makers,damn there's some disciplin in their craft and second up how hard it's been to maintain said levels of concentration over so long.

I will share more images bro........I'm just so wrapped up in trying to make my leccy install right now all of my focus is there it's so so important to nail that.

Hmm that's why this thread is here Sam reading your's Dells and the other lads posts. I don't just want to take mate trying to give a bit back in me own ickle way:D

I can't wait though to finally start to glue all these bits of wood together into actual cabinets they are stashed everywhere as we have no place to store it all built. Once all the SB leccy is sorted I can slowly move towards that....get campy up an running in some working state.live a bit and maybe do a couple or 3 extras I've been plotting for eons

cheers again

stu
 
  • Like
Reactions: JOG
Hmm more pics as I'm spent now an it's futile pushing further in this heat.....mind since last post lots of the lower dash is in and secured...plus did some ovva stuff.........

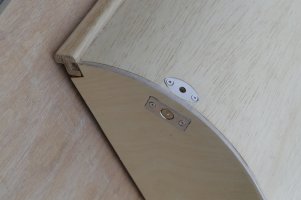
see curves and catches don't work in a conventional way.........the trad push type catch simply isn't going to cut it
my workaround for travel is the humble rack bolt..to be freed up once parked up.it's a little bit of a faff but no biggy with the key an all but will be rock solid in motion..sure also a bit of a faff to inlet into a curved side,

51555417978_520244a304_o.jpg_S2I0797 by Stuart Philpott, on Flickr

jeeprs I didn't really want to show my bottom in so much detail...I thought it was hidden to prying eyes

did this to the top cause I'm sneaky.it don't weigh much cause it's kinda fin..but it's real genuine proper oak so that's ok init :rolleyes: :rofl:

I'm a bit happy my mas massive battery is coming today or tomorrow which I'm gonna squeeze in a really tiny place.it's just like building a camper in a T5 only in a seat base with heat and electrickery an' every fing

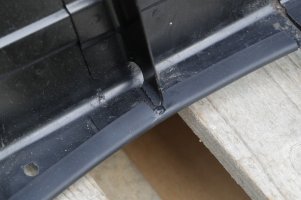
My new batt is really expensive and a bit like me maybe prone to getting scratched:(.....So I went on the T forum and a clever bloke showed me some rubber channel.....it's only a SB 3 meter's that ''ll do.......hmm not in my world had to buy another 3..........how in the hell does that work it's a seat base....................anyways here's a bit of that

well at an early stage:D I did more,it doesn't mattter where I pick my SB up or t'other one.I don't get scratches any more:cool:


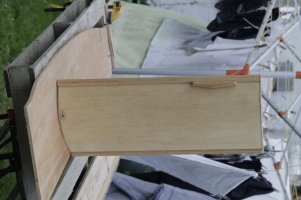
also cobbled up a couple of oak door handles off some scraps so whole door looks like dis
51555902759_2a08c514c2_o.jpg_S2I0799 by Stuart Philpott, on Flickr
 
52130152903_00e45dd4db_o.jpg_S2I2296 by Stuart Philpott, on Flickr


Hot in it.......

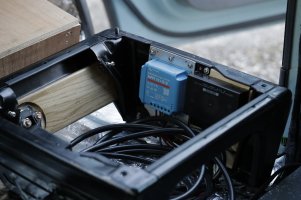
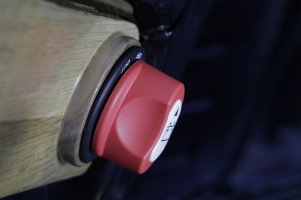
My driver's Sb now properly protected is inhabited by a comfort unit and a blue gizmo called an MPPT and also something called a battery isolator switch.....me being my an all I thought if I'm gonna get on me ruddy knees to switch it off and have to look at it a lump of plastic would be a bit pants...so a lump of oak went in there aswell.....it's cool it's an off cut from me bread bins
52170322091_67dfb0ac17_o.jpg_S2I2304 by Stuart Philpott, on Flickr

But.....ha ha there's always a but...when one isn't the sharpest tool in the box one doesn't fathom why folks stick a horrible lump of plastic up front under a seat .which they only look at when on their knees............it's cause the blummin battery is huge in it stu so now I've got to pull the whole shebang forwards so batt will drop in ....DOH:thumbsup:;)

Naturally a few more mm were scagged by adding a seriously honed walnut ring and eventually my fake expensive batt made of wood naturally , finally dropped in. Ya know when ya just wish ya were a tiny bit clevererer.......this was that......even better was finding out batt is made in a steel case OMG that was a moment......but a got some bright red thick as ya like condoms.which obviiously one can't post piccies of 'cause it's adult stuff

...but me isolator is isolated and looks preddy much like this ( shown elsewhere but hey


52130272514_c4310a9fde_o.jpg_S2I2280 by Stuart Philpott, on Flickr

It's too hot...................before I stop with me cobblers would ya'll do me a favour, pop a little SHALLOW bowl of water outside tonight front and back of your gaff

my ickle mates need a drink don't matter if it's a hedgey hog a birdy charlie fox or any beastie.give 'em a hand folks a couple of shallow bowls of water isn't a big ask

We need them.................... the ecosystem they create we are part of..........I build new houses for the masses .here's a builders mortar tray and what happens in the small hours

I cut it into the front garden when we were all locked down added some turves to hide said tray lights and then did the hours thang

50093711973_f4e5514b46_o.jpg_S2I4212cub drinking 1 smj DN by Stuart Philpott, on Flickr

take care out there guys
 
We are on a campsite in Looe, Cornwall - a bowl of water is going out tonight
 
Thank you Jog........bro sometimes we just don't see the obvious it isn't a thing of blame it just is.............................. I kinda like the idea we have no idea who we might help but if we all did it someone WILL help

that's enough init ;)
 
Well, there are rabbits about and we have terriers…..natural selection might happen!
 
Below the above will be a tambour I still haven't ordered it yet as i'm so short of space nothing has been glued up yet and I want to get the measurements spot on.well as near as I can.

I'm using what I call strip joints as a means of joining everything..no not the strip joints you lads visit:rofl: these are ickle strips of ply sitting in routered grooves.............they will be incredibly strong once clamped up.........I contemplated pocket holes......iddy biddy bits of plastic and teeny tiiny screws were not on the menu...........these joints also allow me to put stuff together fit it and pull apart.

the rear cupboard is fairly conventional...you've seen the shelves above.at the front is a series of pockets.the lowest of which we call the bean store...basically one can stash a shed load of cans in there.the hole just above the WT in the piccy above in me last post

Oh and around this time made up an access door so I can get under the wallas......


View attachment 164435_S2I9353 by Stuart Philpott, on Flickr

back to that rear cupboard.........lol here's a story..............I was going for it and breaking rules.cuase I don't have a proper work bench I used me biggest bit of wood for stability.the front of my rear cupboard and a router bit dropped.left me here..cursing my stupidity and yearning for a get out of jail card

View attachment 164436_S2I0231 by Stuart Philpott, on Flickr


Card came months later......I sat on this one screaming for eons and then me best mate stopped by and said........"stu get your butt down the industrial estate.the furniture makers have thrown out some wood it's to be burnt.."...it was literally on a bonfire pile

I did and scagged wood I could never buy never afford..............sure it was warped or this or that......but trees don't go straight........

an idea slowly set

I'd flattten out a lump of walnut.done with a router sled ponderously slow and then let that walnut into my cockup.........it would add strength maybe look ok and no one would know........LMAO bar the fact I'm me and own stuff

Ha you have no idea how many hours of "don't F up stu don't drop it mate focus focus focus are in this

cut out with a jigsaw be and and then let around 10mm into the ply.................

focus

View attachment 164437_S2I0221 by Stuart Philpott, on Flickr

nearly there and a lump of the raw walnut I started with for comparison

View attachment 164438_S2I0224 by Stuart Philpott, on Flickr

carving into the ply never got an image..it was harder than the walnut gig if I'm honest......everything was to loose..so here's it let in...........

View attachment 164439_S2I0247 by Stuart Philpott, on Flickr

Think this was around aug last year.............started to go into vanish mode and contemplating 2 100AG lith batteries one under each seat.life kinda started kicking me around then.so the batts went south but kinda dig in and slowly but surely added to the victron gear we wanted for our little off grid wildlife toggin dreams

I guess a snap shot of me scrubblin' about in the mud wouldn't be amiss......I spend alot of time ..ok if I can find said time.with hares or our native little sweetheartdeer aka Roe

one of each

View attachment 164449_S2I9395 Opps smj Tdn by Stuart Philpott, on Flickr

View attachment 164450_S2I8637 BOAB smj Tdn by Stuart Philpott, on Flickr

Hmm the latter.made honestly while standing in a pile of bin bags.......no kidding.some scum had dumped on the side of a road in the worlds........FFS why does anyone think that is in any way ok:(

Screaming abb dabs over back to wooden stuff .init:D


when all this started and that jig.................. for bending wood around was made...there was a plan for some over head lockers...........as chrimbo loomed an with little dosh to complete build and come back to locker dom as an added extra......... later on so to speak..............little work I started to grind into those lockers.............all the gear was here so I started to set about what have now become the bread bins..................

First up was to grind into that oak WT that I cut in a specific way yonks and yonks back,,,,,,,,,damn this was a tough old gig making it wrap around a pop and the shape of the bus

Sort of started here by taking the back out of the slap of oak at an angle

View attachment 164451_S2I0805 by Stuart Philpott, on Flickr

View attachment 164452_S2I0802 by Stuart Philpott, on Flickr

then added in a second length for depth an' to hide 'erm stuff;)

View attachment 164453_S2I0808 by Stuart Philpott, on Flickr

back in a mo

Then ripped into that bit to make it all fit

View attachment 164455_S2I0815 by Stuart Philpott, on Flickr

View attachment 164456_S2I0814 by Stuart Philpott, on Flickr

I kinda worked backwards then off the jig to cut down the 2 curved door sections to sommit like 10 bits of preddy much identically shaped ply as the ends and added some bonfire walnut to the door edges cause I could

View attachment 164457_S2I0811 by Stuart Philpott, on Flickr

View attachment 164458_S2I0820 by Stuart Philpott, on Flickr

View attachment 164459_S2I0818 by Stuart Philpott, on Flickr

cut 6 end pieces slightly big glued then together into 3 pairs .ha you can see me strip joints here.which will help bind them into the oak

View attachment 164460_S2I0924 by Stuart Philpott, on Flickr

and also wading into hinges

View attachment 164461_S2I0821 by Stuart Philpott, on Flickr

and how the ends would work with the bit's carryiing the hinges

View attachment 164462_S2I0926 by Stuart Philpott, on Flickr

View attachment 164463_S2I0927 by Stuart Philpott, on Flickr

and that chaps is ya lot for now as I need sleep..........I did get distracted around now in me build by the light diversion of making me own gear knob. without a lathe and a method we could all use...................but it's late for another day

take care

stu
Impressive work indeed. Anyone would be proud to have the wood work in their van. Bloody awesome
 
@Soundz - is your father Groot by any chance?
I wish.damn I loved Jog's reply( class buddy) .nah mate animal from the muppets

TBF I made a cable hidy thing for me lockers recently.my lady is cruel and heartless she said oh it looks like a posh chair for ya dad.............I promise to show ya'll a pic one day ,but tonite I'm too excited for words

got me battery get in......YES !!!!! yes yes :mexican wave:

Impressive work indeed. Anyone would be proud to have the wood work in their van. Bloody awesome
Heartfelt thanks dude

PS soz brief I've got to download an app fingy now and that won't happen with ease:(
 
Damn! this is awesome craftmanship. I knocked up a drawer for a couple of bottles of vino and compared to this it looks like a kid made it! I have to go back to the drawing board, and woodwork school!
This is top skillz. Thanks for the updates too, keep em comin, like a good book I cant put this down now... but like Stephen King did a few years ago; you dont get the next bit til youve all read the first bit!
 
  • Like
Reactions: JOG
I've got to sleep.@Sabre I'm kinda brain dead with letters..they are a knife fight like blue tooth and PC's for me so a comparison to a wordsmiff it humbling .thank you oh and on me bit's of wood...ha glue up will be intersting.;) I have struggled with word all my life so now as i've got old I don't care any more.what ya see is what ya get

Lads it took hours and many choice again read bad) words but finally we got in ..my roamer power pack came here 98% charged with a tech sheet that will take a chartleton a while to decipher. but the phone and the bms see each other,so that's one gizmo of the blue checklist

what was nice though was the box.....I'm gonna have 24kilos of bomb under me butt

Funny as.......... I love that

52230035861_6039f8ae16_o.jpg_S2I2450 by Stuart Philpott, on Flickr

take care all:thumbsup:
 
Back
Top