Brake Pad & Disc change - How I Done It -

i done the front pads today . . .

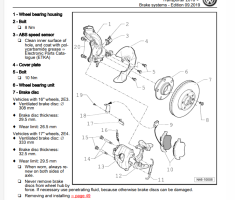
but . . . . run into issues removing the calliper bracket !!!!.


link back up :


.

1649868462418.png

.
 
Stuff used - page updated.

link back up:


.

1649926224819.png
 
I've decided to replace that split 21mm socket with a Impact set.

they want £8 for a single socket - Pah !!

that's not worth it. . .

by definition large bolts and nuts (ie 21mm) will be super mega tight anyway. - which would imply using a impact gun or breaker bar - which puts extreme force on the socket . . . . .

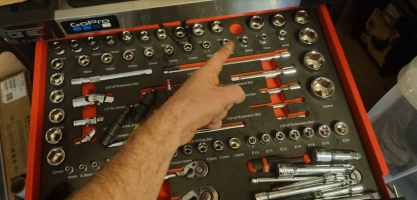
its no surprise really that the standard issue CRV socket popped . . .


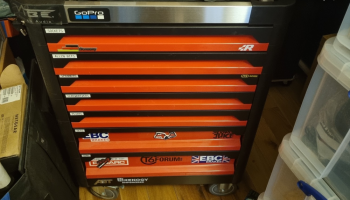
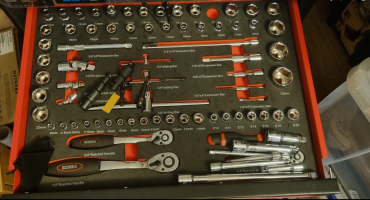
it come from this set: (and yes this lives indoors with me - lol, in the man cave)


1649927154539.png1649927165968.png1649927175915.png


++++++++++++++

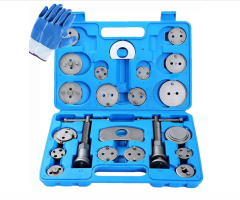
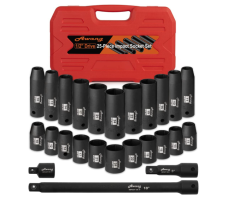
so im going for this set . . 25-peice / impact rated, with extension bars.


its not a branded make, but price vs quality has to take a play here, so

lets do it. . . . and see if we can get that 21mm bolt out . .

i might need to get a new set of 21mm bolts from VW / TPS as the stuck one has started to round its corners. but should be good to still get out.


+++


1649926810579.png


+++
 
I stepped up and did all 4 corners on my 2017 T6 t32 204ps today.

Went for Brembo pads and Discs all round. look a lot better than the rusty OEMs.

AUTODOC sorted me out with the following:

Product name
Price per unit​
Quantity​
Total price in​
Brake Disc
Article №: : 09.9582.11
£43.93​
2​
£87.86​
Brake Disc
Article №: : 09.B498.11
£75.42​
2​
£150.84​
Brake pad set
Article №: : P 85 141
£76.42​
1​
£76.42​
Brake pad set
Article №: : P 85 083
£34.17​
1​
£34.17​
Wire Brush
Article №: : 06965
£1.84​
1​
£1.84​
Torque Wrench
Article №: : GR53001
£28.07​
1​
£28.07​
Order subtotal :
£379.20​


Just want to give a huge shout-out to the OP @Dellmassive and all the info in this thread.

Was invaluable and together with a few You tube video was done and dusted in about 5 hours.

The Van was on the ground so no easy access from underneath slowed the process.

The longest corner was the first one attempted ( front right) . took about 90 min I guess but after that sped thru. Ended up covered in brake dust and grime as well.

The 21mm bolts for the carrier were stuck solid and after 20 min on the first corner trying to loosen them I went the easy route and ordered a Makita DTW300Z impact wrench and it ripped them out. Was well worth the time and effort saved.

Hubs were pretty solid but some light touches with a sledgehammer from behind did the trick.

All in all I saved about £400 doing it myself. The cheapest quote for labour from a local garage was £388+vat. 3 other quotes were all over £400. And before you ask yes I'm in London.

good luck to all those that decide to have a crack in the future.
 
Hi Chaps, bit of advice here….

I have a super annoying squeal from the front, rear pads were replaced a few weeks ago by my independent VAG mechanic so they are all good…..fronts are apparently safe but just annoying. I have digital calipers but haven’t measured thicknesses or inspected pad state as I haven’t decided whether or not to start the whole process!

The yearly service, filters, fluids etc is coming up in a month or two so don’t really need to do it but the squeal is doing my head in and pads don’t cost that much (looking at about £65 for the larger brembo front pads as the van is a 2017 204 T32).

I replaced a LOT of disc brake pads, done a stack of brake bleeds BUT ONLY ON mountain bikes over the years so I am familiar with how the whole system functions, retracting the piston when the old pads are still in, topping up the fluid with correct type AFTERWARDS etc….but have never done this on a vehicle. I used to have a Land Rover defender so as you can imagine I was forced to become fairly competent at working on vehicles… removed and replaced starter brushes, glow plugs, fuel rail, fuel pump, steering column, EGR delete etc but never something that directly impacted safety!

I have the tools except the wind- back which doesn’t seem necessary in the case of the fronts.

what do you reckon? I guess if I get so far and can’t release something I can just bolt back together what I have already done, no harm, no foul? The pad replacement sounded fairly straightforward from @Dellmassive write up, the disc removal seemed to need more penetrating fluid and possibly heat…

it just kinda scares me as the brakes are so vital for safety!

Anyone wanna tell me about their “first time”?
 
Last edited:
Hi Chaps, bit of advice here….

I have a super annoying squeal from the front, rear pads were replaced a few weeks ago by my independent VAG mechanic so they are all good…..fronts are apparently safe but just annoying. I have digital calipers but haven’t measured thicknesses or inspected pad state as I haven’t decided whether or not to start the whole process!

The yearly service, filters, fluids etc is coming up in a month or two so don’t really need to do it but the squeal is doing my head in and pads don’t cost that much (looking at about £65 for the larger brembo front pads as the van is a 2017 204 T32).

I replaced a LOT of disc brake pads, done a stack of brake bleeds BUT ONLY ON mountain bikes over the years so I am familiar with how the whole system functions, retracting the piston when the old pads are still in, topping up the fluid with correct type AFTERWARDS etc….but have never done this on a vehicle. I used to have a Land Rover defender so as you can imagine I was forced to become fairly competent at working on vehicles… removed and replaced starter brushes, glow plugs, fuel rail, fuel pump, steering column, EGR delete etc but never something that directly impacted safety!

I have the tools except the wind- back which doesn’t seem necessary in the case of the fronts.

what do you reckon? I guess if I get so far and can’t release something I can just bolt back together what I have already done, no harm, no foul? The pad replacement sounded fairly straightforward from @Dellmassive write up, the disc removal seemed to need more penetrating fluid and possibly heat…

it just kinda scares me as the brakes are so vital for safety!

Anyone wanna tell me about their “first time”?
I did my fronts a couple of weeks ago. Make sure you get all your ducks in a row before you start.
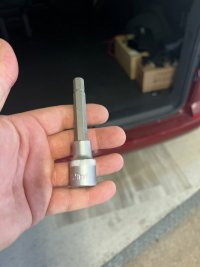
I got a new torque wrench, a loooong breaker bar and a 9mm long Allen key socket and brake cleaner and axle stands.
It was straightforward. Jack up, axle stands, wheels off. Spray release agent onto retainer bolt.
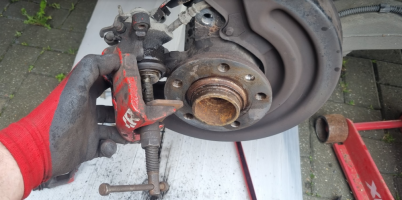
Remove retainer clip,which on the big brakes is a bugger, then unbolt caliper carrier bolts. Breaker bar worked a treat here.
Then undo the carrier bolts and remove the caliper carrier.
Remove retainer screw and use a big persuader (lump hammer) to knock the disc off. Clean the hub mating face so it shines lol then wind back the pistons.
I used a wind back tool because I already have one. BUT with twin pistons you need to put a piece of ply or similar across the two pistons otherwise as you wind one in the other comes out. Doh!
Oh yeah, remove brake fluid cap before this stage and put some old rags round in case you push fluid out in the wind back process.
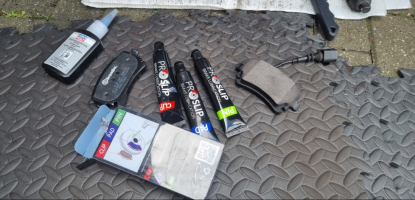
Then new disc, retainer screw and reassemble using ceratec lube (not copper slip) on moving edges and rear of pads (that’s what it stated on my pads). Also lube the slider bolts before you reinsert them.
Then pad into caliper and put caliper on and tighten to correct torque. Then put carrier/pad on and bolt up to correct torque. Then put the retainer clip back on. That is massive fun…..not.
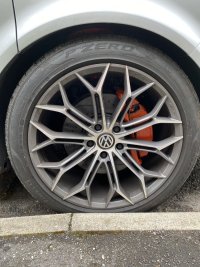
Then clean the caliper and paint it orange and put the wheels back on.
Reservoir cap back on then pump the brake pedal a few times until firm.
Then follow pad manufacturer instructions to bed them in.
If I’ve missed anything I apologise but that’s just from memory.
It’s pretty straightforward.
61CE580F-D4F5-4286-9235-AD960F8F2AA6.jpeg
 
I did my fronts a couple of weeks ago. Make sure you get all your ducks in a row before you start.
I got a new torque wrench, a loooong breaker bar and a 9mm long Allen key socket and brake cleaner and axle stands.
It was straightforward. Jack up, axle stands, wheels off. Spray release agent onto retainer bolt.
Remove retainer clip,which on the big brakes is a bugger, then unbolt caliper carrier bolts. Breaker bar worked a treat here.
Then undo the carrier bolts and remove the caliper carrier.
Remove retainer screw and use a big persuader (lump hammer) to knock the disc off. Clean the hub mating face so it shines lol then wind back the pistons.
I used a wind back tool because I already have one. BUT with twin pistons you need to put a piece of ply or similar across the two pistons otherwise as you wind one in the other comes out. Doh!
Oh yeah, remove brake fluid cap before this stage and put some old rags round in case you push fluid out in the wind back process.
Then new disc, retainer screw and reassemble using ceratec lube (not copper slip) on moving edges and rear of pads (that’s what it stated on my pads). Also lube the slider bolts before you reinsert them.
Then pad into caliper and put caliper on and tighten to correct torque. Then put carrier/pad on and bolt up to correct torque. Then put the retainer clip back on. That is massive fun…..not.
Then clean the caliper and paint it orange and put the wheels back on.
Reservoir cap back on then pump the brake pedal a few times until firm.
Then follow pad manufacturer instructions to bed them in.
If I’ve missed anything I apologise but that’s just from memory.
It’s pretty straightforward.
View attachment 162532
Brilliantly straightforward and good advice to ”get my ducks in a row” before I start! Thanks!
 
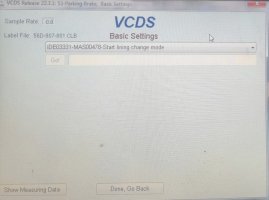
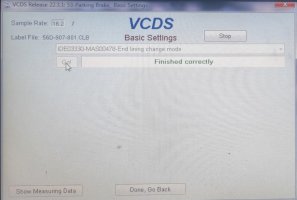
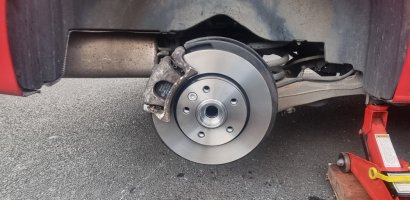
I have bought new rear discs & new rear pads for my bus.
Tomorrow is the day when I will use VCDS for the first time on my T6 instead of this tool.
View attachment 171013


THE POWER OF ELECTRICITY :inlove:

Keep us posted.....

I was under the impression that the only way to do the rear calipers was to use the windback tool.
 
Sorry if I missed it in the thread but for the fronts is it necessary to replace the caliper carrier bolts? I have read that they are stretch bolts on the front but I'm struggling to confirm this or where to source them if required.
 
I am replacing front pads shortly, I picked up a new set of front pads a while ago when they were on offer. The are sealed in plastic but there is only one sensor. Should there be a sensor per wheel?
 
Sorry if I missed it in the thread but for the fronts is it necessary to replace the caliper carrier bolts? I have read that they are stretch bolts on the front but I'm struggling to confirm this or where to source them if required.
Yes they need to be replaced, VW supplied.
 
I am replacing front pads shortly, I picked up a new set of front pads a while ago when they were on offer. The are sealed in plastic but there is only one sensor. Should there be a sensor per wheel?
As far as I’m aware the assumption is that the pads wear at an equal rate so one sensor is enough. Unfortunately this is not always the case, don’t rely on warning lights for checking brake wear.
 
what he said, one per axel set. . . .

you will see the loom that it connects too. . .


1672491270147.png1672491314840.png
 
Can anyone who has removed the caliper pins on a T6 with standard brakes remember the hex size? @Pauly suggests it's 7mm but can anyone else confirm 100%?
 
Yes 7mm fits, It’s defo not 9mm !

image.jpg

A few years back I read it was 9mm and ordered a long reach one only to find it was too big when I went to do my brakes
 
Back
Top