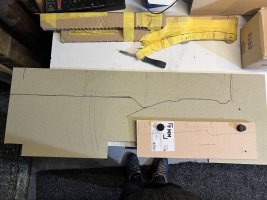
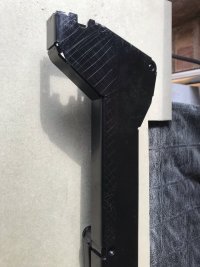
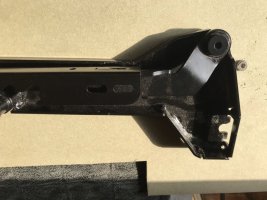
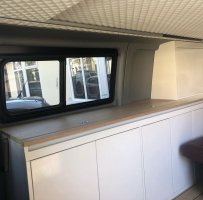
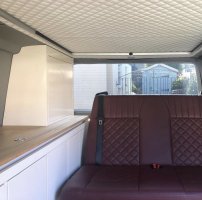
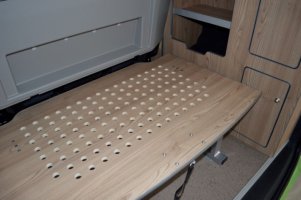
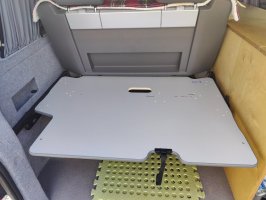
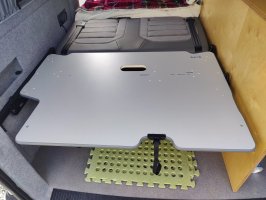
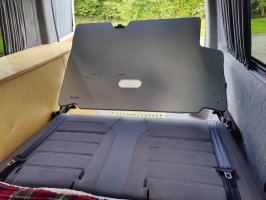
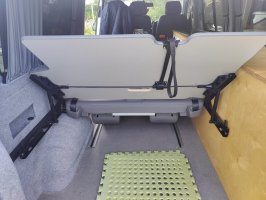
Well I managed to flip the 6.1 bed extension.

Managed to keep everything. Thought I’d need to replace the bed board because of the off-centre pull cord. Turns out they could be flipped as well. It’s a piece of strong webbing the filters off into a T or Y split to 2 thinner pieces.

So basically everything is held in with wood insert nuts then the M5 bolts screw into those.

So I whipped them all out, drilled through the holes to the other side. Then placed the insert nuts back in and bolted everything back again.

The down sides are the holes on top and one side need sanding down so the handle has a bit of breathing room.

View attachment 110038

View attachment 110039

View attachment 110040

View attachment 110041
Its great work, Im currently trying to find a bed extension for the Cali 2 seater bed. Out of interest did you manage to mount this in the van? Im wondering how the brackets will fit to the units and van as they are different lengths each side, and a conversion wont have the cali trim to fix to.

On another point I have been told you can buy a 2 seater Cali seat that sites on the LHS of the van (passenger side). If they sell a seat like this maybe the bed extension is available for our side as well. (As well as the plastic trim pieces.)
 
On another point I have been told you can buy a 2 seater Cali seat that sites on the LHS of the van (passenger side). If they sell a seat like this maybe the bed extension is available for our side as well. (As well as the plastic trim pieces.)
They never did, so no
 
Its great work, Im currently trying to find a bed extension for the Cali 2 seater bed. Out of interest did you manage to mount this in the van? Im wondering how the brackets will fit to the units and van as they are different lengths each side, and a conversion wont have the cali trim to fix to.

On another point I have been told you can buy a 2 seater Cali seat that sites on the LHS of the van (passenger side). If they sell a seat like this maybe the bed extension is available for our side as well. (As well as the plastic trim pieces.)

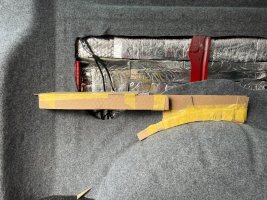
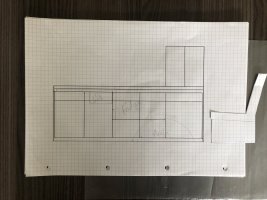
i haven’t fitted this yet. I’ve made a start by templating a bracket to fix the left side above the wheel arch. the right side should be more straight forward.

At the moment I’m looking at making something like this. It will fix into the rear seatbelt bolt, and the would need an upright down to the floor at the other end.

817E73EB-3DDE-4775-86D3-4EFF6C3D9068.jpeg

EFBCC9EC-6825-4579-AD36-11B36718F244.jpeg
 
i haven’t fitted this yet. I’ve made a start by templating a bracket to fix the left side above the wheel arch. the right side should be more straight forward.

At the moment I’m looking at making something like this. It will fix into the rear seatbelt bolt, and the would need an upright down to the floor at the other end.

View attachment 153258

View attachment 153259
Very nice work. Fancy making a second one lol.
 
i haven’t fitted this yet. I’ve made a start by templating a bracket to fix the left side above the wheel arch. the right side should be more straight forward.

At the moment I’m looking at making something like this. It will fix into the rear seatbelt bolt, and the would need an upright down to the floor at the other end.

View attachment 153258

View attachment 153259
Maybe you could go with 2 rivnuts instead of an upright. There is a double skin panel at the d-pillar which should be strong enough. What material are you making the bracket from?
 
Maybe you could go with 2 rivnuts instead of an upright. There is a double skin panel at the d-pillar which should be strong enough. What material are you making the bracket from?

good idea! I’m going to make a prototype from wood then consider drawing it up and having a metal version cut.

ideally whatever solution I go with I want the seat to be able to slide all the way to the back when the bed extension is removed = so the brackets needs to be minimal.
 
its been a bit of a mission, I’ve had to chop part of the bed extension metalwork because it clashed with the wheel arch. I have a metal work friend who has been very helpful.

D42D263F-A385-4DD3-9DA9-999D0F71B413.jpeg

4D5C6B7C-70BF-456F-B311-5FC68B2D79B1.jpeg
 
Great work, however i think it is getting a bit beyond my skillset to copy :(.
 
Here’s ours - SWB with the smaller SMEV (9722?) and a top-loading BI41 fridge.
Not the greatest photos I know, but that’s probably because I’m not particularly happy with it
C08742FA-806C-4656-9C59-6EFAA16EA430.jpeg
841F0194-A857-4844-AC15-15DD69AE33D8.jpeg
Against the original plan
4B1DF230-6468-4CF7-98B3-39EDB2A0F6E7.jpeg

I was anal about having the fronts matching, but this doesn’t really work when your sliding seat ends up sitting in roughly the same places every time you set up camp.
We didn’t want tambour doors because of the rattling and likely jamming issues, but they would certainly help.
The joiner omitted the drawers as he was running behind on time.
NB the draw fronts under the cooker would end up being redundant, or just allowing you to view gauges, due to the Smev being recessed and sitting beneath the worktop, which I didn’t realise at the time.
I’m going to fit drawers and cut a door in the rear panel so I can access the wardrobe when the tailgate is open.
And I’m going to fit high-density foam (or similar) between all surfaces where wood meets plastic, as the squeaking is a killer.
 
@JOG is this the multiflex system that's in your beach?
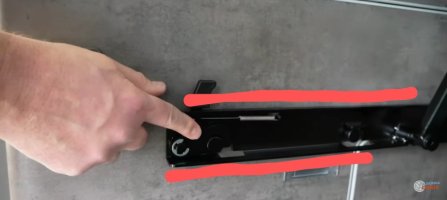
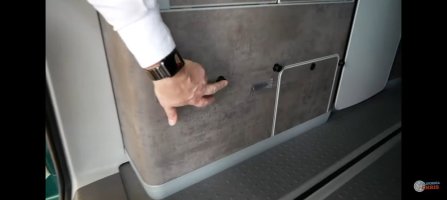
I'm waiting on the mounting pins to arrive before I design the bracket to hold the hinges. One thing that's not clear to me from the pics and videos I've seen is if the hinges are supported by the wardrobe face and rear quarter trim or if there is a few mm gap.
Could you say if this contacts the wardrobe or do the mounting pins keep it away from the face of the wardrobe?

Screenshot_2022-08-24-21-10-51-73_f9ee0578fe1cc94de7482bd41accb329~2.jpg

Screenshot_2022-08-24-21-08-31-90_f9ee0578fe1cc94de7482bd41accb329.jpg
 
@JOG is this the multiflex system that's in your beach?
I'm waiting on the mounting pins to arrive before I design the bracket to hold the hinges. One thing that's not clear to me from the pics and videos I've seen is if the hinges are supported by the wardrobe face and rear quarter trim or if there is a few mm gap.
Could you say if this contacts the wardrobe or do the mounting pins keep it away from the face of the wardrobe?

View attachment 170125

View attachment 170126
Hiya - I have a California Beach, so no wardrobe! I can take pics for you tomorrow if you want me to
 
Hiya - I have a California Beach, so no wardrobe! I can take pics for you tomorrow if you want me to
Brain freeze moment from me. Looks like the beach has a different multiflex board.
The multiflex I have is from the ocean.
 
Here’s my NWCC Verso bed board, they don’t use this design anymore.
It’s a steel frame fixed to the rails with 2x T bolts and thumbscrews.
I run it further back than shown in the photo which maximises space in the van, the supports at floor level are all the way aft to the edge of the tailgate threshold.
The black fabric loop in the photo releases a catch which allows the bedboard to tip up from the rear to lay across the rear of the Cali seat. This allows better access to the lockers.
As this bedboard is moveable on the rails the bed can be rigged anywhere on the rails.
It can also be removed completely which allows the Cali seat to go back to the tailgate creating much more internal space.
It’s a very strong construction, I’ve had the top loaded up to the roof with Spanish booze and camping stuff still underneath, no issues other than body roll.

1661376284220.jpeg
 
Following on from the work @bobbybasic started I have most of the work completed on the multiflex system. Just need to add the 2 rear support brackets, fill the gap in the corner of the multiflex board and cover the original fixing holes in the top of the multiflex board.
We will be using a topper/duvaly.

IMG20221001112052.jpg

IMG20221001111824.jpg

IMG20221001111924.jpg

IMG20221001111914.jpg
 
Back
Top