GUIDE MFSW Steering Wheel Upgrade

Tanstalf

Member
T6 Pro
WHAT: A guide to help people upgrade their nasty plastic steering wheel
WHO: For curious onlookers to DIY experts
WHY: Produce a guide with lots of pictures
VEHICLE: VW T6 registered 2016
TRANSPORTER T28 S-LINE TDI BMT

FROM:

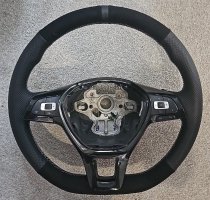
1000007062.jpg

TO:

1000007052.jpg

THANKS,: @The Flying Scotsman who was an immense help
 
OK guys got new swcm ch, and new slipring but got the 5k0971564a harness which as 3 copper clips and a spare wire coming out the mfsw black plug that fits into buttons, now had mfsw on mk5 and now mk6 but stopped working few mths ago, sourced all same parts, exsept the harness as horn never worked always had dummy button by gear shift stick, anyone know what wire for and if it's for assistance to horn. Wire marked red arrow, put swcm on and hoping once do squib and harness be back up running again after coding,

Ps now ch is highline module so my last coding was 0000104 as although got rear wiper deleted but mark as have and mfsw as no push talk or dsg think asks. All help welcome thanks.

Ps not sure if OK post mk6 problem in t6 forum but hope someone can help explain it for me thanks

Screenshot_20241031_133106_Google (1).jpg
 
While there are a number of posts on this forum about the upgrade, you can never have too many :cool: - if you get the urge, I’d love to read it..
 
Hi @Tanstalf, would still love to see your guide, even if you could just post the photos in order, happy to help add the wording as I attempt mine (once I find the right MFSW)
 
I swapped mine a while back for a carbon golf r SW from Ali express, all genuine buttons and air bag tho. I swapped the original wiring loom over to the golf air bag but every now and then when I check diagnostics an implausible signal appears in the air bag module. Does it need coding or a wire swapping I wonder?
 
STEP 1 - PICK THE WHEEL

I went with Steven at

sscustomworks

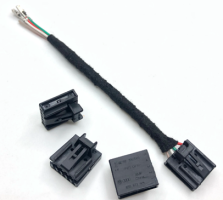
He does a huge range of customisation. I picked an all black with leather and alcantara. The wheel was £280 and controls £150. I re-used my own airbag/horn. I got a few free looms and used the white platic cable routing, but more on that later.

SSCustom MFSW.jpg
 
Last edited:
STEP 3 - REMOVE THE WHEEL & AIRBAG

Remove the TOP black plastic cowel behind the wheel - USE TRIM TOOLS - push it back and out of the way.

PXL_20240706_082014101.jpg

With the ignition on, rotate your wheel 1/4 turn to the right. Pull the wheel forward as far as possible to give yourself room to access behind the wheel.
PXL_20240706_083633844.jpg

REMOVE YOUR KEY FROM THE IGNITION IF YOU ARE WORRIED ABOUT THE AIRBAG GOING OFF

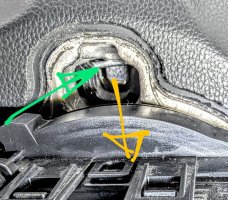
Using a flat head screwdriver. locate the spring bar in the access hole at the back of the wheel
PXL_20240706_084746592.jpg PXL_20240706_085538796.jpg

It's a bit fiddly, but you need to get above the spring bar and leverage it down, while pulling the airbag/horn away from the wheel
This photo is taken looking to the back of the wheel.
PXL_20240707_162831115~3.jpg

Turn the wheel to the left 1/2 turn to expose the other hole and repeat.
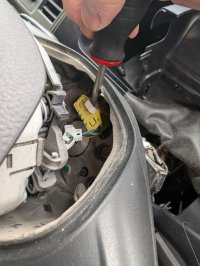
Pull the white tab UP on the yellow connector to disconnect the Airbag/Horn - PLACE SOMEWHERE SAFE

PXL_20240706_085814198.jpg

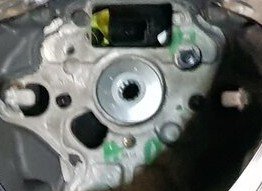
Using an M10 Spline, unscrew the bolt at the centre of the wheel - SEND YOUR OLD WHEEL TO STEVEN

M10 Spline Wheel.jpg M10 Spline Wheel Nut.jpg

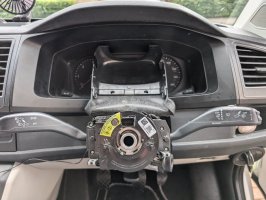
Unscrew the two black TORX bolts and remote the BOTTOM black plastic cowel behind the wheel
1742652934168.jpeg

You now have unrestricted access to the GREY PLUG
1742650804275.png
 
Last edited:
STEP 4 THE GREY PLUG

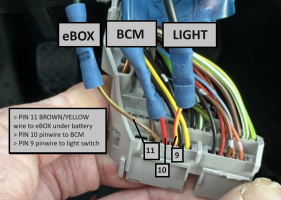
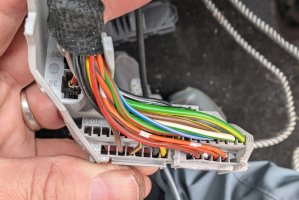
Three Pin Wires connect to the GREY PLUG at back of steering wheel to pins 9, 10 and 11
Use the FULL LENGTH of the 2PC Repair Wire - don’t cut them short or the GREY PLUG won't go back together again.
  • PIN 11 brown/yellow wire - cut and attached to the wire going to eBOX under battery
  • PIN 10 slide a pin connector in - connect to wire going to BCM under dash above pedals
  • PIN 9 slide a pin connector in - connect to wire going to your light switch
GOOD LENGHTS
PXL_20240707_134308431.jpg

BAD LENGTHS
1742651270010.png
 
Last edited:
STEP 5 - LIGHT SWITCH
  • Remove the light switch - PUSH IN AND ROTATE (plenty of guides on this) - disconnect the black connector
  • Look for the thin black wire and cut it - TAP/SPLICE and feed this BLACK CABLE to your wheel - it will connect to the GREY PLUG

    NOTE: Ignore the thick blue wire tapped into the black wire in the photo
1742651625072.png
 
STEP 6 - BCM UNDER DASH / ABOVE PEDALS
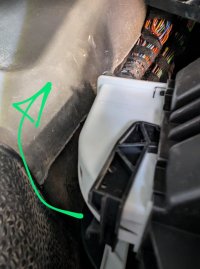
  • Remove the tray above pedals - lie on your back and look up
  • BCM has 2 plugs going into it - remove the big white plug - pull the black lever over the white plug housing to remove it
PXL_20240706_140411078~2.jpg
  • Once you remove the big white plug, carefully remove the white plastic housing from the plug to reveal the black plug inside
  • This black plug slides apart and you are left with 2 black plugs
1742651939453.jpeg

1742651991815.png
  • Use a small pin wire and insert it into pin 36 - this attaches to GREY PLUG PIN 10
1742652067322.jpeg
  • If there is already a wire in pin 36 as I had - TAP/SPLICE but make sure you leave room to CLIP EVERYTHING BACK TOGETHER

PXL_20240706_143211121.jpg
 
STEP 7 - THE F***ING EBOX

THIS IS THE HARDEST PART AND YOU WILL SWEAR .... A LOT
Through the dash into the engine bay and connects to a plug under the battery to activates CCS
Ironically, my CCS did not work in the end, so I could perhaps have avoided doing this...
  • Remove the battery, plate and lid of eBOX to get to mass of cables underneath
  • On the left of the big red power wires you will see a black cartridge that holds lots of different coloured plugs - unclip this and pull it up as far as you can.
1742652364138.png

1742652402033.png

  • I moved the black square relays with the numbers on, over to the right out the way and held them there with a screwdriver
  • I unscrewed the big black earth strap and moved that out of the way
1742652444005.png
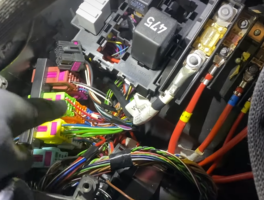
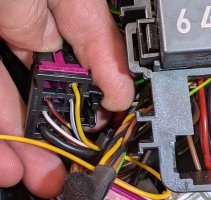
  • The plug you need is black and purple but there are 2 black and purple plugs. And of course the one you need is the RIGHT AT THE BOTTOM
  • You need the bigger pin connectors with the yellow wire and fit it into PIN 1 which is bottom right of plug in pic.
  • Don’t be afraid to give the cartridge with plugs a good pull up. It’s a bugger getting the pin into this connector but you will manage.
  • You can see my yellow wire attached into the back of the black and purple plug
1742652490011.png


PXL_20240707_091744657.jpg

1742653629537.jpeg

PXL_20240707_101441577.jpg

TOP TIP: To remove the fuse box. Remove the lid on the side first
PXL_20240707_105703396.jpg
 
Last edited:
STEP 8 - THE GREY PLUG (REVISITED)

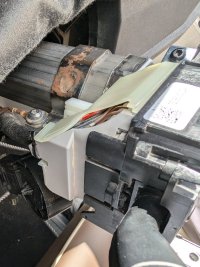
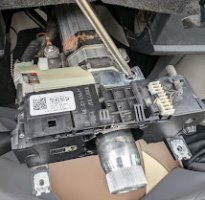
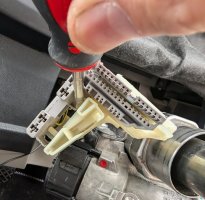
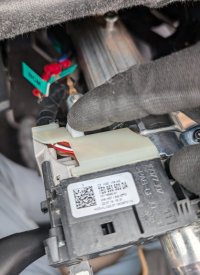
To access the GREY PLUG, I removed the BLACK UNIT completely - THIS MAY NOT BE NECESSARY but access was better

PXL_20240706_115848726.jpg

PXL_20240706_123757487.jpg

PXL_20240706_132752957.jpg

Pull the WHITE TAB up HARD and it will leverage the GREY PLUG back to disconnect.

PXL_20240706_123837202.PORTRAIT~2.jpg PXL_20240706_123906538.PORTRAIT~2.jpg

HONESTY TIME : I took this photo and cannot remember what it shows :cool: - maybe some can update the collective when they get to this bit - I suspect it issomething to do with disconnecting the GREY PLUG...

PXL_20240706_124422334.jpg

Insert your wires into the correct PINs.
NOTE: You can see how much I chewed up the connector before working out how to disconnect it :cool:

PXL_20240707_123148648.jpg

Label up your wires and put everything back in
PXL_20240707_134308431.jpg

PXL_20240707_140734891.jpg
 
STEP 3 - REMOVE THE WHEEL & AIRBAG

Remove the TOP black plastic cowel behind the wheel - USE TRIM TOOLS - push it back and out of the way.

View attachment 279677

With the ignition on, rotate your wheel 1/4 turn to the right. Pull the wheel forward as far as possible to give yourself room to access behind the wheel.
View attachment 279678

REMOVE YOUR KEY FROM THE IGNITION IF YOU ARE WORRIED ABOUT THE AIRBAG GOING OFF

Using a flat head screwdriver. locate the spring bar in the access hole at the back of the wheel
View attachment 279679 View attachment 279680

It's a bit fiddly, but you need to get above the spring bar and leverage it down, while pulling the airbag/horn away from the wheel
This photo is taken looking to the back of the wheel.
View attachment 279681

Turn the wheel to the left 1/2 turn to expose the other hole and repeat.
Pull the white tab UP on the yellow connector to disconnect the Airbag/Horn - PLACE SOMEWHERE SAFE

View attachment 279683

Using an M10 Spline, unscrew the bolt at the centre of the wheel - SEND YOUR OLD WHEEL TO STEVEN

View attachment 279684 View attachment 279685

Unscrew the two black TORX bolts and remote the BOTTOM black plastic cowel behind the wheel
View attachment 279702

You now have unrestricted access to the GREY PLUG
View attachment 279686
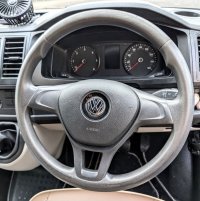
Correction it is an M12 SPLINE.
 
Wow @Tanstalf !! Great write up..

Hopefully someone can help fill in the blanks on Step 8..

I ended up paying someone to do my swap over recently - and they didn’t touch the fuse box under the battery. They seemed to just repurpose existing wires from under the steering wheel/driver side dash and then from behind the steering wheel itself.
 
Nice clear guide. I`ve already got cc so didnt bother with a wheel with cc. I take it I`ll only need to put a repair wire to the bcm and light switch then ?
 
Back
Top