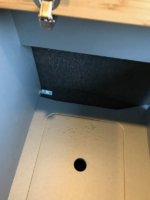
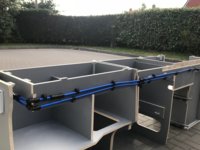
Fill and shower points
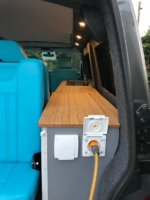
IMG_1428.JPG

First test didn't go well

IMG_1427.JPG

I'd not used a proper Whale elbow connector and the one I did use off Ebay didn't have the grooves in so the pump pressure pushed the fitting out.

So I replaced that and at the same time replaced the last 3 feet of the tank fill pipe with a flexible pipe to allow me to fit the units either and ensure the fitting didn't move or come lose with any movement whilst driving. If I did it again I would probably just use the flexible pipe for everything rather than all the Whale fittings but they came with the tank kit I got.

I also had issues with the drain tap not sealing!!

IMG_1429.JPG
 
i just noticed that you are missing the black rubber seal on your water inlet, mine did the same thing, a bit of sikaflex will keep it in place, if you still have the rubber seal
 
i just noticed that you are missing the black rubber seal on your water inlet, mine did the same thing, a bit of sikaflex will keep it in place, if you still have the rubber seal

Thanks, I know it's a pain. I still have.
 
also keen to know if these are potable, where you plan on putting the filler cap and where you bought the tank from?
I have just spoken to Steve at UK Leisure Parts and he assures me they are potable.

I’m thinking about ordering just the tank and using it for fresh water, so I don’t have too much grief with freezing risk. I’m not interested in a shower attachment, and Neilson’s point about using flexipipe seems to simplify the install, along with Fish’s monitor modification.
 
I'll have a look
I tried 15mm and with a little warming that worked.

Another couple of questions tho:

  • Which level gauge did you use? There seem to be 2 varieties and not sure which is best fit for this tank
  • How did you terminate the drain? Got any pictures perhaps?
 
I tried 15mm and with a little warming that worked.

Another couple of questions tho:

  • Which level gauge did you use? There seem to be 2 varieties and not sure which is best fit for this tank
  • How did you terminate the drain? Got any pictures perhaps?
I’m about to bite the bullet and order one of these.

@Ann3x have you used the parts supplied or have you used your own piping?

Did you sort out a drain termination?
 
I’m about to bite the bullet and order one of these.

@Ann3x have you used the parts supplied or have you used your own piping?

Did you sort out a drain termination?

I'm mid way through. Van had a prang so stuck whilst it's being fixed.

I think I have my plumbing sorted tho.

25mm tubing for fill/drain
10mm tubing for tap
15mm pipe reinforcers
Various low profile elbows

Metalwork and props to support also done.

Not sorted drain hole yet mind.
 
I'm mid way through. Van had a prang so stuck whilst it's being fixed.

I think I have my plumbing sorted tho.

25mm tubing for fill/drain
10mm tubing for tap
15mm pipe reinforcers
Various low profile elbows

Metalwork and props to support also done.

Not sorted drain hole yet mind.
Crikey, hope the prang isn’t too much grief
 
How much modifying was involved to fit the units?
I routed about 8mm off half of the first unit. It only needs to be about 25mm from the top of the work top.

You could trim 25mm ish off the bottom of all the units and lower them. then they would slide in under the blinds. I'll see of I have a better picture.
 
You can see it on the right hand side here. It's probably more than 25mm actually.

IMG_1242.JPG
 
@Edmeista Have a look underneath as you want to make sure you avoid the cross members and exhaust mounts. The passenger side is easier as there's not much in the way but the drivers side has the exhaust and plenty of heat shields. I think I dropped the fuel tank as well but might be wrong.

Also when you fit the R/R bed check it passes the C post. I didn't and I can't slide it right to the front which is annoying. To be honest though as I've fitted draws to the bed it's not easy un-clamping and moving it anyway and due to the weight it doesn't slide very easily. Not sure I would fit them next time.

Thanks for the advice mate I know I've got to drop the tank but I wasn't sure what was involved with the exhaust side. Cheers. Ed
 
@Neilson what Bed did you go for? Love the idea of the bed on sliding rails in my shuttle but worried about the height. I would go for a smart\titan\rib on rails but they cost a fortune as they're either a very expensive product with their own in house rails or based on Caravelle rails. Also I don't need full length rails as I'll have my shuttle mid seats in play.
 
@saintclarkey1 I used the evolution 2 bed from smart beds. I love the bed and the rails don't add much height (25mm approve with the adaptors and rails). But with the weight of the bed it is difficult to move it as you have to basically drag it across the rails. I've added an under bed drawer and no I never move it.

The rails do give you some flexibility and are relatively inexpensive but I would say if you want to move the bed on a regular basis it would be worth considering a sliding system with bearings.
 
Back
Top