bigyellowvanman

Member
T6 Pro
Hi all,

I have found the forum super useful in getting information together for my build and deciding what I want. I figured I could document what I end up doing in case anyone wishes to do similar. I decided to write the thread in retrospect so the first few posts are back to back. I've separated them into sections to try and give shape to the stages in which I have done work.

Background:
I have had lots of cars through my 10 years of driving. Sports, SUV, Estate, Saloon. You name it I've had it...but nothing has ever stuck and I wanted to get something that fitted my lifestyle (mountain biking, hiking, camping, etc). I am based in Cornwall and generally work from home so I don't need anything for commuting either. My other half has a runabout car so we have the weekly shop covered. The van is used for bigger trips and when she is out in the car.

The van I ended up buying cost me £14k....it seemed a good deal but you be the judge??
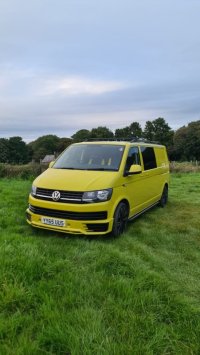
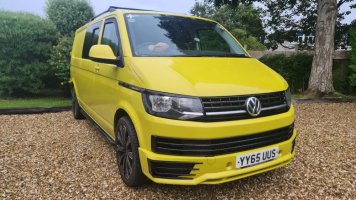
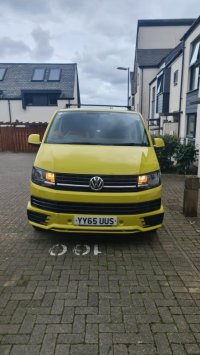
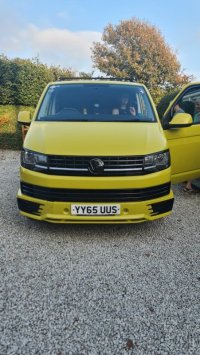
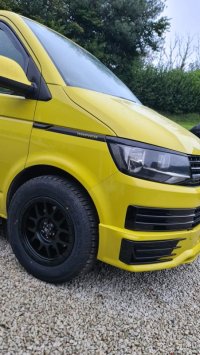
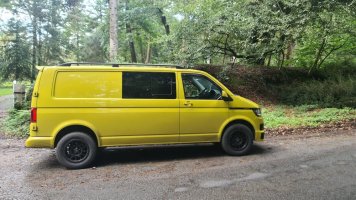
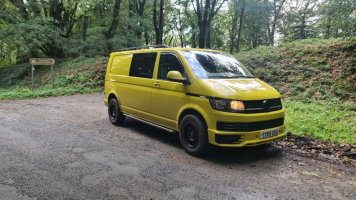
2016 T32 LWB 102bhp Startline...was on a personal plate at time of pictures
Grape yellow
106k Miles
Full History and recent cambelt
AC
Split charger for leisure battery into a weird box panel thing for controls
Carpeted over ply lining
Smelled very strongly of lemon

So the van itself seems solid, it came with 20inch rims that rub the arches and needed a good clean.
I am a little confused regarding the spec, as it appears to be a startline but has a body coloured bumper and sportline front bumper. The guy I had bought it off didn't seem the sort to modify so a bit weird. Otherwise It has the start/stop engine, and DAB radio....that's about it!

My plan is to turn into a soft roader. Partly for the look...and partly because the roads in Cornwall are terrible and I often head off down farm tracks and onto Dartmoor/Bodmin Moor. A standard van would handle it fine I am sure. But sometimes its nice to have a little more grip and height. I am fully aware that a 2WD has limited ability. But I don't intend on doing anything too crazy!
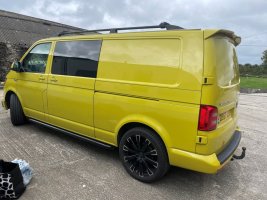
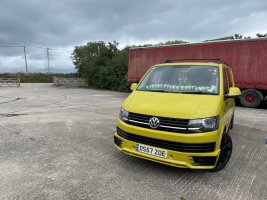
received_616757890525448.jpeg

received_6635274763174242.jpeg
 
Last edited:
First things first I wanted to have the van serviced. I am not hugely mechanical, so generally tend to outsource a lot of work.

Service and health check undertaken by North Cornwall VW. Overall report is that the van is in great condition apart from a hole in the turbo inlet pipe...150 pounds for a new one fitted.

The van only has standard convenience lights in the back, so i want to get LED spotlights fitted as well as the electrics looked over by someone who knows what they are talking about.

Other points of progress:
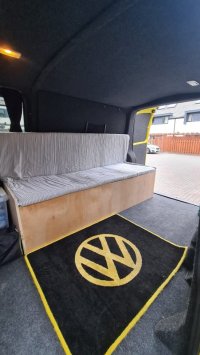
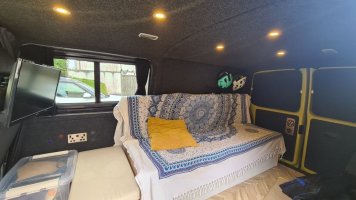
- Bought a DIY pull out bed. But it isnt the best. £240. Currently using a sofabed mattress which is doing the job.
- Removed a kitchen cabinet that came with the van. It was incredibly heavy!
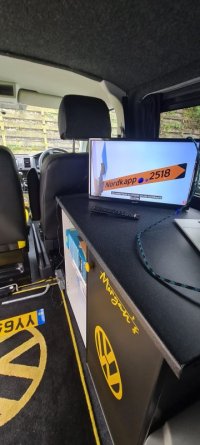
- Bought a 12V Television and cheap magnetic aerial. Works great.

WhatsApp Image 2023-09-20 at 09.44.05.jpeg

WhatsApp Image 2023-09-20 at 09.43.31.jpeg

WhatsApp Image 2023-09-20 at 09.44.06.jpeg
 
Last edited:
Getting on great with the van (posts are back to back as I only decided to make a thread in retrospect).

Took the van to Wadebridge based Kustom Interiors, who are transporter/campervan specialists.

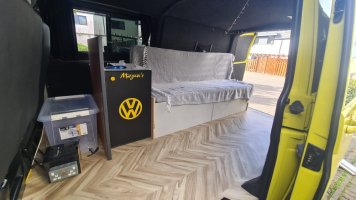
The leisure battery set up was very poor, using a cheap split voltage charger (a no no with a start/stop van). The power cables were spliced in several places and generally shoddy workmanship. The controls for the battery were just whacked onto a plywood box and it all just looked crap... I decided to pay to have the whole electrical system overhauled. New battery, Victron charger, new cabling, and control panel moved to underneath the rear window. Total cost including adding 6 LED spotlights was £800.

6 LED spotlights is overkill. I would say 3 in a line would be fine.

Also ordered a lino cut floor as we have a Labrador and i often put muddy bikes in the van. Much better! Easier to clean and fairly easy to fit. Just required some gentle trimming with a Stanley knife.

WhatsApp Image 2023-09-20 at 09.52.12.jpeg

WhatsApp Image 2023-09-20 at 09.53.06.jpeg
 
Next update:

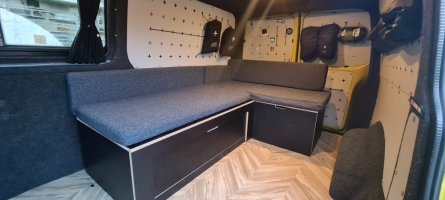
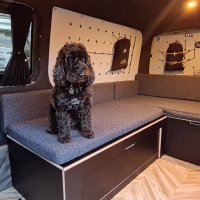
The bed was doing my head in so have decided to sell this one. Someone collected it for the same price that I paid. Decided to buy an L shaped set up from Van Furniture instead. Expensive but hopefully worth it!

In other news:
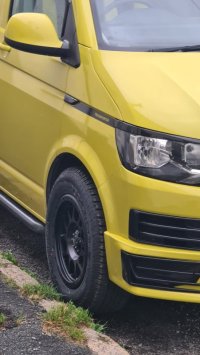
- Added black eyebrows to front
- Added THQ LED indicators as the old ones were full of gunk (trying to justify a drunk friday purchase!)
- Bought black badge
- Added black transporter stickers on front wing

WhatsApp Image 2023-09-20 at 09.53.51.jpeg

WhatsApp Image 2023-09-20 at 09.53.34.jpeg
 
Badge fitting....nightmare!

The black badge goes onto a backplate which itself fits onto a backplate behind the grille. If you are lucky its a case of pulling the first out and fitting the other.

If you are unlucky, the backplate falls backwards and wont stay clipped in. For me the backplate fell down in front of the intercooler. I've got chunky hands so was thankful for my partners smaller arms in retrieving the backplate.

The short version of this is....take the 3 self tapping pins out of the top of the bumper (under the bonnet) and the screw that holds the battery separator. This will allow you to get a hand in behind the bumper and hold the backplate in place. Its a pain in the arse and just get a friend to help. Takes 5 minutes with 2 people!

Black badge...on.

WhatsApp Image 2023-09-20 at 09.54.12.jpeg
 
Now finally up to date....

I have been wanting to get rid of the giant wheels and lift the van. I am a huge fan of the swamper look. They are my dream camping/go anywhere vehicle. Wish I had a 4 Motion but it is what it is!

After a few pints on a friday I found a PCD 25mm lift kit for T6 on Ebay for 80 pounds. As I dont intend on heavy offroading then these are fine for me. I may switch to Koni shocks in the future.

I managed to sell my wheels locally, and bought a set of Tomahawk Katos with Yokohoma Geolander GO15 tyres (245/65/17) from Rogue Alloys. Great company and excellent customer service. The wheels are literally bolt on. No spigots needed.

The van is in the garage right now having the lift kit fitted, alignment and tracking done, and the new turbo pipe sorted.

I will get up to date pictures tonight, but heres some with the Kato alloys fitted on standard suspension.

WhatsApp Image 2023-09-20 at 10.06.14.jpeg

WhatsApp Image 2023-09-20 at 09.54.40.jpeg
 
Final update until the bed comes...lift kit and rogue alloys fitted and sorted!

Happy with the look and glad I only went for 25mm in lift. I decided to go for spacers as I wont be driving off-road often. Mainly tracks and trails. Therefore I couldn't warrant spending £££ on a full setup.

Ride is similar to before. With the combination of bigger tires/tread and spacers there is definitely more noise in the van (I'm quite sensitive to noise and vibrations so others may not sense it as much). So far so good! Shall report back on long term usage.

For now, it looks like a big badass yellow bus...!

Wheels here https://www.roguealloy.co.uk/product-page/17-gloss-black-kato-alloy-wheels-5x120-1250kg-load-rating
Spacers here T5/T6 Suspension Swamper Lift Kit (Silver) | PCD Parts

WhatsApp Image 2023-09-20 at 18.19.51 (1).jpeg

WhatsApp Image 2023-09-20 at 18.19.51.jpeg
 
Love it fella. I am also wanting the swamper look although I think I messed by buying 18" wheels, I say this because the tyres I want are the GG at3s, now, I've Been told to get the 235/65 r18s and these can fit with a 50mm drop, the issue is it has coil overs which I've just raised but I'm still only getting 390mm from wheel center to arch. Do you know if i would need new springs or can you fit spacers on top of coil overs.
 
I think it depends on what the mounts look like. Spacers may work if the mounts are similar to OEM. A lot of people switch to Koni dampers and then spacer kit which seems to be the best setup.

I'd be surprised if 235/65/18 will fit with a 50mm drop. Mine looked snug with just standard suspension. They look OK with the 25mm lift
 
Love it fella. I am also wanting the swamper look although I think I messed by buying 18" wheels, I say this because the tyres I want are the GG at3s, now, I've Been told to get the 235/65 r18s and these can fit with a 50mm drop, the issue is it has coil overs which I've just raised but I'm still only getting 390mm from wheel center to arch. Do you know if i would need new springs or can you fit spacers on top of coil overs.
235/65/18 is a massive increase in rolling radius, it will increase your gearing by about 10% over OE, your speedo will be 10% out too.
235/55/18 is slightly bigger than OE and is commonly used by forum members.
I'm sure people have done it but I wouldn't, it will make it less driveable. (Although you'll be able to do 200mph downhill ;))
 
Iv got 235 65 17 GG AT3 and I’m reading 3 mph under on the dash at 70mph.
Also have 25mm lift spacers,fitted by CRS, with Koni adaptive shocks, and kept the original T32 springs, drives lovely.
 
Last edited:
Quite tempted to do that koni shocks at some point!

What engine do you have? I've got a mapped 102bhp (think it's up quite high at 180ish now). But I find it's a drag at around 60mph
 
I think my dual mass flywheel may be on the way out as there's some shaking when loading the engine in 4th and 5th. Wish I had the 6 speed!
 
Update with pictures to follow:

When I had my electrics overhauled the company who did the refit informed me that my van had undergone a cheap and cheerful conversion. The electrics were a fairly dodgy DIY job (now rectified) and the lining had been done poorly.

The inside of the van is carpet lined. With the ply panels being lined and then put back in place. There is no insulation in the gaps and the boarding is only screwed down in a few places causing them to sag when there's stuff hung on them.

My plan is as follows:

- Remove ply boarding
- Cut away carpeting behind the boarding and line the van with Dodo Thermo Liner
-Replace the old boarding with stitches and steel panels (in theory they will work well for my desired vibe

Any thoughts? I'll report on the Stitches and Steel panels as I have seen mixed views.
 
Well they are done. It was quite a fight.

S+S Panel Retrofit Steps:

- Removed old ply panels by unscrewing.
- Cut away carpet to expose bare metal walls
- Add Dodo Thermo liner and fleece wool to walls
- Cut out holes from carpet on metal to expose the factory holes
- The push clips are quite fussy, the holes need to be completely clear for them to go in so it is quite fiddly
- Panels with no carpet on them were a doddle
- The CNC cut of the S+S panels is good, they match up to the holes really well
- 2 holes needed drilling to move the hole in line slightly

S+S Panels:
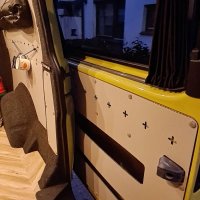
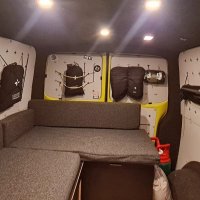
I read some comments on poor quality of these. The edges are unfinished, and they are a little rough, but they are designed from a utility perspective and they do it perfectly. They seem tough and personally i much prefer them over having hairy walls. It definitely makes the van feel more professionally done. The addition of insulation behind the panels has been a huge shock as the van is so much quieter! I really like the crosses on the panels as you can hang bungees all over or use "S" hooks. I used two methods for mounting the bungees...

- Cutting a piece and putting a thumb knot in each end, then wedging the knot behind the cross cut outs
- Feeding the elastic behind the panel and connecting the elastic together with a reef knot, then scooting it round so the knot is at the back of the panel

The latter technique seems to work best, using thumb knots just seems to pull the elastic out.

All in all, im really pleased with the panels! They work really well and are a much more contemporary alternative for an adventure van setup.

WhatsApp Image 2024-01-16 at 14.06.34.jpeg

WhatsApp Image 2024-01-16 at 14.06.33 (2).jpeg

WhatsApp Image 2024-01-16 at 14.06.33 (1).jpeg

WhatsApp Image 2024-01-16 at 14.06.33.jpeg
 
Back
Top