T6 Midroof LWB Wheelchair Campervan Build

Well, i managed to get it all back together, dash trim and seats

Had to install a rubber grommet in the seat swivels for the seat air bag connections as the engineer didn't put one in.

The hole is a thin perspex about 1mm thick and was sharp, so i fitted one to each just incase as its cheap insurance.

Turned it on and started it, no faults one the dash:D

A big thanks for the tips on not turning the ignition on while the seats were out.:thumbsup:

The only problem i have now, is that i was thinking last night, mmm an amp would be nice:rofl: and i have a spare 25mm2 cable that i could have run while the cab was stripped:(.

Oh well, it won't be the last time the rubber floor will get taken up, a job for next time.
 
Its been a while since i posted.

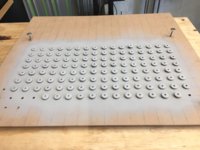
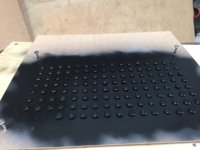
I etched the bolt heads and gave them a few coats of Expoy Satin "Black, While was there i cleaned up the CAK tank mounts, primed them gave them a few coats of Satin Black.

I also had to source some longer bolts for the floor tie down points as the VW ones were to short, i managed to get some Allen Key dome head bolts, which were black, but needed a bit of Satin Black as well.

IMG_1207.JPG
IMG_1210.JPG


The CAK tank mounts aren't the greatest made mounts, id be embarrassed if id made them, i really should have re welded them before painting.

I thought i'd taken a photo, oh wel,l we all know what they look like.

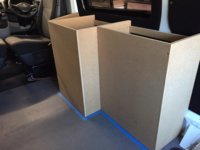
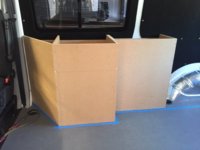
I had the 16mm x 2400mm x 1200mm MDF sheets turn up last week for my Template Cabinets Layout, i'd forgotten how heavy these sheets are!!!

At 11.6 Kg/m2, it adds up, so i used the duct lifter to get them up onto the saw houses to rip into a rough size.

The 17 mm Lightweight ply I'm looking at using is 5.5 Kg/m2, so thats quite a weight reduction and a little easier in a Wheelchair.

I then used the MFT table to cut to size, it was handy with the 1:1 scale layout drawing, i did during the week, just ran the ruler and protractor over the drawing to get all my sizes.

Im making it up in 3 pieces, the Angled Fridge Cabinet, the Drawer Unit and lastly the Wardrobe.

So far I've made the template fridge and drawer unit layout unit, i'll drill the rails and fix into the van into the 6mm Rivnuts that i installed, i'll also be using the now redundant floor tie down mounts to hold the Drawer and Wardrobe cabinets down

I'll assess those fixings, and i may look at using T nuts under the ply floor to hold each cabinet, as i still need to fix the front angled fridge unit and the ply floor is coming up when the van is lined, so i just can install them then.

Last thing you want is having a crash and the cabinets coming loose from a rear mount fixing and taking your head off.


IMG_1225.JPG IMG_1227.JPG

I have to cut out the Fridge frame space tomorrow, work out what size door will work for the angled cabinets, Cut the bench top and cut out the sink,
then look at drawer sizes.

Its good to finally see some progress, I've got to get it sorted before the weekend as i'd like to get the RIB back in, to double check my clearances and openings.

Then I can put apart the templates and start on the Real cabinets.
 
well id like to say I've done more, but i took 4 days off and relaxed :D

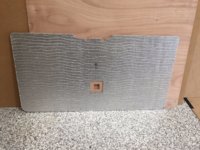
I kicked back into gear on monday and remade the rear tailgate, as i forgot to recess the insulation to allow the tailgate strap handle to recess into the slot on the first one

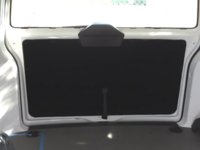
Took me a day, but i cut another panel, redid the insulation on the inside this time, cut out a 100mm square recess and then carpeted the panel and got it back in the van.

IMG_1240.JPG

I used the black bolts this time, and they kinda of disappear in the black carpet.

IMG_1251.JPG

Spent Tuesday, stuffing around, measuring amps for the CRX 65 fridge and the fridge amp draw over 24 hrs and also using a power meter on the Induction hob to confirm the inverter size.

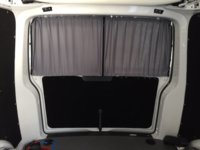
Today i decided to fit the tailgate curtain, so at least thats one thing sorted:), still have to stretch them a little
IMG_1252.JPG

Hopefully ill get onto building the wardrobe this week, but i really need to batten out my roof first, so i can trim the top half of the cabinets to be spot on.

The timber is sitting there, I've just got to do run it on the jointer and then through the thicknesser to size, rebate the roof supports and stick it up with screws and Sikaflex.

I've got the option to grab a Victron 200 ah Lithium for half the normal price, but still a little to pricey for me as it also needs Victron BMS and relay set up.

but its temping:rolleyes:, but a local mob has some good quality Fullriver 250 ah 6 volt batteries that will fit perfectly tied together to make 12 volts, under the RIB for a 3rd of the price of the whole lithium set up.

That set up should last a few years until lithium prices come down :laugh:
 
well id like to say I've done more, but i took 4 days off and relaxed :D

I kicked back into gear on monday and remade the rear tailgate, as i forgot to recess the insulation to allow the tailgate strap handle to recess into the slot on the first one

Took me a day, but i cut another panel, redid the insulation on the inside this time, cut out a 100mm square recess and then carpeted the panel and got it back in the van.

View attachment 14980

I used the black bolts this time, and they kinda of disappear in the black carpet.

View attachment 14981

Spent Tuesday, stuffing around, measuring amps for the CRX 65 fridge and the fridge amp draw over 24 hrs and also using a power meter on the Induction hob to confirm the inverter size.

Today i decided to fit the tailgate curtain, so at least thats one thing sorted:), still have to stretch them a little
View attachment 14982

Hopefully ill get onto building the wardrobe this week, but i really need to batten out my roof first, so i can trim the top half of the cabinets to be spot on.

The timber is sitting there, I've just got to do run it on the jointer and then through the thicknesser to size, rebate the roof supports and stick it up with screws and Sikaflex.

I've got the option to grab a Victron 200 ah Lithium for half the normal price, but still a little to pricey for me as it also needs Victron BMS and relay set up.

but its temping:rolleyes:, but a local mob has some good quality Fullriver 250 ah 6 volt batteries that will fit perfectly tied together to make 12 volts, under the RIB for a 3rd of the price of the whole lithium set up.

That set up should last a few years until lithium prices come down :laugh:

Victron the ‘Creme de la Creme’ ..... some great kit they sell always had their gear on boats
 
Victron, do have some great gear, but its not cheap, when it comes to Marine, you don't want a product that will let you down while offshore!!!

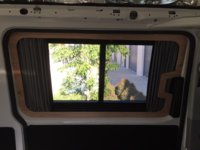
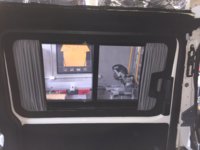
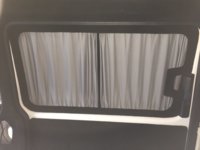
Today, i played around with making a sliding door window surround and fitted the curtain while i was there.

IMG_1262.JPG

I made a 40mm wide plywood profile around the frame, the sides are connected to pop riveted bent sheet steel with rivnuts installed and the top and bottoms are fixed with 6mm rare earth magnets in the ply panel, which are attached to some more bent sheet metal pop riveted and hidden under the curtain rail.

This allows the curtain to move unimpeded along the rail :)

I still have to fit another magnet on the bottom, as i forgot to put it in, and it was time to call it a day.

These things are extremely strong magnets, , i'll secure them further with a small bead of expoy, then clean the ply edges up and carpet it.

It now time for a beer :D
 
oh and I'm really happy with the bolt heads that i painted in expoy satin black, you really have to look for them
 
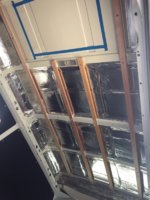
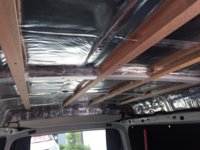
This week, i worked on the roof battens.

I made two sets, first set was 30mm high and then after they were made and fitted, i realised that i could reduce the height down to 18mm with a 3mm step up.

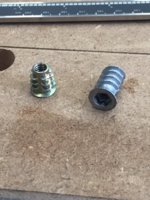
9mm is 9mm, so i grabbed some lightweight Meranti hardwood at 41mm x 18mm and used the first set to copy the rebates rebates, put in new insert threads in to hold the roof panel.

I'll hold the roof up with the black bolts that I've used for the rest of the interior, they will screw straight into the threaded inserts:thumbsup:

I also rebated an area of 2mm under the batten were the timber meets the roof support, this allows the Sikaflex FC11 to get a better hold, than completely compressed.

After fixing i checked with a straight edge to see that the rails were completely straight, it was, but that was because most of the work it prep fitting and trimming before final fix.

I could have cleaned the joints up better, but a finger round adds a little more strength than a clean joint.

Now i just have to make up the Heki 400mm x 700mm timber profile to allow a straight edge in the inside for the Heki to screw into.


IMG_1275.JPG IMG_1295.JPG IMG_1290.JPG
 
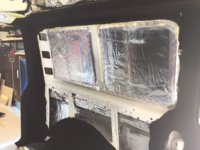
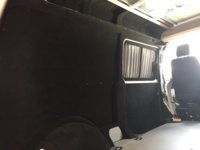
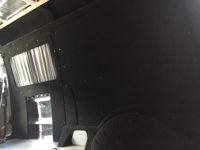
I've spent most of the week carpeting the van, what a shit job!!!

Full credit to the guys on here that do this for a living, I'm use to spraying contact and laying laminate, but stretch carpet is another animal all together.

I spent a full day just on prep work, roughing up the paint and cleaning it down with acetone, i also had to fit some m6 bolts into the rivnuts so i could cut them out after the carpet was installed and also to keep the threads clean.

I got both sides finished, just have to fit the tailgate section tomorrow and refit the rubber trim.

I also got around to carpeting the trim panel for the sliding door, it came out quite good, the photos are average as the lighting wasn't the greatest in the shed.

IMG_1307.JPG IMG_1310.JPG IMG_1313.JPG

All the curtains are now installed, and I just have to run some more cable tomorrow and then i can put the panels back on :)
 
Refitted the floor and the carpeted panels to test the fitment.

I have to take a few mm of the floor as the carpet wedges the floor in and its to tight for my liking, once this is done and then i can trim and lay the vinyl

I will do that, the skylight install and cabinet cubby lining i come back from holidays as i don't have time now.

The photos are crap, its hard to get a decent photo of the black interior and the black bolts are highlighted by the flash, when in real life they blend in to the carpet.

I carpeted the sides of the midroof, so i can use that as the rear lining of my overhead cupboards, i already fitted Rivets into the angled roof beam that runs around the van, so I can secure the bottom of the overhead to the chassis, and the front of the overhead into the roof panel beam from inside the cabinet.

So it will be mostly hidden and allow a heap more storage on the passenger side for longer items, such as my fishing rods, middle fiamma awning support and awning crank handle.

The other overheads above the kitchen will give me a bit more storage for 2 minute noodles and packet pasta :rolleyes:


Thats all I've had time to do, as i am leaving to go and spend a week in Hawaii to find a suitable Hula Girl for the van dash :D

IMG_1335.JPG IMG_1337.JPG
 
Well after a little break in Hawaii, I'm back and started to get back into it.

Got my Lula Girl while i was there.
IMG_1371.JPG

Ill have to put it during the week.

I got a start on the HDPE skylight mount spacer, i cut and routered it to size, will need to scribe it to the roof and cut it to suit later this week as its is a wet week!!

IMG_1369.JPG
IMG_1370.JPG

Had a bit of an issue, while i was cutting out the HDPE, i had the Roller door down and ear muffs on, when a storm came through with heavy rain.

We got 60mm of rain in 45 min and the side windows were open in the rear and i didn't realise until it was too late.

I opened the sliding door and water was running out, not a great start to the week..

I've got a commercial blower going in the van to help dry the interior and will head back out to the workshop in the next few hours after dinner with some help to remove the floor.

Hopefully the damage isn't too bad..
 
Gotta love those commercial blowers, they put out a heap of air..

It had done a great job, partly drying out the van, i just removed the drivers side panel and the wife and i pulled up floor, it was still quite damp under there, glad i pulled the floor up.

Threw the blower back in and know kicking back at home with my feet up

I'll head to the workshop tomorrow morning and take out the blower first thing in the morning and then get a carton of beer for the builder next door for the loan of his blower :thumbsup:
 
The van is dry as a bone, as the blower did its job, i made the right choice taking out the floor to speed things up :thumbsup:

While the floor was out in the shed drying, i grabbed the vinyl and chucked on the floor and routered it out.

IMG_1375.JPG

I don't plan on gluing it down as its commercial vinyl, the weight should keep it in place as well as the tie down points, cabin rubber floor lip and rear tailgate trim.

Then i flipped it over and aligned the VW seat cutouts so they were spot on an proud and level, i then glued them with PVA, so once that cures, it should keep them still for a while.
IMG_1379.JPG

I need to trim the floor by at least 2mm on each side due to the carpet, once the glue has set, i'll flip it back over and use a rebating bit on the router, then flip it over and use a straight trimer to trim the remaining rebate.

It will give a beautiful smooth finish over a crappy jigsaw cut, a jigsaw is handy for cutouts, but don't really give a professional clean finish.

Managed to grab a smaller rebate bit this arvo, so hopefully i can crack on tomorrow.
 
Took a day off yesterday, i got to the shed and it was 36 degrees outside, so i said nope :pand when home to play Fifa in air conditioning

Routered 1.5mm of the floor with a rebate bit and then i ended up using a bearing cutter to follow the rebate, it saved flipping over the floor, and for me thats a big help.

I couldn't get the 2mm i wanted and the next size was 3.2mm, so i went with the, less is more, as you can add it on later.

After a heavy thunderstorm with hail that made me drop tools quickly, to get the van in the shed. i installed the floor and the vinyl, it is snug nut not tight, pretty happy with it and the colour of the vinyl, it ties in with the curtains.

I'm letting the vinyl it over night to see if it sits 100% flat before fixing it down.

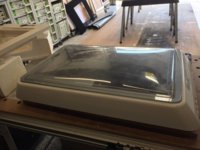
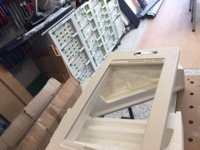
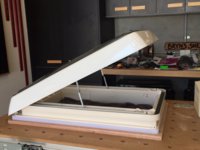
While i was mucking around this morning, i got out the Heki 400 x 700 Skylight and had a bit of a play.

IMG_1385.JPG
IMG_1386.JPG
IMG_1387.JPG

The build quality is quite good, kinda annoying that the interior parts are a cream colour :(

I headed to Bunnings after the storm to get some plastic primer, as i have to paint the Heki wind deflector, as its the same colour as the Heki interioro_O and not the white exterior???

Im going to look at the painting the Heki interior panel satin black once its fitted, but i'd ill have to pull it apart, know me ill end up breaking it.

Tomorrow i really have to start fitting the ceiling, so i can fit the skylight and give it enough time to cure before a xmas trip
 
i started on the ceiling today, i finally removed the interior light fittings, i had to resort to using a pair flat head screwdriver to level it off, as the trim panel levers weren't strong enough.

got all the dimensions for the size and bolt hole location, so I'm ready to cut and test fit it tomorrow.

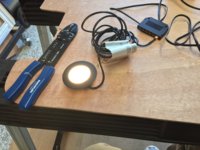
While i was there, i had a play with the Hafele Loox Lights i brought from Hafele (Cabinet Consumable supplier i use)

IMG_1391.JPG
They a a satin black faced recessed 3000K, as i wanted a warm white, according to the load meter it is using .11 amps

Seems quite bright and I'm liking the defused look.

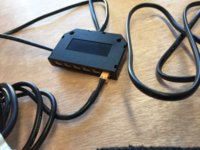
As I'm running 6 lights i grabbed the 6 light unit distributer, each light has 2 mtr of cable, so they will all connect into the Distributer and then a single cable of the lights, for $8 it saved me splicing all the lights

IMG_1392.JPG

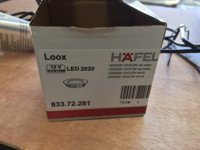
Here a pic of the box if anyones looking at getting a set, you can get sized larger lights, but I'm sure that these will be enough

you can also, get dimmers and a heap of other options with Loox lights.

IMG_1394.JPG
 
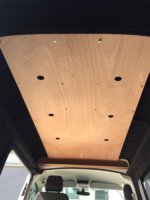
Cut out the roof today, marked out the JCB holes and also the lights holes for the Look lights.

Gave it a trial fit, it needs a little modification to be perfect, so ill have to look at doing that next week.


IMG_1397.JPG

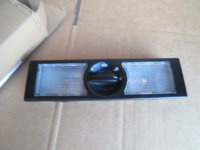
I have to decide were I'm going to place the VW interior lights, and router those in, i'll also got to scribe and fit the skylight bottom mount i made with Sikaflex 11FC, so i can use that as a guide for the router later in the week.

I've noticed i can get a black version of the interior light i have, i think it'll look better than the light grey one, so i'll have to get a price from VW, i also need to extend my interior light wiring and need a few VW connectors from the local vw parts dealer.

s-l1600.jpg
 
Looking good mate :thumbsup:
Send me a message if you need any part numbers for the connectors and stuff I know the dealers are not always forthcoming looking up the little odds and sods
 
Back
Top