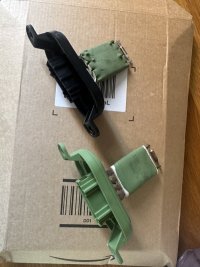
Can you drop a link to the fog light bulbs please ?
What Have You Done To Your Van Today?
- Thread starter Daneeyre
- Start date
-
- Tags
- mod modification mods retrofit
Her
Osram 62210CBH-HCB Cool Hyper Plus Off Road Headlamp Bulb, Blue, 12 V, OFFROAD-Only, Set of 2 https://amzn.eu/d/76oUruh
Here you goCan you drop a link to the fog light bulbs please ?
Osram 62210CBH-HCB Cool Hyper Plus Off Road Headlamp Bulb, Blue, 12 V, OFFROAD-Only, Set of 2 https://amzn.eu/d/76oUruh
If I had known how much I would end up spending on my van I would have bought a Holliday home in St Ives it would have been cheeperSeptember is going to be expensive. Advanced in Car Tech going fit the Ghost 2 and the VW LED Headlight unit with active DRL. I had better enjoy Aug while i still have money in piggybank.
so so true. there is always a gotta haveIf I had known how much I would end up spending on my van I would have bought a Holliday home in St Ives it would have been cheeper
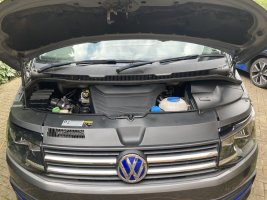
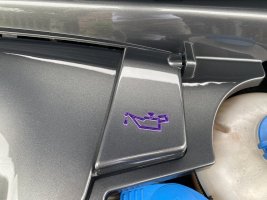
Fitted a load of plastic in the engine bay! About £125 total but tidies things up nicely. As expected nothing fits perfectly even when designed for T6 (engine cover only).
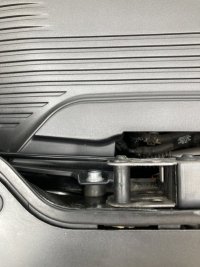
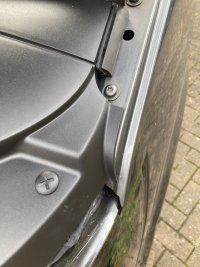
I didn’t like how the engine cover seemed too short and pulled partially out of the rear rubber brackets. So, I tapped the hole out M8 and fitted a bolt using 12mm of rubber hose as a spacer. Had to adjust the bonnet safety catch back slightly as it initially hit the bolt. Now fits well and looks the part. Just need to decide what (if any) badge to apply to the centre as it’s aftermarket and not VW.
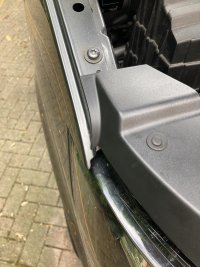
The battery cover (and offside headlamp cover) are both T5.1 and so have problems. On T5.1 they obviously connect to the front grill top by included clips. However, the T6 front grill stops short and leaves a gap which allows the new covers to flap about. Cured this by fixing a small piece of abs at each side of the front grill top that locates in the clips on the two new covers. I had to purchase a push in retainer socket for the outer battery cover screw. All push clips have also been replaced with new.
The bonnet closes ok without trimming the two outer covers but it does look a little odd how the covers don’t follow the wing contours. I’m undecided whether to leave as is or attempt to dremmel the excess off. Any ideas?


A couple of days ago now but I swapped my road tyres and Solows for Falken Wildpeaks and BMVS Edition coilovers. Pretty similar gap above the tyre but about 2" more ground clearance and a surprisingly supple ride.
Thanks to @BognorMotors

Thanks to @BognorMotors

Not on tik tok myself but the next videos that auto play! Gad!Yeh it’s currently legal.
This guys intro cracks me up.
Fitted a Tow Trust towbar and a newly-painted used rear bumper (thanks @Kev.O ) to sort out the shoddy repair job undertaken by a previous owner after reversing into a bollard. There were loads of clips missing, really poor work, would love to know which garage did it. Anyway, all replaced with new ones now. Off to fetch the trailer!
Lights, rear panels and bumper off...

Towbar fitted... (the sticking plaster sticker is just there until I can get a small dent pulled out, although the kids are begging me to keep it)

Before (these were bodged in with sealant):

After:
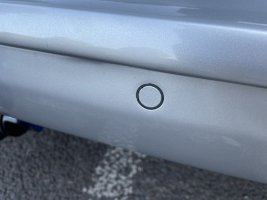
Lights, rear panels and bumper off...

Towbar fitted... (the sticking plaster sticker is just there until I can get a small dent pulled out, although the kids are begging me to keep it)

Before (these were bodged in with sealant):

After:

Partly inspired by somebody else posting in the 'electrics' forum, I added another 240V socket next to an existing 12V socket. My rear end puckered up a bit when I introduced the hole saw to the back board but it all worked out OK in the end. I also added a couple more small storage nets for charging cables and misc. bits and pieces which I stuck on with 3M tape rather than screwing them in place.


When we were away in June (had van 3 years) wifey said “are those the same as the sockets at home?”Partly inspired by somebody else posting in the 'electrics' forum, I added another 240V socket next to an existing 12V socket. My rear end puckered up a bit when I introduced the hole saw to the back board but it all worked out OK in the end. I also added a couple more small storage nets for charging cables and misc. bits and pieces which I stuck on with 3M tape rather than screwing them in place.
View attachment 209208
View attachment 209209
View attachment 209210
Me “yes”
Wife “ so can I plug things in like a hairdryer and stuff?”
Three years. Talk about observant.
Say no otherwise she will pack all sorts of stuff like that!!When we were away in June (had van 3 years) wifey said “are those the same as the sockets at home?”
Me “yes”
Wife “ so can I plug things in like a hairdryer and stuff?”
Three years. Talk about observant.
Since my chameleon tint I needed an alternative way to mount the phone holder as it is crazy sticky so now it’s on the dash. I buy another mount like I’ve got for sat nav but two wouldn’t sit together.
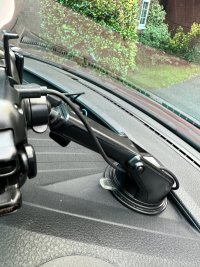

Thought whilst I was there I’d run a power from near 12v supply rather than have it come from the side of a pillar and then that quickly changed to a socket with usb attached on the side .

Unfortunately it has blue leds which don’t match my red and are distracting so I was going to tape it up then came across usb blanks ha ha.
So it now has blanks and whilst at it blanked off the unused one by cup holder
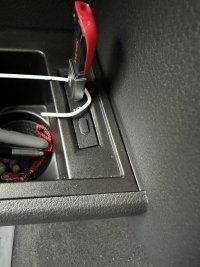


Thought whilst I was there I’d run a power from near 12v supply rather than have it come from the side of a pillar and then that quickly changed to a socket with usb attached on the side .

Unfortunately it has blue leds which don’t match my red and are distracting so I was going to tape it up then came across usb blanks ha ha.
So it now has blanks and whilst at it blanked off the unused one by cup holder

Now you need to get it sprayed to match your engine bay/van colour.Fitted a load of plastic in the engine bay! About £125 total but tidies things up nicely. As expected nothing fits perfectly even when designed for T6 (engine cover only).
I didn’t like how the engine cover seemed too short and pulled partially out of the rear rubber brackets. So, I tapped the hole out M8 and fitted a bolt using 12mm of rubber hose as a spacer. Had to adjust the bonnet safety catch back slightly as it initially hit the bolt. Now fits well and looks the part. Just need to decide what (if any) badge to apply to the centre as it’s aftermarket and not VW.
The battery cover (and offside headlamp cover) are both T5.1 and so have problems. On T5.1 they obviously connect to the front grill top by included clips. However, the T6 front grill stops short and leaves a gap which allows the new covers to flap about. Cured this by fixing a small piece of abs at each side of the front grill top that locates in the clips on the two new covers. I had to purchase a push in retainer socket for the outer battery cover screw. All push clips have also been replaced with new.
The bonnet closes ok without trimming the two outer covers but it does look a little odd how the covers don’t follow the wing contours. I’m undecided whether to leave as is or attempt to dremmel the excess off. Any ideas?
View attachment 209162
View attachment 209163
View attachment 209164
View attachment 209165
View attachment 209166
Give Allan @Crafted Automotive a shout, he did mine.
His number is 01274 242009

Similar threads
- Replies
- 0
- Views
- 586


