What Have You Done To Your Van Today?

I do something similar but moved away from two bucket method now in winter. My Van has a ceramic coating on as a base (Gyeon can coat)

1. Bilt hamber snow foam whole va
2. Clean wheels while foam is dwelling
3. Pressure washer whole van.
4. Foam again with and wash with a single bucket with shampoo.
5. Power rinse off
6. Spray wet coat on van one or two spray per panel and wheels and power wash off.
7. Dry van with a towel job done
Sounds more efficient
 
Thanks for this and car plan shout too.

I don’t know if I have cleaning routine nailed.

Tend to do wheels first. With the stuff that changes colour when cleaning

Then foam van let it sit

Then two bucket noodle mitten wash (used a wash and wax product)

Then rinse

Then dry with big towel things

Then apply and buff off (daniel San style) super resin compound (never used before)

And then sprayed some wheel protector there dressing stuff.

sure there are tweaks or wholesale changes I could make

Doesn’t sound too dissimilar to my routine, but I give it a good rinse down before foaming, and then again after letting it sit for a few minutes, just to make sure as much loose grit and grime is off before I start touching the paint.

Autoglym SRP is a polish with some filler in that does a pretty good job, but needs something over the top to seal the paintwork.
The Extra Gloss protector does a decent job, I use this on my wheels.

The bodywork is getting Autoglym Rapid Aqua Wax every other wash, it is easy to use, and can go on whilst the bodywork is still wet.

My work car has been used to test a bottle of CarPlan Super Ceramic Hybrid, which is impressive for the price. It’s still beading nicely after 2500 miles.
 
Not what have I done but what has it done…………tailgate button has gone on strike! I’m assuming water ingress and micro switch failure. Luckily I have a key barrel on the outside so can still access the boot. I had the handle colour matched late October so I’m wondering if disassembly/reassembly has caused it. Either way it’s going back early Jan for some touch up work so I’ll raise it then. Hopefully, it’s a cheap fix :confused:
 
  • Sad
Reactions: CAB
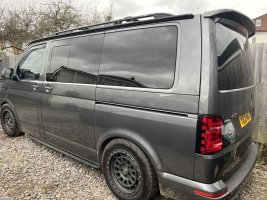
Finally plucked up the courage to fit my dummy 3/4 windows.

Forced into it following some storm damage - a fence post slamming into the rear panel - but more than happy with the results and surprisingly easy following the various videos online showing how.

Just used the kit from THQ / Camperglass

IMG_8780.jpeg
 
I looked at it and thought it needed a wash! I looked at it again later and agreed with my initial diagnosis. Thankfully, I managed to keep on walking!!!

I am so glad I wasn’t triggered!
 
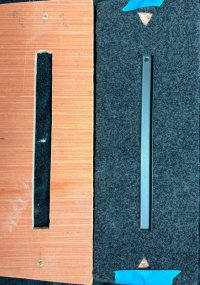
I managed to find some time to build a cover for the front of the seats as it bugs me that it’s open both visually and for items to roll under the seats.

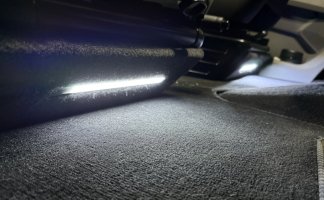
When I fitted the back covers I installed some cabling so I could fit some additional lighting as the footwell lights are so poor as standard and I want to be able to control them from the rear switch button for when sleeping in the van.

I used a cardboard template to start with and ensured there was enough gap at the bottom to allow the front mat to be removed a if needs be.

I wanted to nut and bolt them on as I didn’t want to see any screws, but with the sub under the drivers seat there simply wasn’t access to reach to back of the hole. I ended up using a trick that I did with the van shades where a ‘V’ is cut out to cover the screw once fitted. It came out better than expected if I’m honest and really happy with the results:

IMG_0461.jpeg

IMG_0466.jpeg

IMG_0463.jpeg
 
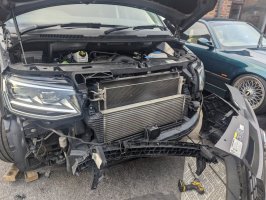
Had the aux belt and tensioner changed by SB motors on my drive at home, specialises in VW's, did a good job, only problem is he recommended the cambelt gets changed soon so going to have to get him back!!
 
Some updates done over the Xmas break here:-

 
Where did you get the lights from Kev ?
I bought them on eBay, here is the link (I ordered the non IP cool white version). Just be careful as they pull around 1.5 Amps per meter

These aren’t quite as bright but only pull around 350mA per meter (I ordered the 5050 SMD in cool white):


The lights are enclosed inside this which I bought the ‘U’ shape in black:

 
Back
Top