Crispy’s ‘TIPPSY’ - Daily driver, camper and motorbike hauler

Crispy

Member
T6 Pro
I’m moving on from my 2011 SWB T5 Kombi onto a 2016 LWB T6 Kombi. It was my first van to see if I needed and enjoyed owning one. And, I love it. Such a versatile vehicle. It was used as a daily driver, camper and track day motorbike hauler.
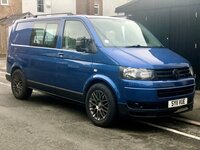
D93A7F06-2C28-4E80-ABDA-A1694C834287.jpeg
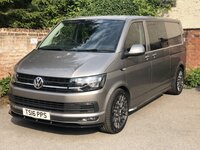
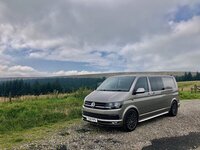
I’m now moving onto this little beauty...
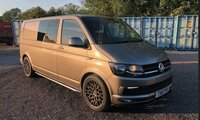
31CB75C8-F498-4132-8554-B97952977CA9.jpeg
I have some plans and intend on keeping this thread up to date with mods, where it ends up and how I choose to make it mine.
For those interested these are the bikes it’ll end up hauling to tracks around the country.
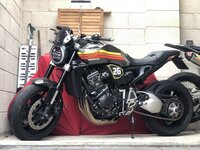
9001D08B-76D7-4F49-B694-06474AB487CC.jpeg
2018 Honda CB1000R and this little firecracker...
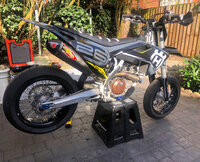
17FFC4B0-A0C0-4777-BF92-3234C2846B94.jpeg
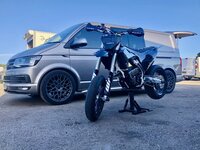
2016 Husqvarna FS450 Supermoto. Love this thing! Very naughty.
Cheers
Crispy
 
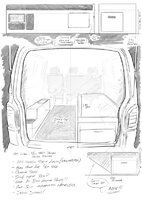
Had the idea of a ‘small’ single bed and storage solution that gets bolted down to the lashing points (I have a similar set-up in my old T5). Just under 2 meters long with a 1.4 meter long drawer on heavy duty runners. Storage unit will have a permanent home for a Goal Zero Yeti 500X.

So, I broke out the iPad and started an initial design sketch...
5046AA44-18D4-49C5-91E3-5EF37143709B.jpeg
 
I like your forward planning. And good to see you are planning on using it as your daily Vehicle.
I have a wee works Van that i use daily, so don't get to use my Kombi as much as i would like.
 
I like your forward planning. And good to see you are planning on using it as your daily Vehicle.
I have a wee works Van that i use daily, so don't get to use my Kombi as much as i would like.

I love the planning part of projects no matter what the subject. My current setup in my T5 works well, most of the time. I’ve learnt what worked and what doesn’t. Hopefully the new setup in my T6 will be better suited to how we use our van
 
That's a great illustration. Are you a courtroom artist?
 
That's a great illustration. Are you a courtroom artist?

Thanks I’m a professional illustrator and graphic designer. I love drawing. Planning anything always involves me sketching. It’s a nice change to be drawing something I want to draw as opposed to what a client briefs me to illustrate.
 
I think the Goal Zero Yeti 500X is going to be my power source in the new van. Realistically it’s mainly iPads and iPhones that need a charge when away. Two standard USB sockets, a USB C and a high power USB C will cover 99% of my charging needs. If I kit the van out with the Yeti in mind then all the kit and lighting can be low power draw. Even a little Dometic fridge can run off it for a decent amount of time. My aim is to have everything I do to the van, bar carpeting, insulation and panels, to be easily reverted to standard.

Here’s a quick review of the Yeti 500X for those interested:


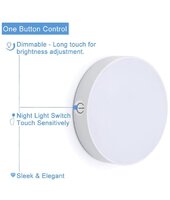
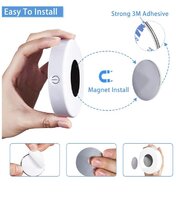
I’m thinking a couple of these LED dimming touch lights will be a simple but flexible method of lighting. Some strategically mounted steel plates will allow multiple positions for the magnetic back to mount to:

Dimmable Touch Light | WILLED Buit-in 1000mAh Large Battery Rechargeable LED Tap Lights | Magnet Stick on Closet Light | Portable LED Puck Night Lights for Cabinet Wardrobe Counter Kitchen Bedroom https://www.amazon.co.uk/dp/B07PVYDMKF/ref=cm_sw_r_cp_api_i_tUMlFbEJPJNH1

98527AF8-7929-4746-BA72-27892955E270.jpeg4FC1506F-AD59-45F5-A1F4-00A9B1BA4034.jpeg
 
Trawling YouTube for potential building solutions for the bed/storage unit and I came across this slick self contained slide out kitchen that some guy has made for the back of his Tacoma. I love it. Potentially I could use the same building method.


I found a company called Matara in the UK. Not the cheapest but they look like a one stop shop for the extrusions, fixings, connectors, hinges, panel material....looks like Meccano for adults! Super excited with the potential of this.
 
D1C89B9A-FD48-4303-9EAC-428F617BD8A3.jpeg
She’s all mine! Ride down to Bridgwater on the CB1000R from Derby early doors yesterday. A bit of paperwork, bike ratchet strapped in the back and a nice 160 mile drive back to get to know it. Let’s just say I’m a happy chap

Let the Camping/bike hauler conversion commence...
 
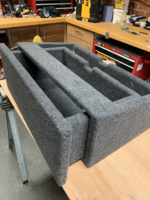
First addition to my T6 will be some under seat drawers. I’d love to have some storage that’s out of sight that we can store things like trail shoes, tent pegs, mallet, jack, small tool kit etc etc. I saw on another thread that @Brennanpj had made these:

D42D0121-10D3-4167-9BDB-07248BA32E3E.png

Look like a great piece of inspiration to use for the basis of mine. I’ve got some left over ply and anthracite coloured Veltrim. Time to fire up the jigsaw...
 
  • Like
Reactions: DXX
A couple of bits ordered this morning to help secure my motorbikes when in the back of the hauler (Going to need a better name!)
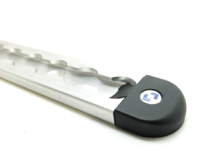
2 x 1m Slimline L-Track for either side of the rear:

1597305788092.png

I'll stand the aluminium off from the steel of the body some wide composite washers to work as a thermal break.
 
First proper day out in the newly named Tippsy. Absolutely brilliant day out in the Derbyshire Dales and The Peak District. The T6 was almost perfect. Just a rattle tailgate that need the stops adjusted to add a little pretension when shut. Dodo May and 3M Thinsualate on half the metal panels and has made a huge difference to the sound when driving already. Ceiling and remaining panels will make even more of an impact

4C0D2171-0680-4117-B094-F2B7F13C0F4E.jpeg
 
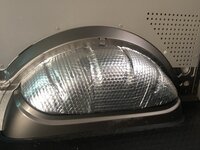
Sound deadening insulation has been the Order of the T6 jobs for the last couple of mornings and evenings. Dodo Mat and 3M Thinsulate self adhesive sheets are a pleasure to work with. Dodo Mat’ing the wheel arches is strangely satisfying...

DFD2EF16-8A01-4541-8532-2F4E42616AA9.jpeg

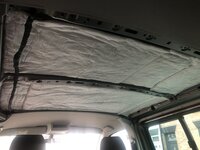
Just the fore section of the rear ceiling to Dodo and insulate.
 
3M Thinsulate on all the interior faces of the metalwork. Very easy and clean to work with. I’ll see how well one layer goes for now during the warmer weeks. I might in the future apply a second layer to the back of my ply panelling.

798F26FE-2822-40DE-A825-EB8B28569FBB.jpeg
 
And so the build begins...

D7C195F9-402B-4C0C-AE2A-5A9A9C355675.jpeg

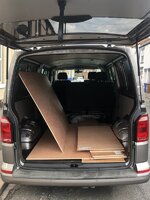
9mm and 12mm for the majority of the cabinet and reinforce corners with 2x2 where needed. Next I’ll work out what hardware and fittings I’ll need.
 
First addition to my T6 will be some under seat drawers. I’d love to have some storage that’s out of sight that we can store things like trail shoes, tent pegs, mallet, jack, small tool kit etc etc. I saw on another thread that @Brennanpj had made these:

View attachment 81112

Look like a great piece of inspiration to use for the basis of mine. I’ve got some left over ply and anthracite coloured Veltrim. Time to fire up the jigsaw...
Looks like you’ve guaranteed rattle free furniture!
 
Trawling YouTube for potential building solutions for the bed/storage unit and I came across this slick self contained slide out kitchen that some guy has made for the back of his Tacoma. I love it. Potentially I could use the same building method.


I found a company called Matara in the UK. Not the cheapest but they look like a one stop shop for the extrusions, fixings, connectors, hinges, panel material....looks like Meccano for adults! Super excited with the potential of this.
Deffo be interested how you get on with this idea :thumbsup:
 
Back
Top