Yes the Ring will work, it can cope with a solar input of 50volts. The only problem is it's mahoosive and I don't think I have space for it under the seat.
You are using an out of date browser. It may not display this or other websites correctly.
You should upgrade or use an alternative browser.
You should upgrade or use an alternative browser.
Deaky’s Kombi to Camper journey
- Thread starter Deaky
- Start date
Before the roof was done I started phase 2 of my audio install. The signal processor has a double rotary knob. The rear controls the rear speakers and the front controls the sub. You can click the front button so scroll through 10 pre-set programs. There's an led that changes colour to indicate which program you're on. Its massive and it's bright.
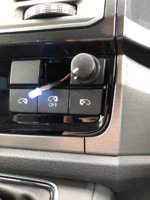
I didn't want to give over a full switch blank to this led so I decided to fibre optic it to the switch. I found an old audio fibre optic lead to sacrifice and fitted it to the switch blank with the control knob on.
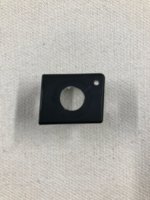
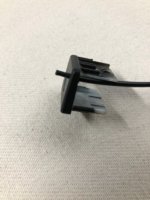
I butchered up on of the plugs to push the led into on the other end and cut the end off with a sharp knife. The result looks great.
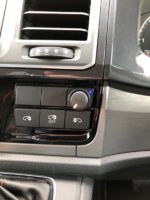
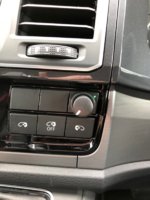

I didn't want to give over a full switch blank to this led so I decided to fibre optic it to the switch. I found an old audio fibre optic lead to sacrifice and fitted it to the switch blank with the control knob on.


I butchered up on of the plugs to push the led into on the other end and cut the end off with a sharp knife. The result looks great.


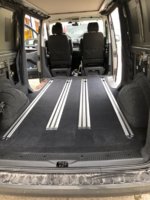
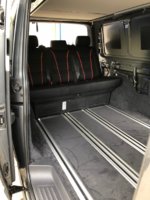
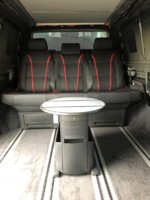
Went to visit Colin at @VWVC yesterday to have my Caravelle floor and seats fitted. I'm over the moon with Colin's work. All done in a day. If you want OEM rails or seats fitted then this is the guy to see.
View attachment 20217
View attachment 20218
View attachment 20219
That looks great!!
I saw that you lined the cab floor with Silent Coat.
Was that just 2mm ? Are you going to add a sound barrier in the front that will raise the cab floor.
Did you do the back with Silent Coat before the Velle floor went in?
Looks great! Having slept in my Kombi before a recent Gravel race event, I’ve decided I need more comfort before a long day in the saddle - I think it’s called getting old.
I saw that you lined the cab floor with Silent Coat.
Was that just 2mm ? Are you going to add a sound barrier in the front that will raise the cab floor.
Did you do the back with Silent Coat before the Velle floor went in?
Looks great! Having slept in my Kombi before a recent Gravel race event, I’ve decided I need more comfort before a long day in the saddle - I think it’s called getting old.
I used 2mm silent coat on the cab floor. I'm not adding anymore thickness to it. The cab carpet is thick enough IMO and it will cause problems with the seat bases, side steps and b pillars if I raise it up. I will however raise the back edge by about 8mm so that the carpet is the same height as the 'velle floor where the 'velle trim strip between the cab and the back fits.
I didn't put anything on the flooring in the back as it would affect the height of the floor in relation to the rails. The thickness of the floor plus carpet on top is a good enough sound barrier. If not, I'll just turn the stereo up
Cheers - that’s good info. I’ll have a chat with Colin.

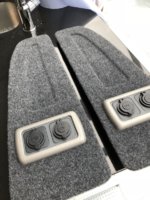
Where have you got your hidden fixings from? Those panels look nice, but thicker than original so how have you got the fixings to pass through?Starting to make a bit of progress tonight now the light nights are here. I’ve removed the C pillar covers that Van Doc had cut the carpet and screwed to the van. Recut the panels, added hidden fixings and a bit of shape detail and a USB and 12v point.
View attachment 20543
Where have you got your hidden fixings from? Those panels look nice, but thicker than original so how have you got the fixings to pass through?
Nah, they’re made from the old roof lining. 4mm thick so the hidden fixings fit fine. I cut the shape out of the middle and stuck another piece over the hole on the back

Bosh! SimplesNah, they’re made from the old roof lining. 4mm thick so the hidden fixings fit fine. I cut the shape out of the middle and stuck another piece over the hole on the back
Few more jobs ticked off tonight.
Insulated inside the ‘C’ pillars and fitted the covers I made yesterday.
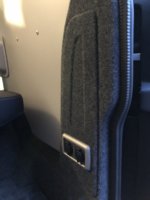
put the rear panels back in to tidy up the back while I decide how to increase them in depth to cover the door motors without the need for the plastic covers. I’ve also tidied up the wiring looms down both sides of the van ready for fitting the pelmets.
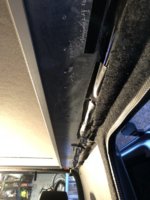
Plasidyed the carpet threshold strip so it’s the same anthracite colour as the steps and packed the cab carpet up so it’s the same height as the Caravelle floor
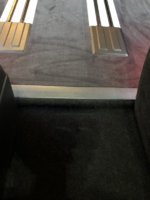
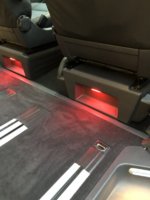
Insulated inside the ‘C’ pillars and fitted the covers I made yesterday.

put the rear panels back in to tidy up the back while I decide how to increase them in depth to cover the door motors without the need for the plastic covers. I’ve also tidied up the wiring looms down both sides of the van ready for fitting the pelmets.

Plasidyed the carpet threshold strip so it’s the same anthracite colour as the steps and packed the cab carpet up so it’s the same height as the Caravelle floor


I've just come across this build post very well thought out and very informative keep up the good work pal 

Blinking clever this.Before the roof was done I started phase 2 of my audio install. The signal processor has a double rotary knob. The rear controls the rear speakers and the front controls the sub. You can click the front button so scroll through 10 pre-set programs. There's an led that changes colour to indicate which program you're on. Its massive and it's bright.
View attachment 20220
I didn't want to give over a full switch blank to this led so I decided to fibre optic it to the switch. I found an old audio fibre optic lead to sacrifice and fitted it to the switch blank with the control knob on.
View attachment 20221
View attachment 20222
I butchered up on of the plugs to push the led into on the other end and cut the end off with a sharp knife. The result looks great.
View attachment 20223
View attachment 20224
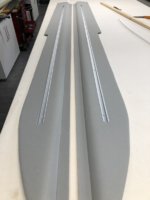
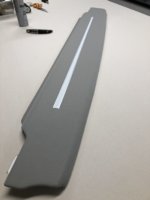
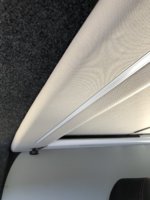
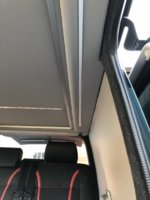
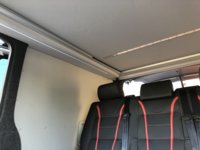
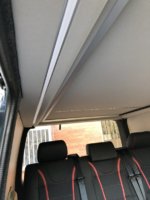
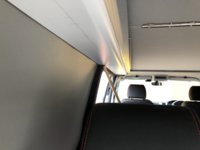
Today I’ve finished the trim panels around the HiLo. The usual finish is a carpeted piece of ply, screwed to the roof of the van with the screw s covered by the carpet. Now I don’t want carpet, I want all the roof sections I covered in headlining material. This would mean screws with caps on which is another no from me. I got Van Doc to leave the sides f or me to sort at a later date.
The wiring loom. Along with all the other leisure electrics coming up the B pillar is around 25mm thick along the side of the van.
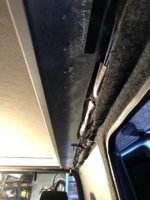
Rather than bend a piece of ply around the loom I decided to got a shaped pelmet from the edge of the HiLo to underneath the wires. I’ve used a curved plywood boxing that’s used for boxing in pipes. Cut it down so it clears the loom and scribed it to the side of the van.
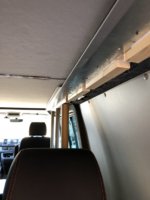
I Sikaflex’d some noggins of wood to the underside of the roof cassette.
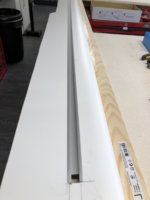
Not wanting any visible fixing, I thought about using Velcro but eventually decided to fit some recessed LED lights and place the fixings inside them. This meant I had to cut a long slot into each side piece.
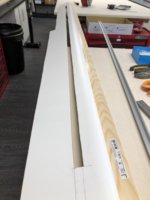
This weakened the side so I fitted a ‘bridge’ from one side to another to keep the rigidity.
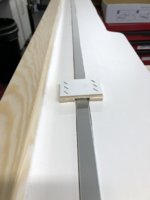
After spending a while fettling the mitres they were nearly ready to cover. The make sure all the panels lined up I fitted a biscuit to the rear panel that will slot into a hole in the side panels and hold everything in place.
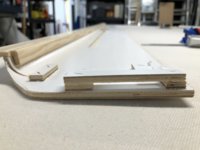
The wiring loom. Along with all the other leisure electrics coming up the B pillar is around 25mm thick along the side of the van.

Rather than bend a piece of ply around the loom I decided to got a shaped pelmet from the edge of the HiLo to underneath the wires. I’ve used a curved plywood boxing that’s used for boxing in pipes. Cut it down so it clears the loom and scribed it to the side of the van.

I Sikaflex’d some noggins of wood to the underside of the roof cassette.

Not wanting any visible fixing, I thought about using Velcro but eventually decided to fit some recessed LED lights and place the fixings inside them. This meant I had to cut a long slot into each side piece.

This weakened the side so I fitted a ‘bridge’ from one side to another to keep the rigidity.


After spending a while fettling the mitres they were nearly ready to cover. The make sure all the panels lined up I fitted a biscuit to the rear panel that will slot into a hole in the side panels and hold everything in place.


