You are using an out of date browser. It may not display this or other websites correctly.
You should upgrade or use an alternative browser.
You should upgrade or use an alternative browser.
Deaky’s Kombi to Camper journey
- Thread starter Deaky
- Start date
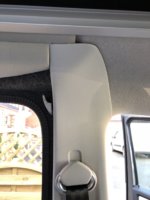
Today I’ve finished off the b pillars
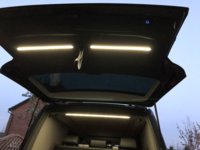
Then set about the lighting. @Montecha the tailgate has a Caravelle door card and surround. I’ve cut it and added a couple of led lights with a touch switch on the bottom of the door card. I’ve linked these lights to the white lights in the strip across the back of the van.
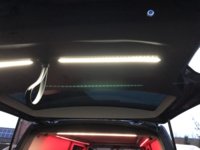
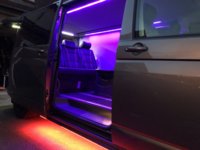
The light channels around the HiLo are fitted with RGBW led strips. Eventually there will be 4 zones. The sides of the roof, under the bed, the side of the van under the awning and outside around the roof.
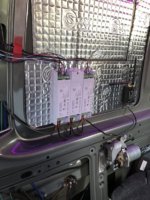
This is the brains of the operation. Still waiting for one of the zone controllers and the two fixed controllers that will be fitted on either side of the van. For now, when my phone is connected to the van network I can use the WiFi control.
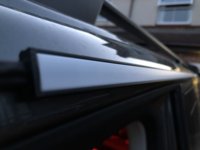
The awning rail is made from an led strip in an aluminium channel with a fridge magnet strip to the back so it can stick to the van.
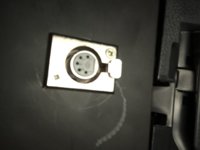
I’ve fitted a 5 pin XLR socket in the passenger footwel for the light to plug into.

Then set about the lighting. @Montecha the tailgate has a Caravelle door card and surround. I’ve cut it and added a couple of led lights with a touch switch on the bottom of the door card. I’ve linked these lights to the white lights in the strip across the back of the van.


The light channels around the HiLo are fitted with RGBW led strips. Eventually there will be 4 zones. The sides of the roof, under the bed, the side of the van under the awning and outside around the roof.

This is the brains of the operation. Still waiting for one of the zone controllers and the two fixed controllers that will be fitted on either side of the van. For now, when my phone is connected to the van network I can use the WiFi control.
The awning rail is made from an led strip in an aluminium channel with a fridge magnet strip to the back so it can stick to the van.

I’ve fitted a 5 pin XLR socket in the passenger footwel for the light to plug into.


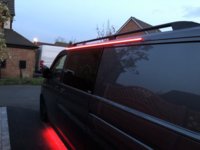
I haven’t stuck the leds into the channels yet so they look a little more dot like rather than diffused. I threw the end caps from the rails by mistake si I still need to remove them to fit the replacements.
While I was on I’ve fitted the red Chanel with a changeover relay so when I’m driving and the lights come on the lights down the sides of the van will feintly glow red.
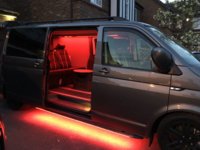
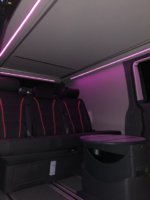
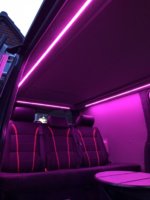
While I was on I’ve fitted the red Chanel with a changeover relay so when I’m driving and the lights come on the lights down the sides of the van will feintly glow red.


Jeez @Deaky, you’ve taken it to a whole new level. That’s awesome.I haven’t stuck the leds into the channels yet so they look a little more dot like rather than diffused. I threw the end caps from the rails by mistake si I still need to remove them to fit the replacements.
While I was on I’ve fitted the red Chanel with a changeover relay so when I’m driving and the lights come on the lights down the sides of the van will feintly glow red.
View attachment 21036 View attachment 21037 View attachment 21038 View attachment 21039
Thanks for all your kind words  Guess I’m lucky that I’ve always been good with my hands
 . After the bag of shite I got back after sending my old van for someone else to convert, this time I thought I’d try and do as much as I could myself. This being my second van I know exactly what works for us camping and using the van for work. It’s getting exciting now but I could of happily set fire to it a few weeks ago when I got it back from VanDoc. I’d stripped all the dash, leisure electrics, door cards, stereo and cab out. Got to admit I was a bit overwhelmed
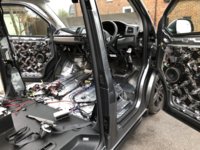
As usual I’d set myself an impossible goal of doing everything in a couple of days. Fortunately I have a great wife who kept me from the matches Glad I stuck with it now.
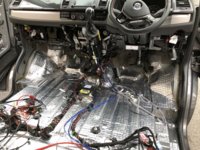
 Guess I’m lucky that I’ve always been good with my hands
  . After the bag of shite I got back after sending my old van for someone else to convert, this time I thought I’d try and do as much as I could myself. This being my second van I know exactly what works for us camping and using the van for work. It’s getting exciting now but I could of happily set fire to it a few weeks ago when I got it back from VanDoc. I’d stripped all the dash, leisure electrics, door cards, stereo and cab out. Got to admit I was a bit overwhelmed

As usual I’d set myself an impossible goal of doing everything in a couple of days. Fortunately I have a great wife who kept me from the matches
 Glad I stuck with it now.
Holy crap! I'm brave when it comes to stripping at fixing my vehicles, but there's no way i'd undertake what you've done unless I had a spare few months, and a large workshop, plus didn't actually need to use the van in the meantime!
You are a better and obviously far more tolerant man then me, hats off to you Sir.
You are a better and obviously far more tolerant man then me, hats off to you Sir.
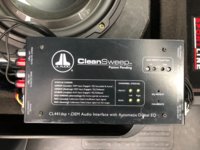
Finished off the audio in the front tonight. I’ve rewired the quad loc on the back of the head unit to make a new front/rear left/right speaker loom. This is fed into a JL Audio cleansweep. This takes the high level output from the head unit, removes any equalisation and delay from the head unit and gives a flat line level output for the front and rear. It’s simple to set up, pop the cd in disconnect the speakers turn it to 3/4 volume and press the calibrate button.
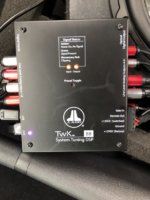
The clean sweep feeds into the signal processor. It has too many functions to list but it acts as a full crossover, delay and equaliser. You can set various presets and scroll through them using the button I modded further up the thread.
For anyone interested in audio the speakers are:
In the front
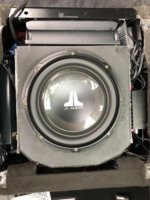
Hertz Mille pro 165.3 midbass, 70.3 midrange in the doors, 25.3 tweeter in the A pillar. JL Audio 10W0 10” sub under the seat. All running off a JL Audio XD700/5.
In the back
Hertz Mille pro 165 coaxial speakers run be a JL Audio MX280
Everything fits nicely under the drivers seat.
The DSP is configurable via a lap top. Here’s a couple of screens.
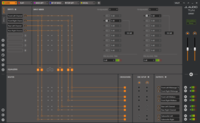
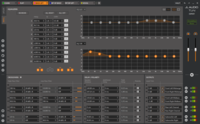
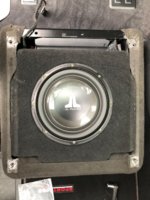

The clean sweep feeds into the signal processor. It has too many functions to list but it acts as a full crossover, delay and equaliser. You can set various presets and scroll through them using the button I modded further up the thread.

For anyone interested in audio the speakers are:
In the front
Hertz Mille pro 165.3 midbass, 70.3 midrange in the doors, 25.3 tweeter in the A pillar. JL Audio 10W0 10” sub under the seat. All running off a JL Audio XD700/5.
In the back
Hertz Mille pro 165 coaxial speakers run be a JL Audio MX280
Everything fits nicely under the drivers seat.

The DSP is configurable via a lap top. Here’s a couple of screens.


Awesome build thread @Deaky , the finish and attention to detail is amazing! I’m away to google the parts in your last audio post, I have a setup from @Absolut5 so you have peaked my interest with those add-ons. Trying to get my head around how you made the rotary do multiple things? Mine is setup for sub currently
Hi mate, thanks for the kind comments. It’s a double rotary control. There is a ring at the back. Both controls are configurable in the TUN software. In my setup I have the front one as the sub level and the rear one as the rear speaker volume. The front control also has a push button in ir to select the presets you can assign. Each preset has a colour that’s indicated by the led next to the control.Awesome build thread @Deaky , the finish and attention to detail is amazing! I’m away to google the parts in your last audio post, I have a setup from @Absolut5 so you have peaked my interest with those add-ons. Trying to get my head around how you made the rotary do multiple things? Mine is setup for sub currently
Deaky you are one clever old dog!
I actually need your help, I have from day 1 wanted some pink or purple lights for under the van - given you are totally at home with lighting I wondered if you could recommend any sort of set up. I dont want anything too clever as its a lease van, happy to use a switch to activate.
I actually need your help, I have from day 1 wanted some pink or purple lights for under the van - given you are totally at home with lighting I wondered if you could recommend any sort of set up. I dont want anything too clever as its a lease van, happy to use a switch to activate.
Little bit of tidying today. There is an aluminium frame fitted to the bottom of the HiLo cassette. It has a cut away at the back so you can remove the sliding panel. From the factory the cut is covered by gaffer tape  on a 5 grand roof
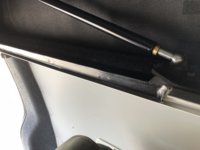
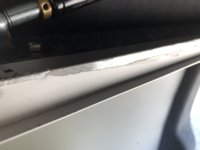
Mine had started to come off already. This is what’s underneath.
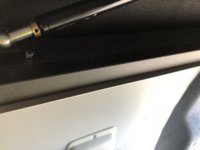
2 quid bit of L shape plastic from B&Q and a bit of double sided tape.....

Mine had started to come off already. This is what’s underneath.

2 quid bit of L shape plastic from B&Q and a bit of double sided tape.....

Can see that I need to take a trip to B&Q in the very near future! Do you have a link on their website so I know what to get?Little bit of tidying today. There is an aluminium frame fitted to the bottom of the HiLo cassette. It has a cut away at the back so you can remove the sliding panel. From the factory the cut is covered by gaffer tapeon a 5 grand roof
View attachment 21314
Mine had started to come off already. This is what’s underneath.
View attachment 21315
2 quid bit of L shape plastic from B&Q and a bit of double sided tape.....
View attachment 21316

