Dellmassive`s Camper Van Adventure

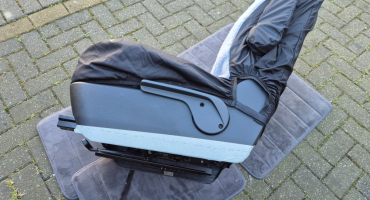
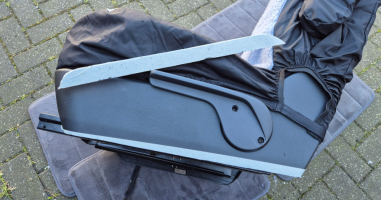
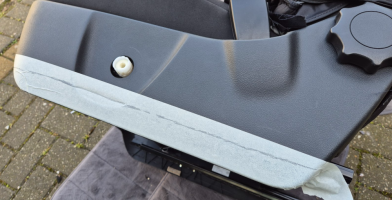
Heads Up on fitting these !! If you want to keep the full range of height and for/aft adjustment on the OEM seat, you will have to trim a fair chunk of the bottom edges on the lower side plastic trims (both sides of each chair) and a section deeper where the adjuster handle sits. You will be able to mark it on the up/down & for/aft positions to see how much to take off.
Thanks,

the install guide calls for 30mm to be trimmed off all the seat plastics.

and apparently the drivers side comes with a replacement soft handbrake cover.


no opened the boxes yet. . . and the van is off Britstopping this weekend without me. . . :(
 
  • Haha
Reactions: CAB
Is this not the same for all non-OEM swivel bases, or are there options that don’t require trimming?

Personally, I’ve never trimmed mine, as I keep the seat height raised using the built-in height adjuster. This provides enough clearance for normal swivel operation and is also the most comfortable position for my height. I’m using Sportscraft swivels.
The RIB V2 swivels come with two spacer blocks that raise the drivers seat a bit, so you don't need to adjust the hand break in any way..

however, when the seat is fully down the seat will contact the swivel bracket.

from experience, its best to raise the seat fully, then rotate, then lower if needed. . . . i didn't trim my seat plastics, and now they are hanging off the seat with damaged retaining clips.

totally my own fault. . . deciding it was a good idea to setup the van - after dinner & Beers and not before - OOPs.

.

from my research the best swivels are:

#1 - VW OEM
#2/#3 - Sportscraft / RIB ( not sure what's better as I've not had the SC ones to test)
#4 - the others,

i had the KIRAVANS own version, they were terrible and got sent back, ( swapped for the RIB v2)

the rustylee ones a bad rep for the wobbles,
 
selling the rear Kombi 1+1+1 setup.

what trim is this on the seats?


1740844966476.png1740844979583.png1740844991964.png


++++++++


weve always had these seat covers on, so i have no idea. . .

these were all fitted by the previous owner.


.
 
Now things are progressing....

I've done a deal with @bp_porcaro for the kombi system, he's going to fit that in his van.... That leaves me space for the kitchen and RIB bed.

That leaves the OVANO XL now also available. (When removed after the pop-top install)

Anyone interested in it before I put it on the market?..... PM me if your interested.
 
hello, I'm currently comparing the Vanmax roof against the Stealth B2 because I really like the aesthetics of these slim roofs but I've been reading that they might cause a headroom problem if you have the RIB bed because they sit high. Have you sat on a RIB in a van with the Vanmax?
 
hello, I'm currently comparing the Vanmax roof against the Stealth B2 because I really like the aesthetics of these slim roofs but I've been reading that they might cause a headroom problem if you have the RIB bed because they sit high. Have you sat on a RIB in a van with the Vanmax?
I've sat in @Bigsidavies who has the vanmax. But can't remember what seat he has?

The head high depend on a few factors...

Slider rails make the seat higher.
Floor thickness.
Bed height.
A person's height.
Etc.

I'll ask the installer by how much the roof drops inside the van.

And if I remember I'll take some measurements from the floor to the current roof panels, and the floor to the bed board when it's fitted.
 
@Dellmassive what Poptop is that you having fitted? It looks great, I’m pondering getting one fitted and was thinking skyline as they have a place local to me but now I’ve seen yours you getting fitted it just looks much neater so any info on it would be appreciated
Thanks
Paul
 
Testing the Heater in the van - Loved it.

it makes such a difference when its cold and wet outside.


.

View attachment 275092View attachment 275095
View attachment 275093View attachment 275096

View attachment 275099


monitoring the Temps on the Shelly APP. . . a BT temp sensor stuck on the wall.

View attachment 275097

and the Victron VRM - a RUUVI temp sensor stuck to the LB.

View attachment 275098


.
Chilly one today. . . some more testing. . .


it was -4C ouside overnight, and the other half is off to work in an hour, so i set the heater to full power mode for a 2hr timer.

starting with this, -4c inside, -2c outside,


1741074543738.png


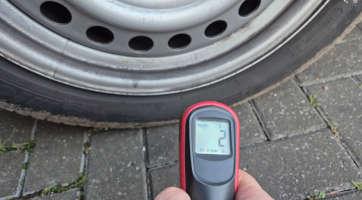
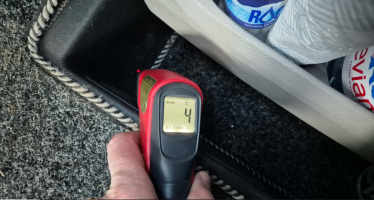
30mins later, i had a quick test with with the thermals,

the outside ground temp is 2c,

1741074637506.png


the step vent inlet temp is around 4c,

1741074681828.png


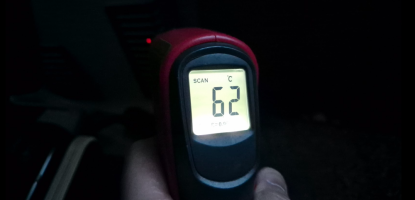
the heater outlet temp is 62c,

1741074725795.png
1741074710143.png

which looks like this on the thermal cam,

1741074757434.png

the internal temps have started to rise, now showing +3c inside - the temp sensor is mounted at head height in the rear quarter of the van, so there is a lot of van to warm before that sensor.


1741074836592.png


ill EDIT and add the 60mins temps. . . . .


TBC.

.
 
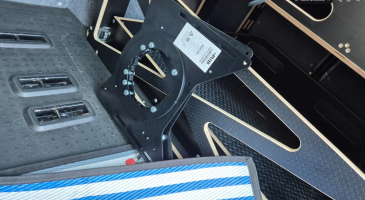
RIB V3 seat base swivel plates.

new RIB swivles have arrived. . . .

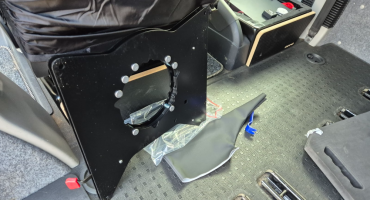
these call for 30mm to be trimmed from both side plastics on both seats. . . so seat out.

1741289184433.png

used masking tape, tape measure and a pencil to se the 30mm,

1741289227650.png

and used the grinder to whip it off, then finish the edge with some emery cloth. . .

1741289273736.png

the RIB bases are super beefcake. . . . the V3 kit needs the handbreak lowering

1741289319773.png

once the seat was trimmed it was just a case of bolting it in. . .

1741289381669.png

thats the passenger side done. . .

1741289427134.png

.
the drivers seat base it a bit more busy. . .

1741289457746.png


so, same again with the seat. . .

1741289487679.png
1741289512505.png

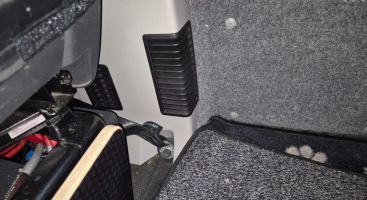
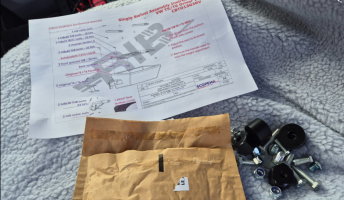
seat trimmed it was time to look at the handbrake . . . . the kit comes with the faux leather cover, and a bracket.

there wasn't much to go on, but it looked like you had to remove the OEM plastic housing, fit the lowering bracket, then use the supplied soft cover.

1741289622970.png


I'm not so sure on the overall look as the metal bracket is now on show? - i need to work out what to do with that later.

1741289725285.png

1741289691682.png
.

moving on, next up was to fit the plate to seat . . .

1741289767540.png


the bolt onto the seat base using the supplied spacer blocks. . .

1741289803203.png
..

seats back in and a quick test. . . we are all good.


started to get dark, so ill drop some pics later.


++++++++++

if you want the RIB V2 set, see here:


++++++++++
 
  • Like
Reactions: CAB
You may have found answers to all these things between the post I read and this one, so apologies if so, but I noticed you weighing up some similar things to us on the new conversion we are having done and I think were missing some options.

Sliding bed - We are going with Mobiframe. More flexibility in where the seat is set vs the Reimo - every 15mm i think. I believe the seats are a little lower - we asked about head height with the reimo roof and we were told that the owner is 6’2 and it’s comfortable for him. Also comes in a 120cm which it sounds like you are erring towards (same as us). We are coming from a 129 RIB in current van and the compromise on storage is too high, but no way we could go down to a 112! Mobiframe also has some neat options for the rails - bike racks being one, but they also sell the kit to create your own to slot in, so we are having some other custom things made that will fit in when we need them - eg portapotti for off grid.

Fridge compromise - we had same dilemma with the 120cm bed and liking the straight cabinet layout, but solution is a top loading fridge. Compromise is the Vitrifrigo top loader that fits is only 20l, but we’ve decided to go with that and use a portable 2 zone fridge to supplement it when we need more, as for weekends, festivals etc its fine for the basics. As we are going with LPS and solar, we will have plenty of power to run both (and my guess is power wont be an issue for you either!). Interestingly Knights did say there is a conventional fridge option for the 120 bed as well but not sure what it is. I can ask if you like? Also note that the Mobiframe seat comes with an option to add a drawer fridge underneath instead of a storage drawer. We were tempted (still may be) but the storage drawer option is probably what we will go for as i think we can cope on most trips without it and I am not sure i want a fridge chugging away underneath the bed!

Swivel bases - I know you’ve solved this now, but as I have also just been doing down this rabbit hole, I dont think you mentioned this option, which was recommended to me by the guy who is also supplying brackets to allow other seats from the MQB platform to be fitted. They solve the handbrake issue with a bracket, are 30mm lower to counteract the extra swivel height, and the option of a safe is quite neat as well. IF anyone has experience of them good or bad would be good to know.


Anyway hope it helps someone!
 
...we were told that the owner is 6’2 and it’s comfortable for him
This is just a general observation and not aimed at you @borat, but be wary of such comments as they can be misleading. My son and I are the same height (give or take a few mm), but he's got a long torso and relatively short legs (a trait of my wife's family) and my proportions are t'other way round. Consequently, the headroom I need to feel comfortable is significantly less than the headroom he requires.
 
This is just a general observation and not aimed at you @borat, but be wary of such comments as they can be misleading. My son and I are the same height (give or take a few mm), but he's got a long torso and relatively short legs (a trait of my wife's family) and my proportions are t'other way round. Consequently, the headroom I need to feel comfortable is significantly less than the headroom he requires.
Yep fair comment
 
all fitted and tested - very nice,


Today was this lovely 2017 VWT6
•External mount in the factory location
•Retro fit so it looks like factory!
•Comfort Controller mounted on the drivers b pilar
•Modem to control the heater via your phone
•Silent fuel pump
•Heaters fuel feed taken from the vehicles fuel tank
•Drivers side lower cover that helps protect heater installs as the one was hold, cracked and broken
•3 years heater warranty
Planar Pete installed, the heat is on!


View attachment 275029View attachment 275030View attachment 275031View attachment 275032View attachment 275034View attachment 275035


we also needed a new under tray - as the existing one was smashed. - a common issues apparently.

luckily he had one in stock and fitted for parts only charge.


View attachment 275036


View attachment 275037


++++


very happy with the quality of workmanship and install quality.

Pete is a Diesel heater fitter machine - no messing around.

i recon he could fit one on a T6 with a blindfold on.

100% @Dellmassive recommended.


I've given him the heads up about joing T6F as a trade member,

in the meantime heres his details . . just say @Dellmassive from T6Forum sent you. - :mexican wave:

++++++++++++++++++++++++++++++++++++++++++++++++++++


Pete -07593 245553

Planar Pete is in Camberley, Surrey.​


View attachment 275038


++++

View attachment 275033
@Planar Pete is now on T6FORUM

Check out his awesome work.

hell be starting a trade page on here shortly


.


.
 
  • Like
Reactions: CAB
@Planar Pete also removed the kombi floor brackets for me.

He is a great skilled mechanic, knows his way around a T6, owns a well sweet T6.1 Sportline, and does mechanical works, and leisure electrics as well as heater fittings.


....

20250318_185040.jpg20250318_182736.jpg20250318_182710.jpg
 
The next order is in for "12voltplanet" for kitchen electricals.

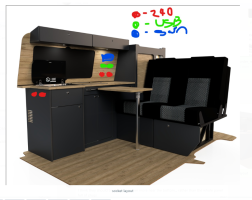
with this kitchen layout, . . .

basically :

RED - twin 240v sockets
GREEN - Twin USB/PD chargers
BLUE - Victron Cerbo GX 50 screen

1742490066772.png


we are going for

CBE sockets, frames, and covers.
ill add my own USB chargers into the 29mm CBE frame
3mm2 twin core for the 12v feeds (including the Fridge)
2.5mm arctic blue for the 240v stuff.

and some random Ferrell's and Victron 90 Ve-Direct leads.

++++++++++++

1742489989641.png1742490001227.png

++++++++++++++++++
 
In other news, the Bus is booked in for the Pop-top install. - watch this space.

went for a few options.


standard slimline poptop install with,
colour coded roof,
Black Canvas,
fitting of my supplied 180w solar panel, and wired to the seat base.
possible Alcantara on underside of bedboard,
possible carpet lining cab roof,

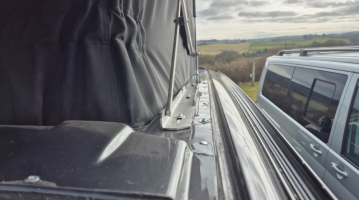
will loose the roof chanel C-Rail, so opted for twin Vanmoose Multirails.


====

it should look something like this. . .

View attachment 276679View attachment 276680View attachment 276683View attachment 276684View attachment 276687View attachment 276686View attachment 276682

====


and when colour coded and fitted should look like this similar van to ours. . .


View attachment 276688View attachment 276689View attachment 276690

View attachment 276681

View attachment 276685


++++++++++

edit:

details added. . .

so we contacted them for a rough price. . .


the following day they come back with:

"Hi there price for a swb slimline poptop roof is £4000 and colour coding is £500 , for a bifold bed price is £450
Price includes slimline poptop roof with a scenic canvas fully retrimmed to choice of carpet lining with led lights fitted, yes of course we can fit the kitchen and bed for you we would have to discuss what exactly need doing before we can price this up like fridge hob and sink, gas and all electrics etc
Are you local to us as if so you could call in so we can show you the roofs and have a chat about your requirements thankyou

M Carney"


looks like we are back on again. . . .


High Quality Manufacturing of Slimline Poptops


Made to order each poptop roof is designed for you.


Included in starting price:
High Quality Fibreglass Top & Frame
2x Gas Struts
2x Hinges
Wind Deflector
360 View Scenic Tent (Colour Choices)
2x Front Fastening Straps
Elevating Bed Board
6x LED Spot Interior Ceiling Light
From £3850

Extras:
Roof Bed Mattress
Exterior Roof Colour Coding
Interior Ceiling Decorations
Roof Bars Fitting and Refitting
Solar Panels
Removal of Interiors
Interior Cab Carpeting
plus more...

+++++


CALL US
TEL: 01422 647840

TEL: 07568936284

EMAIL US
[email protected]

[email protected]

OPENING HOURS
Mon - Fri - 9.30am - 4.00pm

Sat - Sun - By Appointment Only

CONTACT US FOR MORE INFORMATION


Contact:

Unit 13C Asquith Bottom Mills
Sowerby Bridge, Halifax
West Yorkshire, HX6 3BT

++++++


Im building up a list of T6F members that have the VANMAX Roof.

"yes a VANMAX, but from the new guys that are supplying / fitting them. HALIFAX CAMPER CONVERSION"


@Bigsidavies - fitted at Vanmax 2019
@Led Sandwich
@Dellmassive - fitted at HCC 2025
@
@


PM Me to get added to the list. . . . .


.


++++


I've now started a dedicated thread for the - VANMAX PopTop -


++++

This build is picking up pace, and as such we are starting to bounce all over the place.


so lets get back on track.


the Pop-Top.

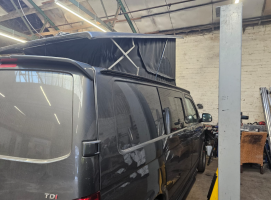
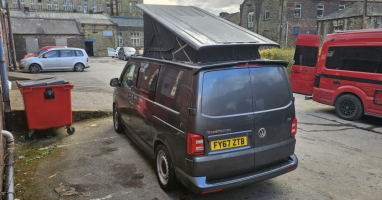
its done and fitted.


it took a Monday to Friday week to get done with the extras.

Michael and his team done a grand job.

we even had a chance to meet with @Bigsidavies and compare roofs, as he had the original VANMAX version, that was install at VANMAX HQ in 2019/2020 ish

there are a few upgrades that Simon liked.

namely . . .

the colour coded pop is coloured both sides - so the under side is dark verses the standard white fiberglass look.

the topside of the PT internal frame is carpeted

the LED lights are mounted on the bed board, so kitchen units don't get in the way and block them.


lets take a look.

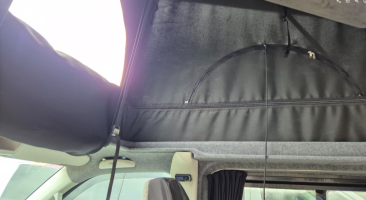
we went for the BLACK canvas, this is a new upgraded canvas apparently.

1742491549093.png


1742491569038.png

there is an integrated elastic around the rear to help pull it in. . .

1742491614362.png


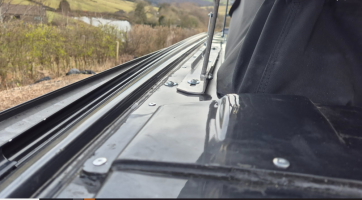
here you can see you loose the OEM roof bolts, which was why we went for extra VANMOOSE rails.

1742491670291.png

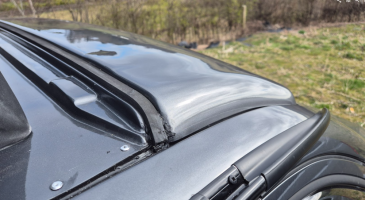
the front section and spoiler are all colour coded . . . . .

1742491729559.png


as is the rear section . . .

1742491759795.png

on the inside you get a front plastics window, and two mesh side windows,

the roof is also scenic, so the whole lot can be zipped back and roller up out the way .

1742491891493.png


here you can see the carpeted frame from the top. . .

1742491932866.png


here you can see the lower carpeted covers that go all the way round to cover the PT frame assembly.

(now im looking at it, i think the kitchen is pre scribed for a standard van, so ill have to either remove the top cover board above the kitchen? or leave it fitted and re-scrive the kitchen. . . . . but we also want the kitchen top lockers, which are also fixed to the van shoulder. . . . . so im thinking the kitchen side cover will have to be removed?)


1742492027618.png

++

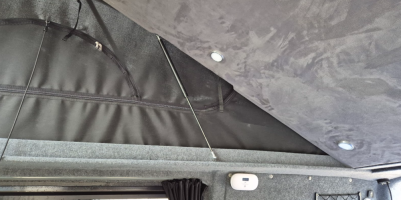
the Chief Advisor wanted Alcantara on the bottom of the bed board (an £100 extra for material) and im glad she did . . . it looks awesome.

1742492252693.png1742492277848.png

the top of the roof is also fully carpeted. . .

1742492329249.png


we also opted for the cab carpet lining, to match the rest (£100 option)

1742492508527.png


and again im glad we did , as i love to look.

1742492562312.png


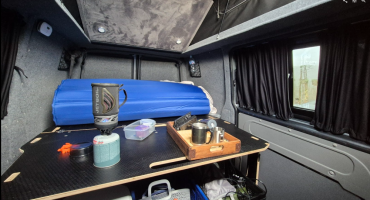
with the roof down. . . it looks great from the inside.

1742492649041.png


as well as the outside too.

1742492686185.png1742492698753.png


and with the canvas up

.


1742492587671.png


.

1742492278139.png
 
VANMOOS MULTIRAILS . . . . .

these were £275 fitted with HCC . .

sure i could have done these myself, but i though while the vans there, and these guys have fitted tons - let them do it.

we had two rails fitted - one each side.


1742492843684.png1742492860936.png1742492874496.png

one slight issue we come into was the S+S black screen cover was too tight now,

with the twin rails, front roof spoiler, twin CLIMAIR window things.


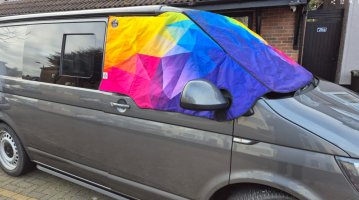
but our main thermal cober fits fine.

1742492976406.png1742492999401.png


rails . . .

1742493048088.png1742493061761.png


i like the way they sort of blend in with the van lines...


1742493092772.png1742493111651.png

1742492874667.png

1742492999696.png
 
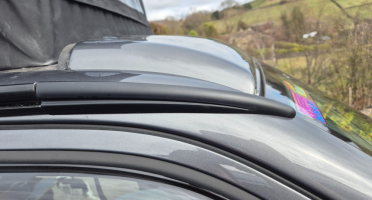
180w Photonic Universe Black Solar panel with rear cable.

again i could have done this myself.

but seeing as it means drilling the PT and frame etc - i though id let the guys do it.

it was a £200 option to fit the panel, i asked them fit the supplied panel and run a 4mm2 cable back to the seat base - which they did.

i love the look of "no cables on show"


1742493347623.png1742493368488.png


the panel its stuck on with Tigerseal / Sikaflex etc. with the rear cable gland drilled through the roof fiberglass.

1742493411243.png

ill be adding some extra tigerseal at the top to fully seal the exposed fibreglass.

here you can see the colour coding . . . or is that black? - im not sure yet.

1742493513923.png


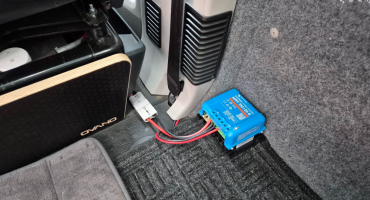
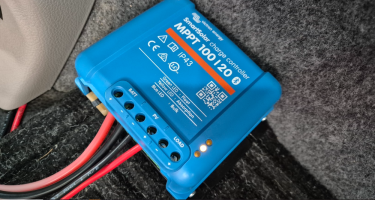
back at the seatbase i dropped in a 100/20 Victron MPPT for a test . . .
1742493587444.png1742493606544.png

all was well.

1742493621537.png


and today we had some cracking sun too. . . .

if you have a van and thinking about solar - just do it its free leccy !!

1742493679306.png


.

i did have one issue, where the PV cable on the roof had pushed back into the van. . .

this was due to a combination of thick 4mm twin core cable on the panel, and the Tigerseal not being fully cured.

basically when the roof was lowerd it pushed the cable back into the void in the rear cover.


so i dug out and removed all the sealant.

then stripped off all the outer core of the PV cable, just leaving the inner two cores,

then taped and tessa taped those,

and shaped the cable into a C shape as best as possible,

the resealed the lower cable entry - and left up for a few hours to set,

but . . .

the next day raising the roof - the same had happened, the Tiger seal hadn't set and with the roof pushing down it pushed the cable back into the void again. GRRR !!!

so, ding dig roud #3

after a dig out and clean up again.

this time i drilled a 4mm hole next to the cable entry to that i could fit a cable tie and secure the cable firmly.

then a re- tiger seal again.

fingers crossed this will work ok, and now the cable has a C profile so that when the roof is down there is a more natural way for the slack to squish down and "unfold" when the roof is up,


.


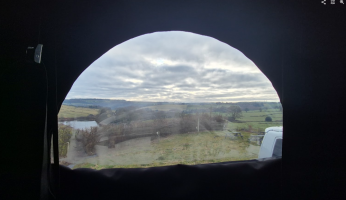
the first morning with the new PT, and opening the front window. . .

1742494258408.png1742494272422.png

we have a couple of happy campers. . . .

1742494307533.png

++++

oh, this happend too.


1742494347521.png

yep freezing cold night.

the derv was down half way between the 1/4 mark and the RED section.

being a flash git in the pub. . . . . and turning on the heater with my phone APP.

1742494455540.png


come out to a freezing cold van and a E13 error !!!

a quick google leads us to NO FUEL.

asking the other the following morning . . . . thats the normal point for the derv heater to cut out.

so note to self - next time make sure you have morer than 1/2 a tank before plotting up for the night.

oops . . .

1742494590675.png

+++

the weather the following morning made up for it.

1742494651870.png


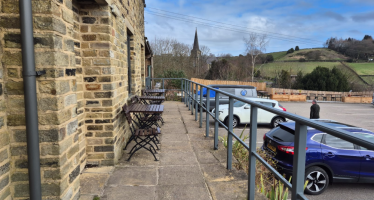
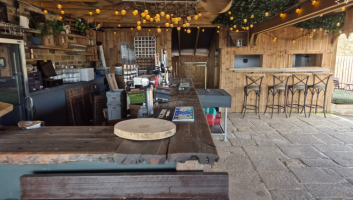
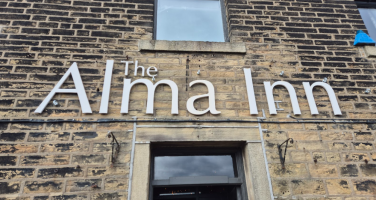
if your planning on heading to Halifax to get your roof done, we highly recomend a Britstop at the ALMA INN, they also have room too !!!

an awesome pub, great food, and good selection of drinks, great staff - and they do breckie too.

1742494771969.png1742494786844.png1742494801527.png


.
1742493606807.png

1742494787214.png

1742494801832.png
 
Back
Top