You are using an out of date browser. It may not display this or other websites correctly.
You should upgrade or use an alternative browser.
You should upgrade or use an alternative browser.
Fitting the OEM Auxillary Heating Ductwork
- Thread starter DaveyB
- Start date
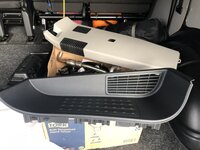
Front Step Vent
So to ensure that I made the cut in the panel the right shape and size, I rubbed a piece of paper over the top of the duct hole, cut out the shape, then glued it to a piece of plywood and cut it all out.
View attachment 18305
View attachment 18306
Next step is to transfer this shape to the van panel. With the original step removed, you’ll find a thinner bit of panelling at the leading edge.
View attachment 18307
The measurements I used, was draw a parallel line 23mm down from the top edge of the panel, and another mark 15mm in from the back of the panel. This then gives you the location to place your template and draw around it.
With your van in the air a tad, remove the underside muck guard, this then gives the access needed to the back of this panel.
Now the scary part. I used a holesaw to make the first central hole, so that with the ductwork placed up behind the panel I could feel and check that everything was going to line up. I then cut out the hole and filed all of the metal work to get the exact shape required.
View attachment 18308
With the perfect shaped aperture, I then had to figure out where the screw holes were going to be located. I got another piece of plywood and screwed my template to it. Slotted that into the duct and then drilled a pilot hole through the back of each hole into the ply.
View attachment 18310
Transfer to van so guide slots into hole, and drill through pilot holes.
View attachment 18311
View attachment 18309
Screw everything together.
View attachment 18313
Put new step on.
View attachment 18314
Don’t forget to pop on a bit of paint to the edges of the cut metalwork to prime them.
Hi your description is excellent and some additional info from other replies. I have my parts to install in the B Pillar, going to attempt cutting my trim for the vents. Only one part of the instructions I am struggling to follow; how did you know where to cut the hole in the B pillar. I’m going to use the intake vent from the kit in the step.
Last edited by a moderator:
They look the same mate.
This is the hole with everything removed.
View attachment 18363
View attachment 18364
There is a cover that screws over the hole that has a groove in the back that locates over the flange.
View attachment 18365
View attachment 18367
View attachment 18368
great to see factory fit,
Last edited by a moderator:
Great to see folks are still opting to do this mod themselves. Makes such a neat final job. It’s the thing I still use the most out of all the bits I did to my van. Last time we were allowed to be out sailing I had the heating running but forgot I’d left a pair of wellies in the way of the outlet. They were rather hot by the time I’d realised!
I left a coil of pvc plastic welding rod at the outlet of mine the other week - it is very distorted now!
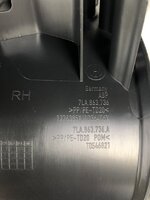
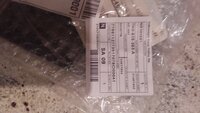
I have the parts numbers, let me know if you still want themHi does anyone have a up to date parts list for a panel van please?
Cheers
* B pillar getting extremely hot after B pillar heater install. Is this normal?
Can I ask a question I have just had a B pillar kit and eberspacher D2 installed - when the heater is running the B pillar (not the vents in the B pillar) but the pillar plastic trim gets extremely hot - I am not sure how hot I have ordered a non contact thermostat which will arrive tomorrow (so I will post pictures and the results) for all of you that have install the b pillar kit have you noticed the b pillar getting extremely hot?
Can I ask a question I have just had a B pillar kit and eberspacher D2 installed - when the heater is running the B pillar (not the vents in the B pillar) but the pillar plastic trim gets extremely hot - I am not sure how hot I have ordered a non contact thermostat which will arrive tomorrow (so I will post pictures and the results) for all of you that have install the b pillar kit have you noticed the b pillar getting extremely hot?
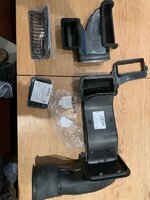
Did you fit all the vw parts, including the big ‘snorkel’ up the bpost? I have fitted the kit but need to now fit the heater?
the snorkel meets perfect to the piece that divides to the two air vents perfectly?
be interesting to hear from others with the same set up. IMO if the ducting is fitted correctly I don’t think the trim-should get too warm as only the outlettouches the vents on the b post trim, there is a gap between the ducting? Look forward to hearing from others?
FYI you might know that (apoptosis in advance if you know) there two sizes of ducting from the snorkel to the outlet in the trim, the one for a van is narrow and doesn’t line up correctly to a Caravelle type trim which is wider?* B pillar getting extremely hot after B pillar heater install. Is this normal?
Can I ask a question I have just had a B pillar kit and eberspacher D2 installed - when the heater is running the B pillar (not the vents in the B pillar) but the pillar plastic trim gets extremely hot - I am not sure how hot I have ordered a non contact thermostat which will arrive tomorrow (so I will post pictures and the results) for all of you that have install the b pillar kit have you noticed the b pillar getting extremely hot?
The plastics on the B pillar on mine hardly got warn when using the heater. Im guessing something is not right.* B pillar getting extremely hot after B pillar heater install. Is this normal?
Can I ask a question I have just had a B pillar kit and eberspacher D2 installed - when the heater is running the B pillar (not the vents in the B pillar) but the pillar plastic trim gets extremely hot - I am not sure how hot I have ordered a non contact thermostat which will arrive tomorrow (so I will post pictures and the results) for all of you that have install the b pillar kit have you noticed the b pillar getting extremely hot?
What is part number of smaller one I've got bigger one which won’t line up with my bentsI don't think the grilles are different sizes, but I know the air guides are wider on the California/Caravelle to suit the wider B pillar covers.
View attachment 55333
it is in post #1
Or post #237
Or post #237
I need the part numbers if you can help me out?I have the parts numbers, let me know if you still want them
Cheers
Thanks
Similar threads
- Replies
- 10
- Views
- 5K
- Locked
- Replies
- 5
- Views
- 4K
- Replies
- 27
- Views
- 8K
- Replies
- 51
- Views
- 14K

