[Guide] How To Line Your Own Van.

For a while we have been thinking of offering a bespoke lightweight ply lining kit for vans. We would like to trial this with a few people before launching it properly. We have every concieveable lining on file and they are absolutely perfect to a fraction of a millimeter. Our database includes vans with electric rear doors, sunroofs, rear heaters with vented roof systems etc etc. We will supply all kits with stealth fixings as standard and will be able to be upgraded with rear speakers and mounting rings, Pre cut for CBE electrical components, American Trunkliner carpet by the meter, cans of glue, skinz soundproofing, DoDomat Thermovanliner etc etc. If your interestef then drop us an email with your requirements and we will send you a quote including shipping charges. Please bear in mind it could take a week or so to dispatch as the lining kit is CNC cut bespoke for most customers :thumbsup:
 
We will also be offering our awesome Birch Ply floors which we sell to several conversion companys and get great feedback on :thumbsup:
 
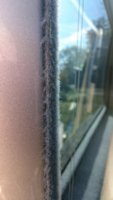
How do you line the sliding door? Specifically, how do you do the edges so it looks fully lined from the inside but is edged neatly where it meets the van?
 
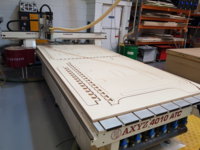
For those that are interested here is a bit of info on our CNC Cut floors.
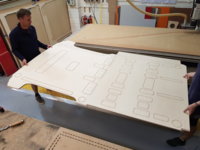
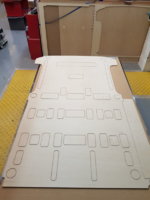
They are cut from sustainably sourced 12mm thick Birch Ply. They are produced as a 3 piece floor with super strong friction zip joints. The reason we produce it as a 3 piece floor is to make it a realistic size for shipping to our customers.20190524_085454.jpg

Once the floor is knocked together it can be handled as a single piece floor without the aid of any glue in the joints.

20190524_085920.jpg

We etch the underside of the floor with the positions of all the cutouts for every variation of Kombi seat setup, The x6 tiedown points, where to jigsaw the extra material away if your vehicle has twin sliding doors and the position of the 9mm packers required so that they can be fixed directly to the floor prior to installation.

20190524_085810.jpg

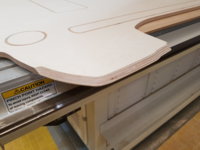
We also chamfer the floor in all the specific areas to get a perfect snug fit all round.

20190524_085825.jpg

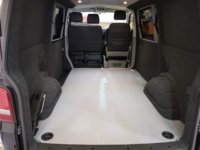
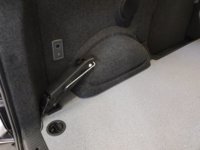
The floors are cut to allow for carpeted vans and to allow for 2mm of soundproofing applied internally to the rear wheel arches. We then add around a 2mm tolerance around the entire floor to aid installation and to allow for our rubber piping finish where the floor meets the carpet. The benefit of this system is that you can apply your packers on the bench along with your floor finish and bond it directly into the van.
 
To give you an idea of what the floors come out like here are some shots from a van we have in the workshop at the moment........

We have yet to work out the shipping and packaging costs on the floors but will post up a price soon. These will be more expensive that the Chinese ply floors all over Ebay currently as the Birch costs a more and with the detailed design they take far longer to cut on the CNC.

20190524_112839.jpg

20190524_112901.jpg 20190524_112917.jpg
 
Had my van lined by Slidepods last September and have to say I’m very pleased with the quality of workmanship and materials. Seeing these ceiling and floor options makes me think a return visit will be in order sometime
 
Thanks @Sharpe glad to hear your pleased with the work we did for you. As you know we never stop trying to develope new techniques and ideas. We do litterally everything from bulb replacements to elevating roof installs. It deffinately helps having our own CNC machine as we can test and produce new ideas really quickly and cheaply. These days we also design stuff in CAD that gets plastic printed, lazer cut and precision engineered for us when we cant produce the final product in house. :thumbsup:
 
Slidepods,

I have to say the rubber piping around the flooring edge and carpet is a beautiful solution:thumbsup:
 
Slidepods,

I have to say the rubber piping around the flooring edge and carpet is a beautiful solution:thumbsup:

Thanks. It always looks a bit rough when Altro is stanley knifed off in the van and Its awful when the joint is sealed up with silicone or polymer adhesive (shudder :sick:). It also guarantees that the floor has been bonded in and not been peppered with self drilling drywall screws straight through the metal floor to hold it down as when the Altro is applied on the bench its not possible to screw it down :thumbsup:. We see vans regularly that are peppered with screws through the metal floor (counted 88 on one van converted by a so called professional company ). Shameful!
 
I've seen a few bad examples of Sealant bonded with the carpet and the flooring, it never really looks good with a textured fabric, if its a laminated ply, then it can be passable depending on who applies the sealant, but i do like your solution, very classy.

A professional company, should never be using screws into the floor:eek:

Keep up the good work:thumbsup:
 
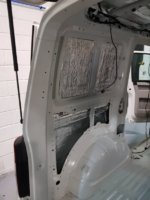
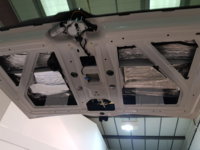
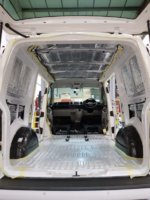
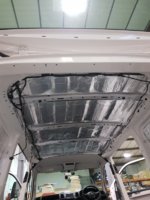
Once you have installed your soundproofing and prepped your van its time to add the first layer of insulation. At Slidepods we use DoDo Mat Thermo Vanliner for this layer. It should be applied everywhere you have applied your soundproofing with the exception of the wheelarches. I would also suggest applying 2 or even 3 layers of this material to the lower cavity of the tailgate, This is due to the fact that you really should not wad this cavity out with a fiberous insulation as a second stage.

20190409_080924.jpg
20190409_080930.jpg
20190409_081010.jpg
20190409_110949.jpg

At this stage you can begin masking off in preparation for carpeting the metalwork in the rear of the van. This is a stage we absolutely never skip as it doesnt take more than a few minutes and ensures a nice clean finish between the carpet and the metal of the vehicle.
 
Back
Top