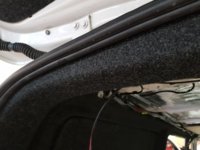
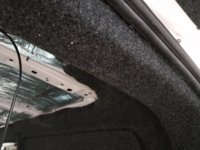
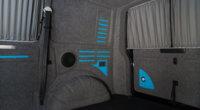
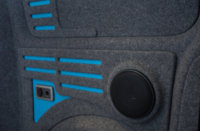
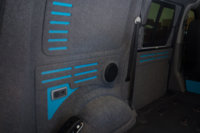
So lets go on to talking about lining panels......
There are a few ways you can do this and there are also a few ways you can fix them in place.
So lets talk fixings first.
Hidden trims or fixings on show? We tend to find most people like a hidden fixing, However there is nothing wrong with using a visible fixing and in my opinion so long as you use a descent panel fixing it can look great and is easy to reverse engineer.
Obviously anybody following this thread will see just how much effort goes into the design of our 4mm thick lightweight ply lining panels and we would love to make a version of these available for customers to purchase and install in D.I.Y jobs to give you all the ability to achieve a professional level lining job at home. Maybe one day I will get round to designing a unique T6 forum members lining package that includes everything you need along with a you tube video on how to install it all.
In the meantime I intend to show you another super easy method to get a really slick finish on your panels. From a materials point of view its extremely cheap and has the added benefit of being super quick and only requires a minimal level of design and carpentry skill to achieve. This is not a system we use at
Slidepods but I will buy in the materials required to enable me to make a couple of panels up so i can provide a descent how to for anybody wishing to use this method. This may take me a while to do as we are stacked out in the workshop at the moment but I promise I will make time for it in the near future. However i will give a brief overview for anybody wishing to attempt this now. If anybody does have a go please take some pics and P.M them to me as they may be able to be used in the thread for the benefit of others

.
For those that wish to use this method its worth noting that whilst giving a really slick finish it does make the panels about 6mm thick and very dense and when compared to a 4mm thick lightweight ply panel it will easily triple the weight of each panel you install (I will add the exact weights of both systems over an area of say 300mm square then use CAD to work out the exact area to give a 100% accurate weight comparison to anybody that's interested on the difference over in weight over a whole van)
What will you need??? a full set of factory panels and x3 sheets of 4mm thick 8x4 MDF boards along with some low profile head fir tree fixings (these can be found
here but be warned once they are in they don't come out easily)
step 1 - Lay a factory Hardboard panel on top of the MDF and scribe round it with a pencil, On the rear quarters extend the bottom area behind the wheel arch. Around the grab handle on the tailgate draw a 75mm square to be cut out of the MDF to allow the grab handle to mount back in easily afterwards, repeat this on the tailgate latch and if you have barn doors give 25mm clearance around the handle to allow the plastic trim to clip back on (DO NOT MARK ANY CLIP HOLES).
Step 2 - workout where the low clearance area on the sliding door area is against the rear wheel arch when the door is open and mark a rectangle roughly 125mm high and 80% the length of the panel to be cut out of the MDF. Mark the hole for the sliding door bump stop on to the MDF to be cut out after.
Step 3 - Jigsaw everything out carefully including the internal marks on the tailgate / barn doors and the sliding door and sand the edges to achieve a nice round over on the internal face.
Step 4 - Spray contact adhesive all over the grey face of your factory panels and the reverse face of your MDF panels and leave to flash for a few minutes (Remember to wear your vapour mask for this)
Step 5 - install the trim fixings into the factory panels everywhere.
Step 6 - bond the MDF directly to the factory panels (this will hold the trim clips in place and make it 100% impossible to see and trim fixings which is cool)
Step 7 - Carpet the panels, possibly in a nice 2 tone if that's your thing.
Step 8 - Install the panels carefully taking the time to make each trim clip line up with the factory holes (I suggest you have all electrics in place first as they will be a sod to remove if you use the clips I recommended)
Step 9 - Sit back crack a beer and be smug that you managed to design / make / carpet and install all your slick looking lining panels in just a couple of hours all by yourself with just a simple how to by the chaps at
Slidepods BOOM!

 .
.