[Guide] How To Line Your Own Van.

Since I have just posted up the latest how to post here is the next shameless advertising post :thumbsup:

Over the past few years we have been offering a sound package made up of Blam Speakers which we custom cut mounting rings for on our CNC machine however this week we have teamed up with a new supplier and will now be offering lovely premium audio products from Audison as well.

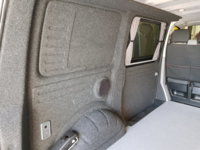
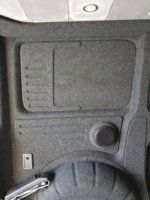
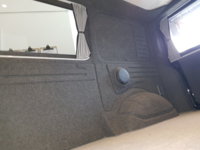
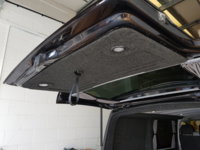
Once again we have been messing around on the CAD design again to start putting together a catalogue of embossed panel designs to compliment the stunning new roof designs we are producing. When designing these kind of upgrades we are always looking to enhance the internal lines of the vehicle and in some cases add complimentary details, We never want these to be "in your face" but subtle and well executed. Needless to say there will be no big VW logos added to panels in our workshop :D.
Anyway I hope you like what you see :thumbsup:.

20190610_080721.jpg
20190610_080749.jpg
20190610_080838.jpg
20190610_080932.jpg
 
Evolution of conversion works....a classy and professional example. I see a lot that I could upgrade on my Slidepods original conversion.....
 
I am really liking your CNC internal panels, great to see some texture/design looking suitably classy. Are you planning to offer these out as a purchase or even fitted/carpeted?
 
Probably not to be honest we tend to keep our latest designs as fitted in house at slidepods options. When they get superceeded with something better we then offer them for self converters and other conversion companys to purchase from us.
 
We do offer CNC cut lightweight ply panels 4mm thick for purchase these days.
 
Probably not to be honest we tend to keep our latest designs as fitted in house at slidepods options. When they get superceeded with something better we then offer them for self converters and other conversion companys to purchase from us.
Think I'll be coming to you for my carpeting then :)
 
So time to move on to the bit most people have all been waiting for........ The carpeting of the metal work.
This part of the job is not rocket science however i can assure you that you will get a better finish if you have done your prep work right, set aside enough time to get all of the metal work carpeted in one hit and use the highest quality 4 way stretch material you can afford. The Trunkliner we use is literally the most expensive 4 way stretch I have ever come across but when we started we used Easyliner a few times and quickly moved on to Mega Stretch which we used for around 3 years and felt was the best even though it was around 20% more expensive than Easyliner, The American Trunkliner is a whopping 50% more expensive than Easyliner but we still use it because its the best.

For those that want the very best money can buy here is the link you need to source American Trunkliner.....

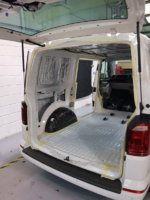
Hopefully your van should look something like this now........

20190409_110954.jpg

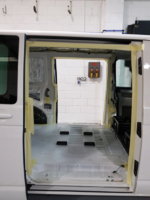
As you can see we mask of around the outside of the rear opening and the same on the sliding door openings to catch any excess glue.

20190409_111000.jpg

You will need to have a few dozen stanley knife blades ready as the carpet blunts them really quickly. On a SWB you will need to have X2 pieces of carpet cut and laid out for gluing at 2.8m long each (3.2m for LWB).

Now its is time to put on that vapour mask!!!!!

High temp spray contact adhesive has some really nasty stuff in it and you will (by the nature of the job) be working in a tiny confined space at times.

You can buy a quality disposable mask from this link for Axminster Powertools Please note its the 4279 version you require because there is Amonia in the adhesive :eek:.

At this point you can completely cover the reverse side of your lining material and one half of the van from the center (top) of the rear opening all the way to the bottom of the B-pillar........
 
Any pictures on how the hidden clips work?

Looking to get the 3.6mm ply and use the hidden fixings into the original holes.

Also should I get the electrics sorted before getting the thicker ply and carpeting?
 
Hi guys, I understand that in a perfect work, everything would be completed in an order that doesn't cause disruptive/abortive works...
Two very similar questions:
1) Does it matter if you install a pop-top before or after you carpet line your van, or there fundamental reasons you would want to install the pop-top before lining?
2) Does it matter if you install a full electric system before or after you carpet line your van?

Thank you
 
Personally I would install the poptop first if its to be a full camper with internal kitchen. Also we carpet the metal then run our electric cables in to avoid getting glue on them.
 
My carpet and glue has arrived today! Scared to start! Although the carpet seems very forgiving.

How much should i remove around the van to get it out the way and protect from over spray etc.
 
rear seats, floor, belts, step, tailgate threshold, front seats and b pillar trims
 
Thank . In this guide I found it says use about 2.8m for each wall.

So then you just start top left behind drivers seat moving along as you go all with one sheet?
 
Back
Top