Newbie Camper Conversion

OllieGBR

VCDS user
T6 Guru
So, given I have gleaned so much information from this site in regard to the attempted conversion of my newly acquired T6 I thought it only fair to take some time and share my pictures and experience.

Screenshot 2019-11-19 at 09.21.18.png This is my 2016 T6 LWB Higline 140BHP. I held out for the 6 speed as felt the 5 wouldn't have enough legs on the French autoroutes. After visiting the motorhome show I also wanted the extra with the LWB.
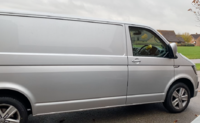
Screenshot 2019-11-19 at 09.21.38.png I even like the wheels, so no need to change these for a while.
After such resistance from my wife on the purchase and the money spent, she then went on to list all the upgrades that would make her happy, DRLs, ABT front bumper, New alloy wheels, respray of bottom half in grey, replacement head unit with Apple Car play, heated leather seats - no mention of the equipment require to actually make it into a camper!
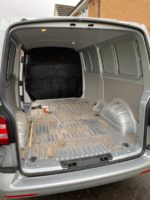
Screenshot 2019-11-19 at 09.21.51.png Screenshot 2019-11-19 at 09.22.01.png
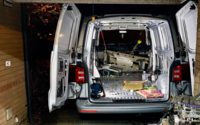
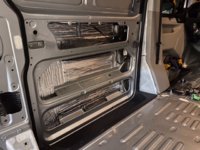
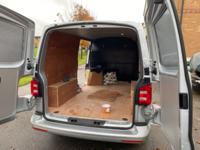
So I set about during my lunch breaks removing the ply lining and ceiling. I think this was a carpenters van with the amount of sawdust. The original panels are in good condition and I believe I can re-use these later.
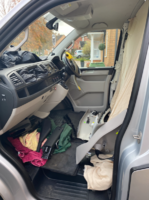
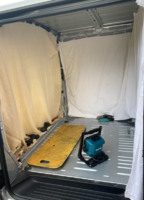
Screenshot 2019-11-19 at 09.31.30.png Screenshot 2019-11-19 at 09.31.42.png
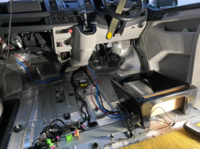
Set about removing the bulkhead over the weekend. What a crappy job that is, so much dust and mess from the cutting and grinding.
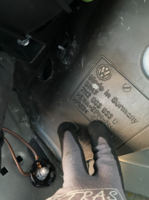
After removing the seats I also discovered a puddle of water and soaked carpet in the cab. That explains the condensation every morning. I'm not sure if this is leaking or split water????
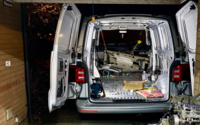
Screenshot 2019-11-19 at 09.22.29.png
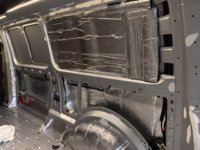
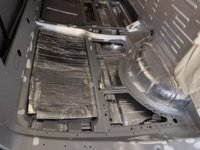
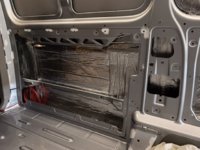
Last night I sanded all the bare metal and primed with black Hammerite, (it's all I have), and lifted the front carpet to dry it out. I tried to fit some of the sound deadening but with frost on the inside of the front window already making an appearance at 7pm, it wasn't sticking properly.

Tonight I plan to overcoat the paint in white and get the front seats back in ready for it's pop top conversion next week. I stupidly switched on the ignition to open the window a fraction for the power cable and forgot it would register an airbag fault:mad:
I might get the odd sheet of sound deadening in depending on the sourcing of a suitable heater:confused:

Screenshot 2019-11-19 at 09.22.29.png
 
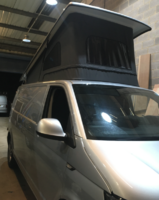
OK, so the project took a week off whilst the WestDubs pop-top was fitted.
Very pleased with the result and 180W flex solar mounted on the top for good measure.
Screenshot 2019-11-26 at 17.27.40.png

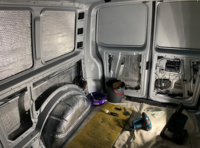
Once back home it was continue with the sound deadening process in 0C temperatures. I had to heat the sound deadening with a heat gun to get it to successfully stick onto the very cold metal. I then ran out so ordered more for next week.
Screenshot 2019-12-01 at 16.21.23.png

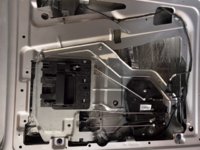
Is it easy to remove the gubbins from the LHS rear door to get the sound and thermals in behind all that lot?
 
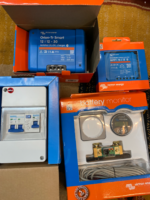
I purchased my kit from Travelvolts during the week, what a thoroughly nice chap!
Screenshot 2019-12-01 at 16.22.02.png

I have no idea [yet] how all this goes together, nor do I think it's going to fit under the drivers seat, (more on that in another thread).

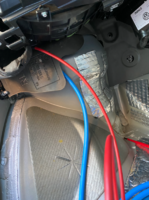
So, set about removing the seats and carpet [again] to feed the mains and battery wires through the bulkhead.
Getting to the two grommets was a bugger, so little room working behind the insulation.
Screenshot 2019-12-01 at 16.21.33.png

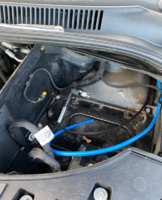
I removed the battery, mostly out of curiosity and to clean in and around it. Looks like I have an AGM and not one of the later batteries causing issues.
It was easy to push the wires through the bulkhead, I wasn't sure where they would pop up - just behind and to the right out the battery.
Screenshot 2019-12-01 at 16.21.52.png

[Break to watch Grand Prix and Subway]

Wired up the horrible three pin socket and mounted it on the flimsy plastic tot he LHS of the battery. Didn't connect the positive feed just yet.
Routed the wires loosely into the cab for now.
Screenshot 2019-12-01 at 16.21.42.png

Screenshot 2019-12-01 at 16.22.10.png
 
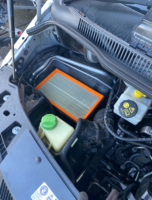
Today's lunchtime effort, DRLs. I'd already replaced the other bulbs with a whiter H4 so wanted to match.
Whilst the battery was out yesterday it was an easy job to replace the RHS.
Surprisingly easy to do the left once you removed the air cover. This has two simple clips front and rear, remove the air pipe to one side and
Screenshot 2019-12-02 at 12.56.25.png

Still lost some skin but nowhere near as much as was probable.
 
Very impressive work so far #OllieGBR. What line of work are you in to take on such a project?
I’ve also bought a Black T6 transporter recently but its going to the pro’s at Jacks Shack Leicester to be converted.
Cheers
 
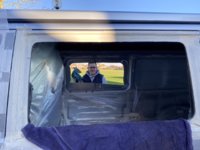
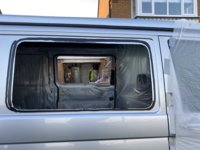
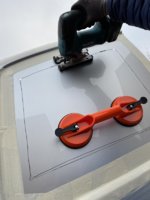
OK, so the plan was to get all the windows in during a cold, damp but clear day.
A friend of mine came over to help, which was really appreciated as it’s a nerve racking experience!
2D0E1AB1-7118-4620-82D4-0287A0DB55F9.jpeg
8333FC84-0F39-49CD-A125-831507697A98.jpeg

However as I was cutting the sliding door window out the blade popped out of the cut and put a few serious scratches through the three layers of protective tape we applied to the surrounds. C’est la vie!
83108B1D-A22E-4D95-A8C2-DD43D3A9ED61.jpeg

Wet and dry then two coats of primer ready for filling/ sanding tomorrow before I put the window in.
2AE57328-CA1C-4A8F-A190-5AFE4F02B0D7.jpeg

(I’ve no idea why these photo’s are all in the wrong orientation?)

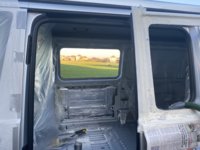
I only managed to get one window on before it got too dark and too damp!
Cutting the metalwork is not easy, trying to get the right line is a challenge and if you’re out slightly then lots of filing required.
The metal filings go everywhere - even though I taped up the interior of the van it’s still a nightmare. I was able to cut through the support brace with the jigsaw and therefore didn’t have to use an even messier grinder for that bit!

The window trim I have is 18mm wide! Not sure that was what I wanted - it goes on easily but in some areas it doesn’t hold itself on the metalwork. Not sure if I’m supposed to be pinching it to help it grip? I also cut all of the sealant from between the skins, perhaps I’m supposed to leave that in?

A15AB9E0-7DE2-41BE-A4F4-A3107824F5BB.jpeg

One thing that also occurred, the outer skin on the large panel on this side is slightly bigger than therefore bows out slightly. I’ll see how it looks in the morning, but trying to line up the second blank window behind it will need some packing!
BA7B869C-3D9B-4FFB-BD1E-6F0192C7415F.jpeg

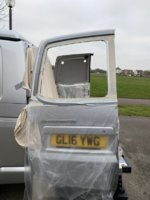
Packed up for the evening and taped up the sliding door window.

Question - there is a gap between the front windows and rear blanking windows, there’s a noticeable gap that’s highlighted because of the van’s silver paint.
Should I spray the gap with black paint to lesson this issue?
 
6A2C69EF-717E-4306-AABE-E403FFCA23B1.jpeg Ok. So after consulting the wife we divided not to bother with painting the silver gap black. Typically it started spitting with light rain whilst trying to get this panel on managed to line it up well though. Very pleased.
 
...you can get a thin rubber strip to fix to the inside edge of one of the glass windows to cover that gap. Fiddly, but you could after fit if you wanted later on.
 
OK, so windows part deux.
AC6FD158-BB70-4C8A-8B2C-2E8365A604DF.jpeg

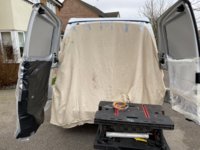
Not seen in this picture but I braced the two rear doors with a pierce of 2x4 taped to the inside lip of each door. This provided enough stability to drill, cut and file.

Rear window 1 - these are harder to cut with a jigsaw due to the differing lengths of the surround around the cut. I was working with 74mm metal blades in the saw and once again found myself being kicked out of the cut as the blade hit int inside lip.

B3A0D3EF-3E7A-49D2-BFDF-2A00DCED1C73.jpeg
I drilled two 10mm holes way inside the cut line to be able to see both sides, then worked my way around a second time which was slow and painful.
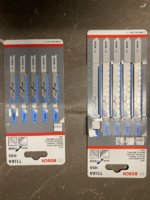
After this I popped to Toolstation and bought some of their longest and thickest blades;
486F23B0-5A9A-4B33-9AB3-9F0DC54545D0.jpeg
Those on the right are what I should have had all along and I would highly recommend to anyone attempting this themselves.
Because the blade is so long and strong, you can use your jigsaw much in the same way as a reciprocal saw. This means you can cut from the INSIDE of the van and just follow the lip. This made the last window I needed to compete a joy and a painful learning curve.

BE5B630C-D79D-4BAA-87FA-7EC50F7A526B.jpeg
I also used a 30mm hole saw, making it easier for the jigsaw cut.

Then time started to run out, and I still had trims and four glass windows to prep and mount.

Needless to say I started to rush and this is the worst thing to do. (I’m back to work today).
So in the dark I glued and mounted the glass, I’m really annoyed at myself for letting that happen and beat myself up about it last night - but it’s done now. I think the sliding door glass has dropped a little, and that will bother me.
More pictures to follow when I can upload them.

I need to remind myself that this is a journey of learning and I will make mistakes.

One other thing that made life easier, the trim I have doesn’t require the sealant to be cut out in-between the panels. This made life so much easier and I only wish that the chap I bought the glass from had told me this!
 
One other thing to note that took until the last window, (too late) to realise. The duck tape I had been using wasn't sticking to the glass. All my windows dropped slightly after positioning. I'm not sure what else you could use, or maybe I had a duff batch of tape but frustrating nonetheless. I tested it again this morning, and although the tape appears to stick, if you provide a small pull in the vertical plane it 'slips'.
 
Hmm might be duff tape then. Duck tape should be fine to use. Unless the glass was not 100% dry - still had moisture on them especially at this time of year.
 
Dont really understand that, should wide masking tape not be suffice?
I thought so too. There are maybe now three possible reasons;
I didn’t clean the glass sufficiently and there was grease on there, it was too damp or poor tape quality. More than likely a combination of the first two.
 
I thought so too. There are maybe now three possible reasons;
I didn’t clean the glass sufficiently and there was grease on there, it was too damp or poor tape quality. More than likely a combination of the first two.
That is good advice, thank you for sharing your progress. I dont get my van until March and will be doing the windows. Without your post and others comments, I too could have run into the same problems. What an excellent forum :thumbsup:.
 
So Over the weekend I’ve probably managed 8-9 hours on the van.

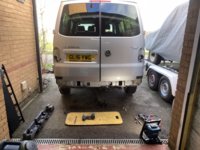
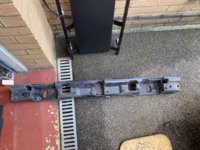
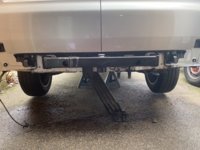
Yesterday I started the process of installing the tow bar. Stripping the bumper off was interesting, there are small retaining clips hidden where the bumper wraps around each side of the vehicle. You need to use trim tools to release them, along with the ones at the rear. Drop the spare wheel which is rusting and I will address later, then the bumper comes off.

49A3BE97-BD5F-42B6-8BE0-46AA8D7D2C69.jpeg
Remove the now redundant crash bar, (on the left in the photo above). Remove the under trays, (I did the whole passenger side as wanted to route the tow bar electrics under the trays.
A00CB622-1BA6-4205-B68A-C5ABCB4EC523.jpeg
Washed the whole area to remove the gunk, then added the recommended replacement plastic support bar? (For the bumper).
Plenty of copper grease on the bolts and add the tow bar support and torque up.

15D1EBD6-6DF8-40C2-A39B-41DC4D9470C6.jpeg

As I had the under-trays removed, I also dropped the tank as part of the Planer heater install.
It was a simple process, the tank was almost empty which made life easier.
 
Well done mate, getting this work done by convertors as wouldn't trust myself... never worked on cars...

Good work on the thread as well, always useful!! :)
 
Back
Top