You are using an out of date browser. It may not display this or other websites correctly.
You should upgrade or use an alternative browser.
You should upgrade or use an alternative browser.
Newbie Camper Conversion
- Thread starter OllieGBR
- Start date
-
- Tags
- build thread.
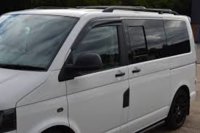
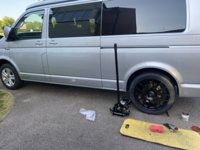
Good question and now you have me worried, I will check at first lightis the window the correct side?, doesn't the slider go at the front?, meaning the one pictured would fit the passenger side.

I have checked the window, it is in the correct orientation - thankfully!
The safety certification notice on the inside confirms this. It must be that this particular supplier has the slider towards the rear of the van.
Also, it's impossible to fit upside-down as the edge profile is different front to rear.
The safety certification notice on the inside confirms this. It must be that this particular supplier has the slider towards the rear of the van.
Also, it's impossible to fit upside-down as the edge profile is different front to rear.
Yes, I cut the window from the inside with a window knife. It's a slow processKeep going! I’m still annoyed that I’ve got to take mine out still but remind myself it’s all a learning curve! Btw when you cut your window out did you do it from the inside?
alangiff3
New Member
I look forward to itYes, I cut the window from the inside with a window knife. It's a slow process
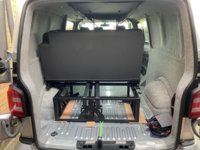
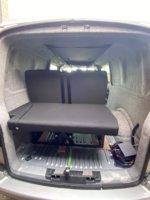
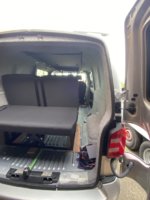
So the bed is quite interesting to fit. Apart from making sure it’s in the right place, straight and square you also need many sharp drills to get through all the metalwork.
Fitting the brace onto the rear cross member/ support strut was straight forward enough.
Because I don’t have my floor in, I needed to support the bed on some 9mm ply. This also meant tapping flat the top part of the wheel arch to allow the bed to slide over it for clearance.
I’ve fitted the bed pretty much where it’s supposed to be, however I thought the 200mm sliding option would allow for more storage space in the rear. It’s the opposite, more living space in the front!
The biggest challenge is the front fixing holes of the bed frame. The centre one is in, however the two side holes are both into the supports for the suspension springs and therefore a no-go.
I’m sure if this was a SWB, there’d be no issue - so bare this in mind if your purchasing one of these for the LWB.
The right hand bar of the bed runs along the exhaust line and the other side I’ve not checked yet. I will need to add a few more fixings to be comfortable.
The bolts for the support brace are also fouling the spare wheel, so can’t get the wheel back on - I will cut the excess threads off but if that’s still an issue I’m not sure what else to do??
I’m impressed with the quality of the bed though
You could try putting the bolt in from underneath or if that doesn’t work change the bolt for an equivalent button head Allen bolt (still from underneath), much lower profile which might do the job?The bolts for the support brace are also fouling the spare wheel, so can’t get the wheel back on - I will cut the excess threads off but if that’s still an issue I’m not sure what else to do??
Great suggestion - thanks @Big.macYou could try putting the bolt in from underneath or if that doesn’t work change the bolt for an equivalent button head Allen bolt (still from underneath), much lower profile which might do the job?
This weekend was all about removing the bed and mounting brackets and move the whole thing 110mm further forward.
The bracket in in the right place and I have removed the bed completely to start fitting the floor.
Spent the afternoon making packing.
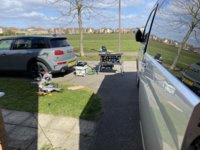
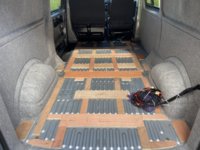
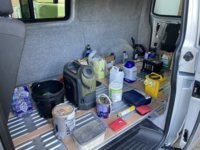
Various garage items used to hold everything down
I also finished adding some insulation and carpeting the remaining panels.
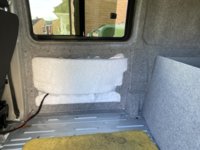
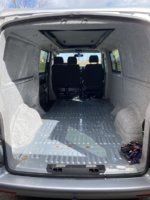
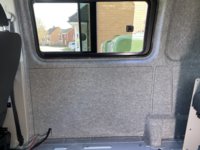
The bracket in in the right place and I have removed the bed completely to start fitting the floor.
Spent the afternoon making packing.


Various garage items used to hold everything down
I also finished adding some insulation and carpeting the remaining panels.


Lockdown work continued over the weekend with some amazing weather!
I finished laying the 12mm floor ply and put the bed back in. So much happier with moving it further forward.
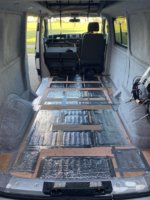
However, I question the two side rails positioning as these are exactly over the chassis rails or suspension struts so just about impossible to find a suitable location to drill a hole for the additional securing bolts.
Whilst the sun was out I set about with my IronX to dissolve the iron filings from the window cutting, great stuff!
Next I set about installing the reversing camera. I wasn't going to upgrade the head unit, but after pressure from my wife of the need for a reversing camera and Apple Car play, I acquiesced. On some forced holiday so have the time to remove all the good work to date!
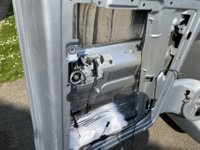
I again removed all the back door mechanism, (easier the second time around) and took off the housing for the number plate lights. Drilled an 8mm hole and added a grommet for good measure. I've just temporarily stuck in the camera in position for now as until I have it connected not sure exactly where it needs to be.
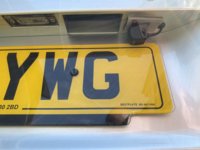
Ideally I'd have liked to run the cable through the left side of the van but for the life of my wasn't able to fins a way through given I now have the pop-top and carpet in.
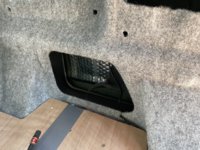
So I opted to cut the carpet away from one of the plastic blanking plates, fettle with the metalwork to make room for the cable, carpet the plastic cover and continue the cables journey under the passenger seat.
There is plenty of cable (9m) and I will take power from the fuse box, having earthed it to the chassis below.
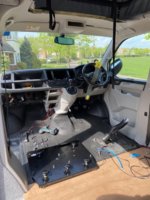
After having no carpet or plastic covers in since I bought the van last year, I set about adding everything back, running wires for heated seats on the passenger and drivers side.
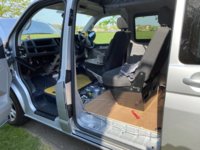
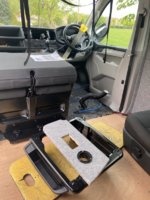
Next was the swivel passenger seat system from . Very impressed with this engineering and great versatility too.
I finished laying the 12mm floor ply and put the bed back in. So much happier with moving it further forward.

However, I question the two side rails positioning as these are exactly over the chassis rails or suspension struts so just about impossible to find a suitable location to drill a hole for the additional securing bolts.
Whilst the sun was out I set about with my IronX to dissolve the iron filings from the window cutting, great stuff!

Next I set about installing the reversing camera. I wasn't going to upgrade the head unit, but after pressure from my wife of the need for a reversing camera and Apple Car play, I acquiesced. On some forced holiday so have the time to remove all the good work to date!

I again removed all the back door mechanism, (easier the second time around) and took off the housing for the number plate lights. Drilled an 8mm hole and added a grommet for good measure. I've just temporarily stuck in the camera in position for now as until I have it connected not sure exactly where it needs to be.

Ideally I'd have liked to run the cable through the left side of the van but for the life of my wasn't able to fins a way through given I now have the pop-top and carpet in.
So I opted to cut the carpet away from one of the plastic blanking plates, fettle with the metalwork to make room for the cable, carpet the plastic cover and continue the cables journey under the passenger seat.

There is plenty of cable (9m) and I will take power from the fuse box, having earthed it to the chassis below.
After having no carpet or plastic covers in since I bought the van last year, I set about adding everything back, running wires for heated seats on the passenger and drivers side.

Next was the swivel passenger seat system from . Very impressed with this engineering and great versatility too.

Last edited:
Almost forgot, and how could I!!!!
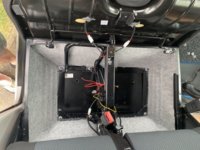
Bought a cheap heated seat kit from eBay. Impressed for the money, but it’s a challenge for a double passenger seat that now sits on a swivel base!
What was also a challenge - getting the covers off the seat back and base - bloody hell, there must be a knack I’m not aware off but brute strength and ignorance finally came through.
I’ve temporally put the wiring under the seat before I drill any large holes for the switch. I’m not sure this will all work well enough to keep.
I plan to have a connector at the bottom of the seat that will need to be disconnected before we can swivel the seat back.

I think you like a challengeAlmost forgot, and how could I!!!!
Bought a cheap heated seat kit from eBay. Impressed for the money, but it’s a challenge for a double passenger seat that now sits on a swivel base!
What was also a challenge - getting the covers off the seat back and base - bloody hell, there must be a knack I’m not aware off but brute strength and ignorance finally came through.
I’ve temporally put the wiring under the seat before I drill any large holes for the switch. I’m not sure this will all work well enough to keep.
I plan to have a connector at the bottom of the seat that will need to be disconnected before we can swivel the seat back.
View attachment 65967
This weekends lockdown task was to fit the Kenwood DAB stereo and supplied adaptor kit from Absolut5.
I had already fitted and routed the reversing camera the weekend before, but had been waiting for the required interface kit to complete the setup.
Other than dodgy Ebay supplied fuse adaptors that sometimes worked and sometimes didn't, (which made for interesting fault finding for the rear view camera and some well chosen words), the install went well, (with very quick message support from Absolut5, without which I might still be there now).
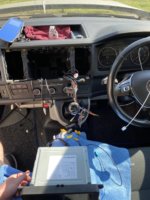
The Kenwood unit looks great in the dash and the best part is wireless Apple CarPlay. The reversing camera is superbly clear, better than most units I've seen in cars.
Sqeezing all the additional wiring in wasn't as much as a challenged as it looked either.
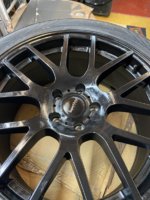
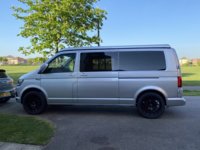
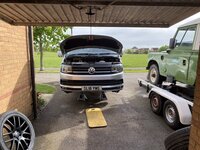
Took the van on the weekly shopping trip with my wife, she didn't notice any difference in the ride with the 20" wheels. I can, it's subtle but noticeable. More importantly I can live with it.
I had already fitted and routed the reversing camera the weekend before, but had been waiting for the required interface kit to complete the setup.
Other than dodgy Ebay supplied fuse adaptors that sometimes worked and sometimes didn't, (which made for interesting fault finding for the rear view camera and some well chosen words), the install went well, (with very quick message support from Absolut5, without which I might still be there now).

The Kenwood unit looks great in the dash and the best part is wireless Apple CarPlay. The reversing camera is superbly clear, better than most units I've seen in cars.
Sqeezing all the additional wiring in wasn't as much as a challenged as it looked either.
Took the van on the weekly shopping trip with my wife, she didn't notice any difference in the ride with the 20" wheels. I can, it's subtle but noticeable. More importantly I can live with it.
Similar threads
- Replies
- 9
- Views
- 637

